 |
| |
|
| |
 |
|
Pecan
Street is
very much the result of "trial and
error": every now and then, something went
slightly wrong or didn't work at all - or I
simply changed my mind and approached things
differently. It's what I call "accidental
modelling". Here's an account of how
it all came together in the end, step by
step (which is why there is also a certain amount
of back and forth).
|
|
| |
Any
commercial products mentioned here are purely bona fide
indications of what I have been using myself.
I have no connection to any manufacturing companies nor
do I profit from listing any products or brands.
|
| |
|
| |
|
FIRST STEP: PROOF OF CONCEPT
|
|
|
| |
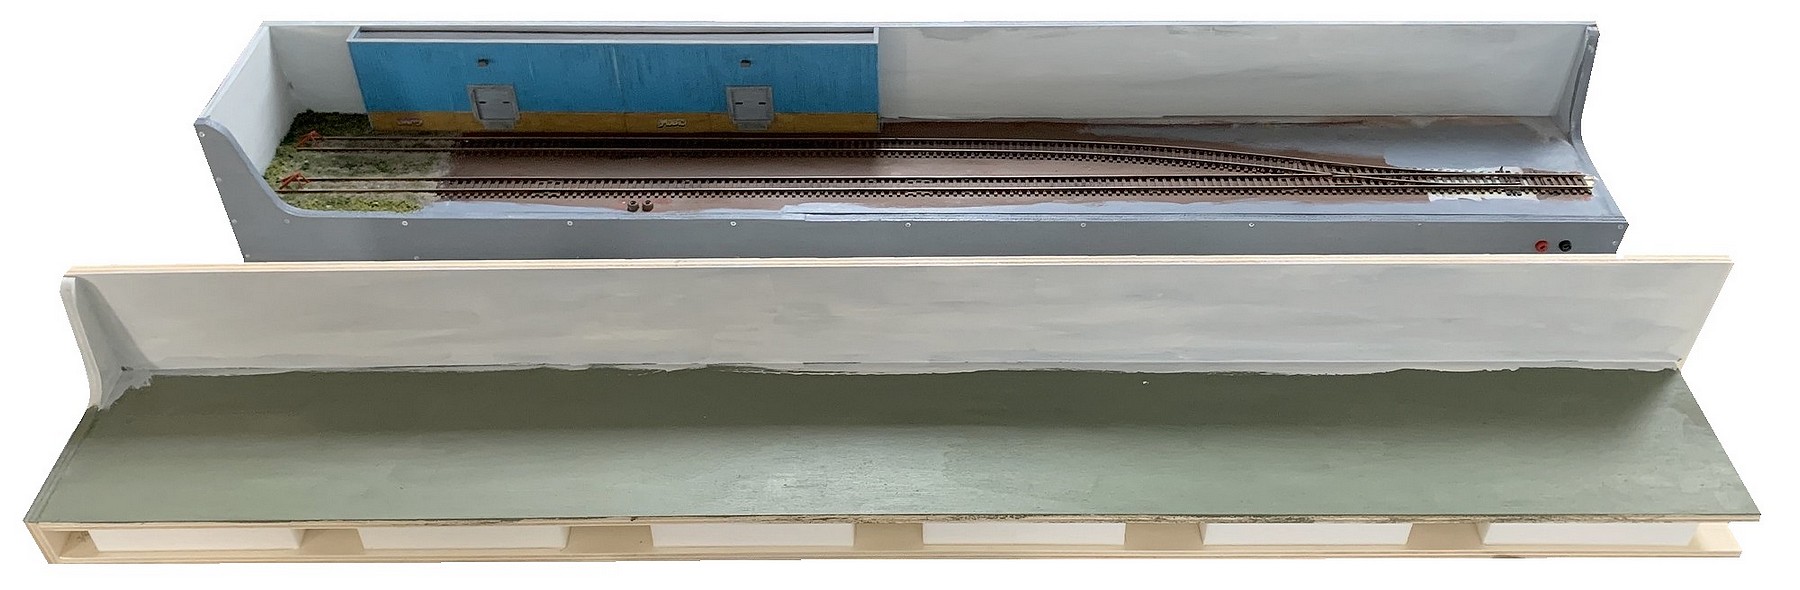
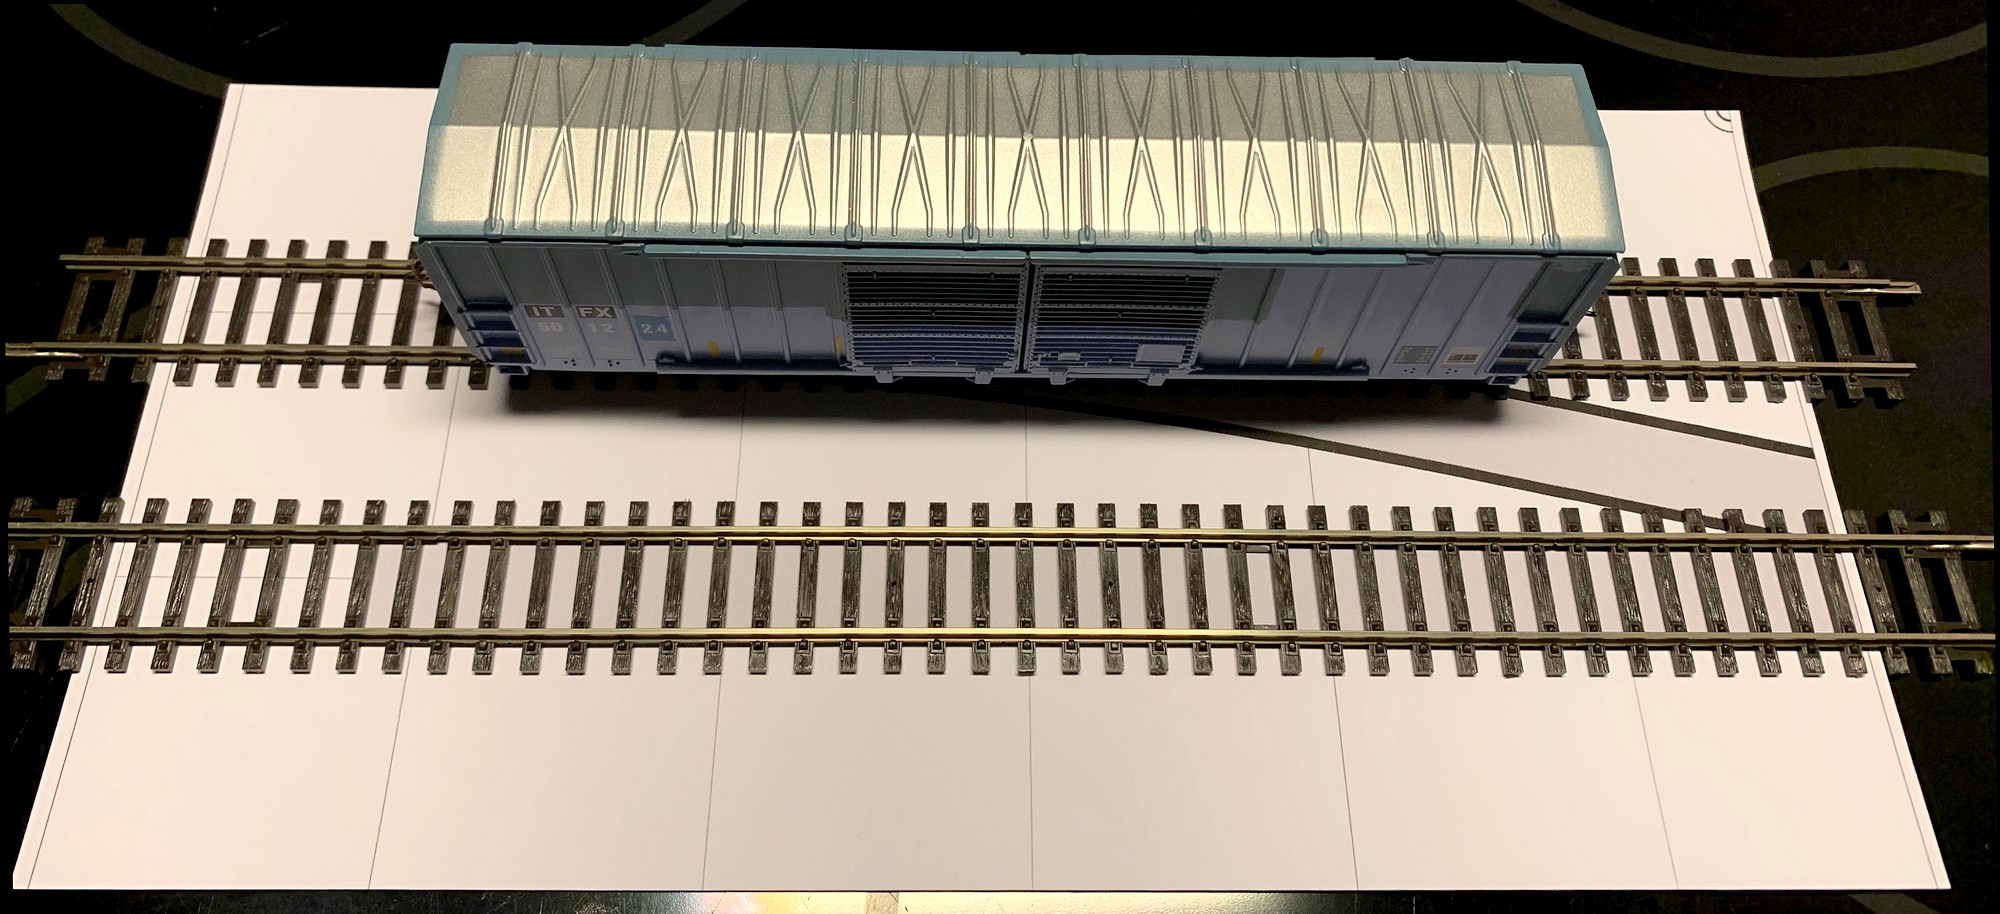
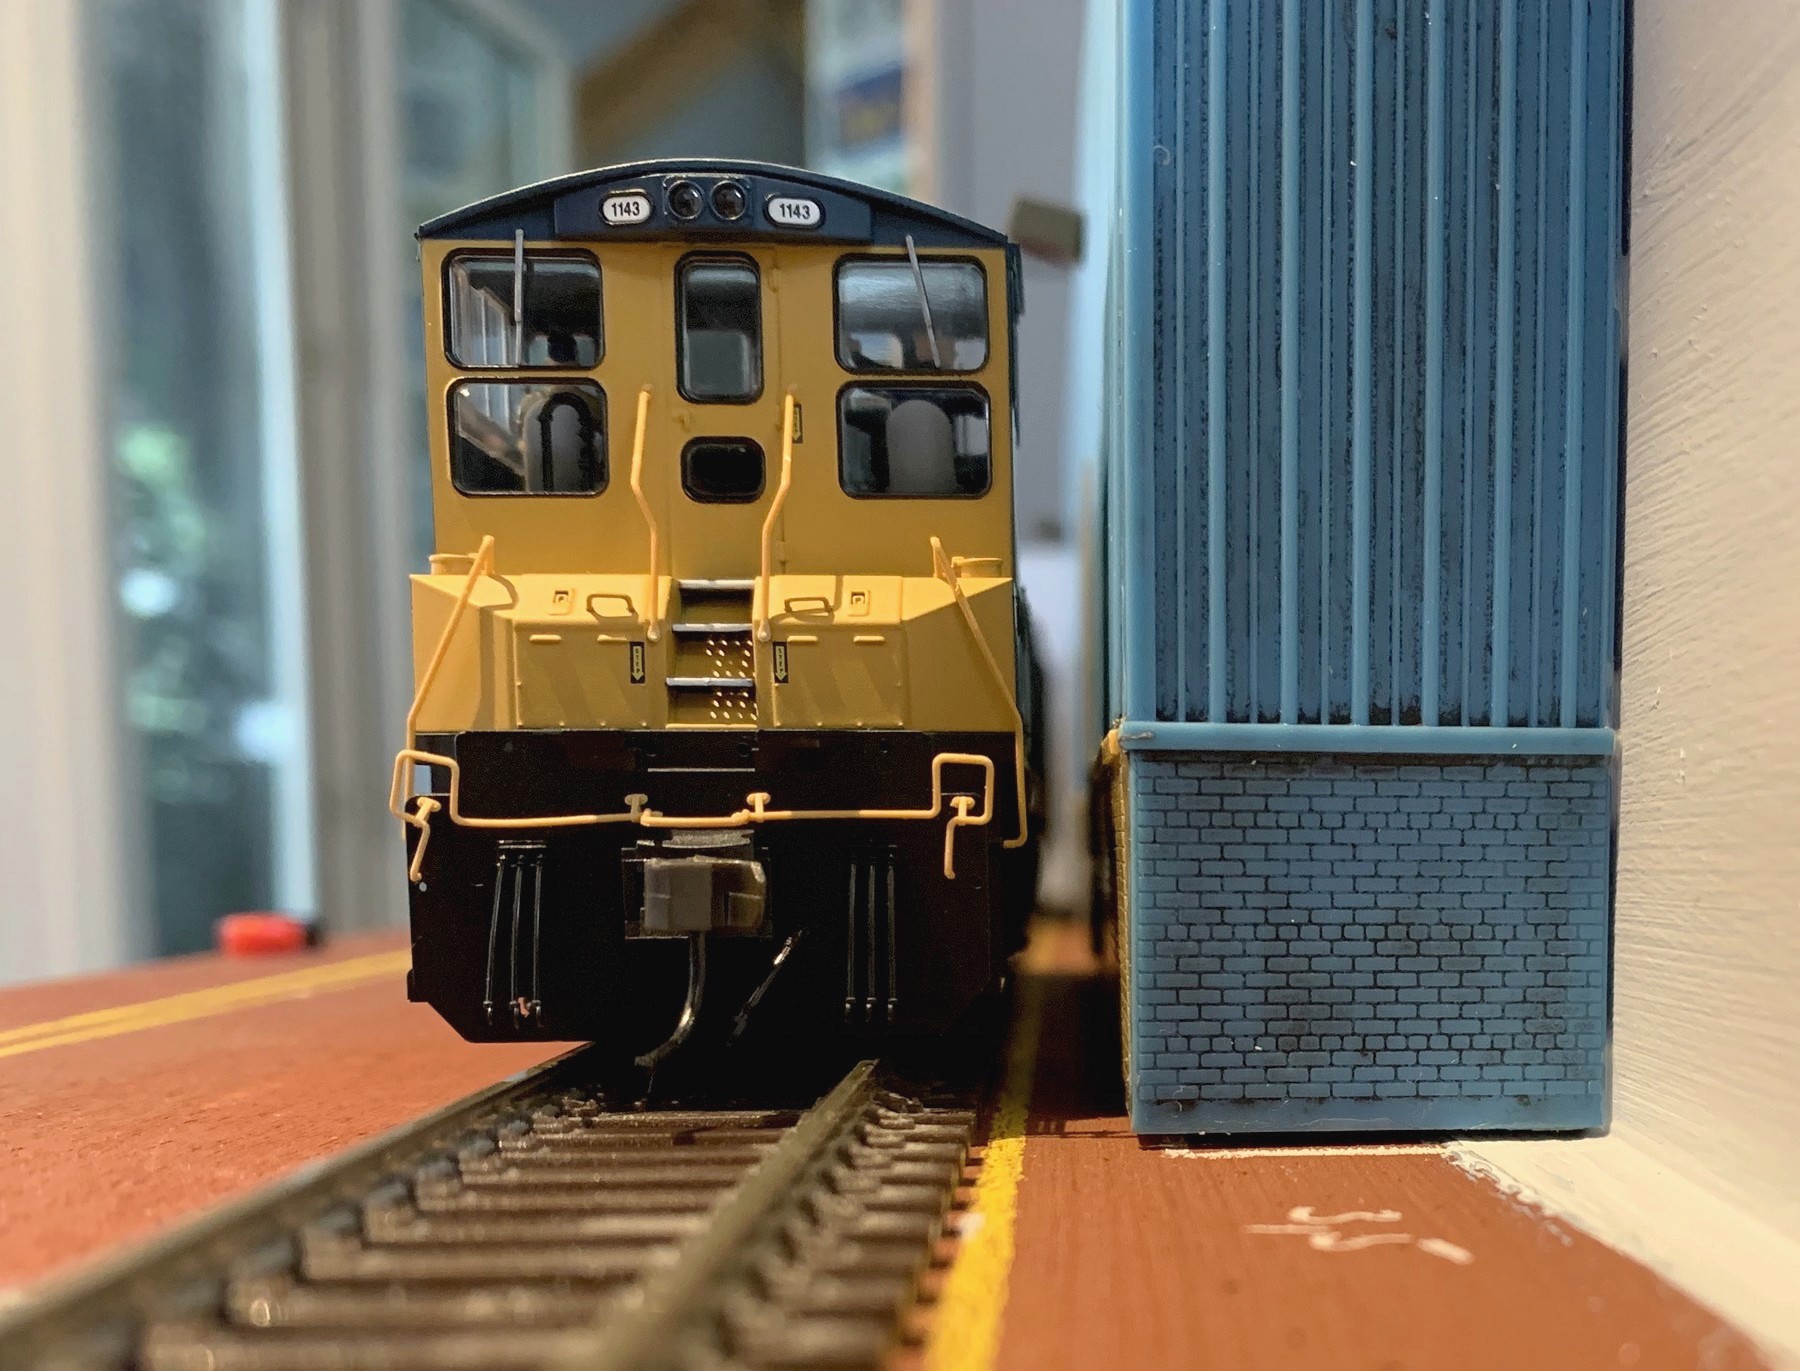
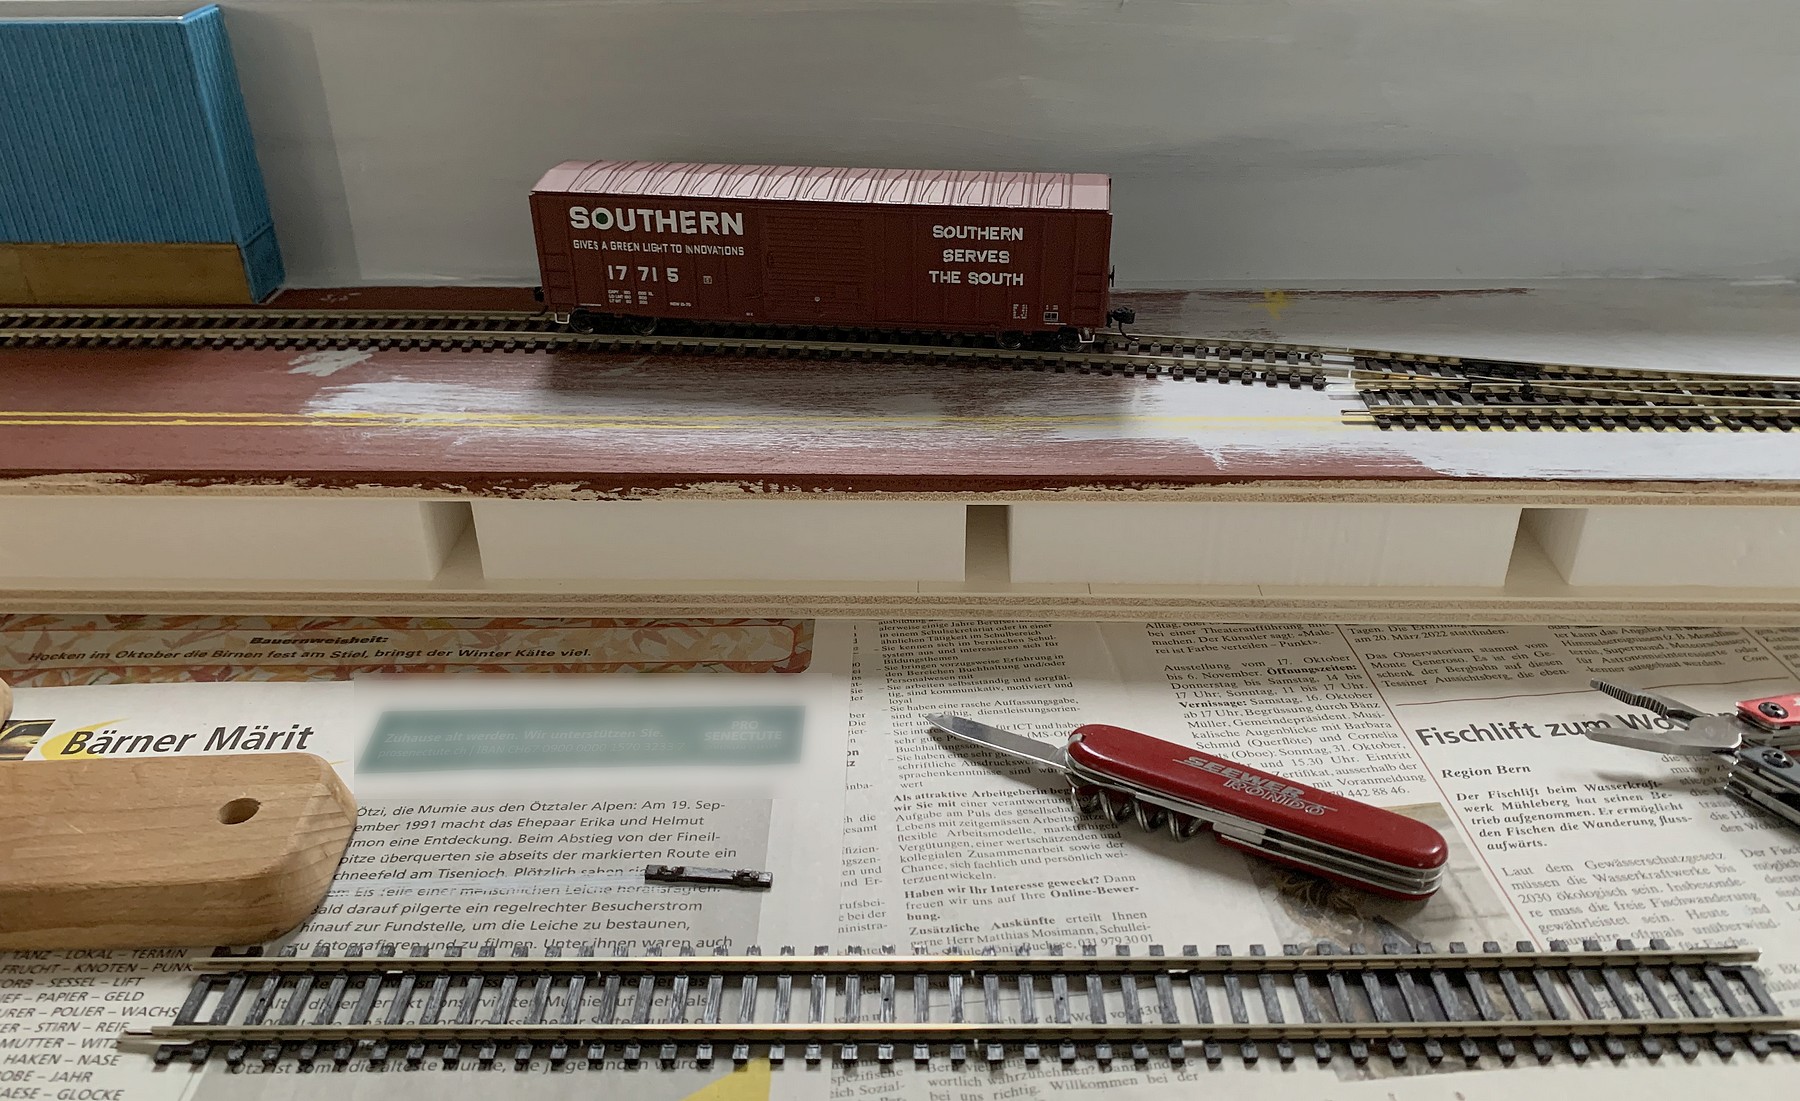
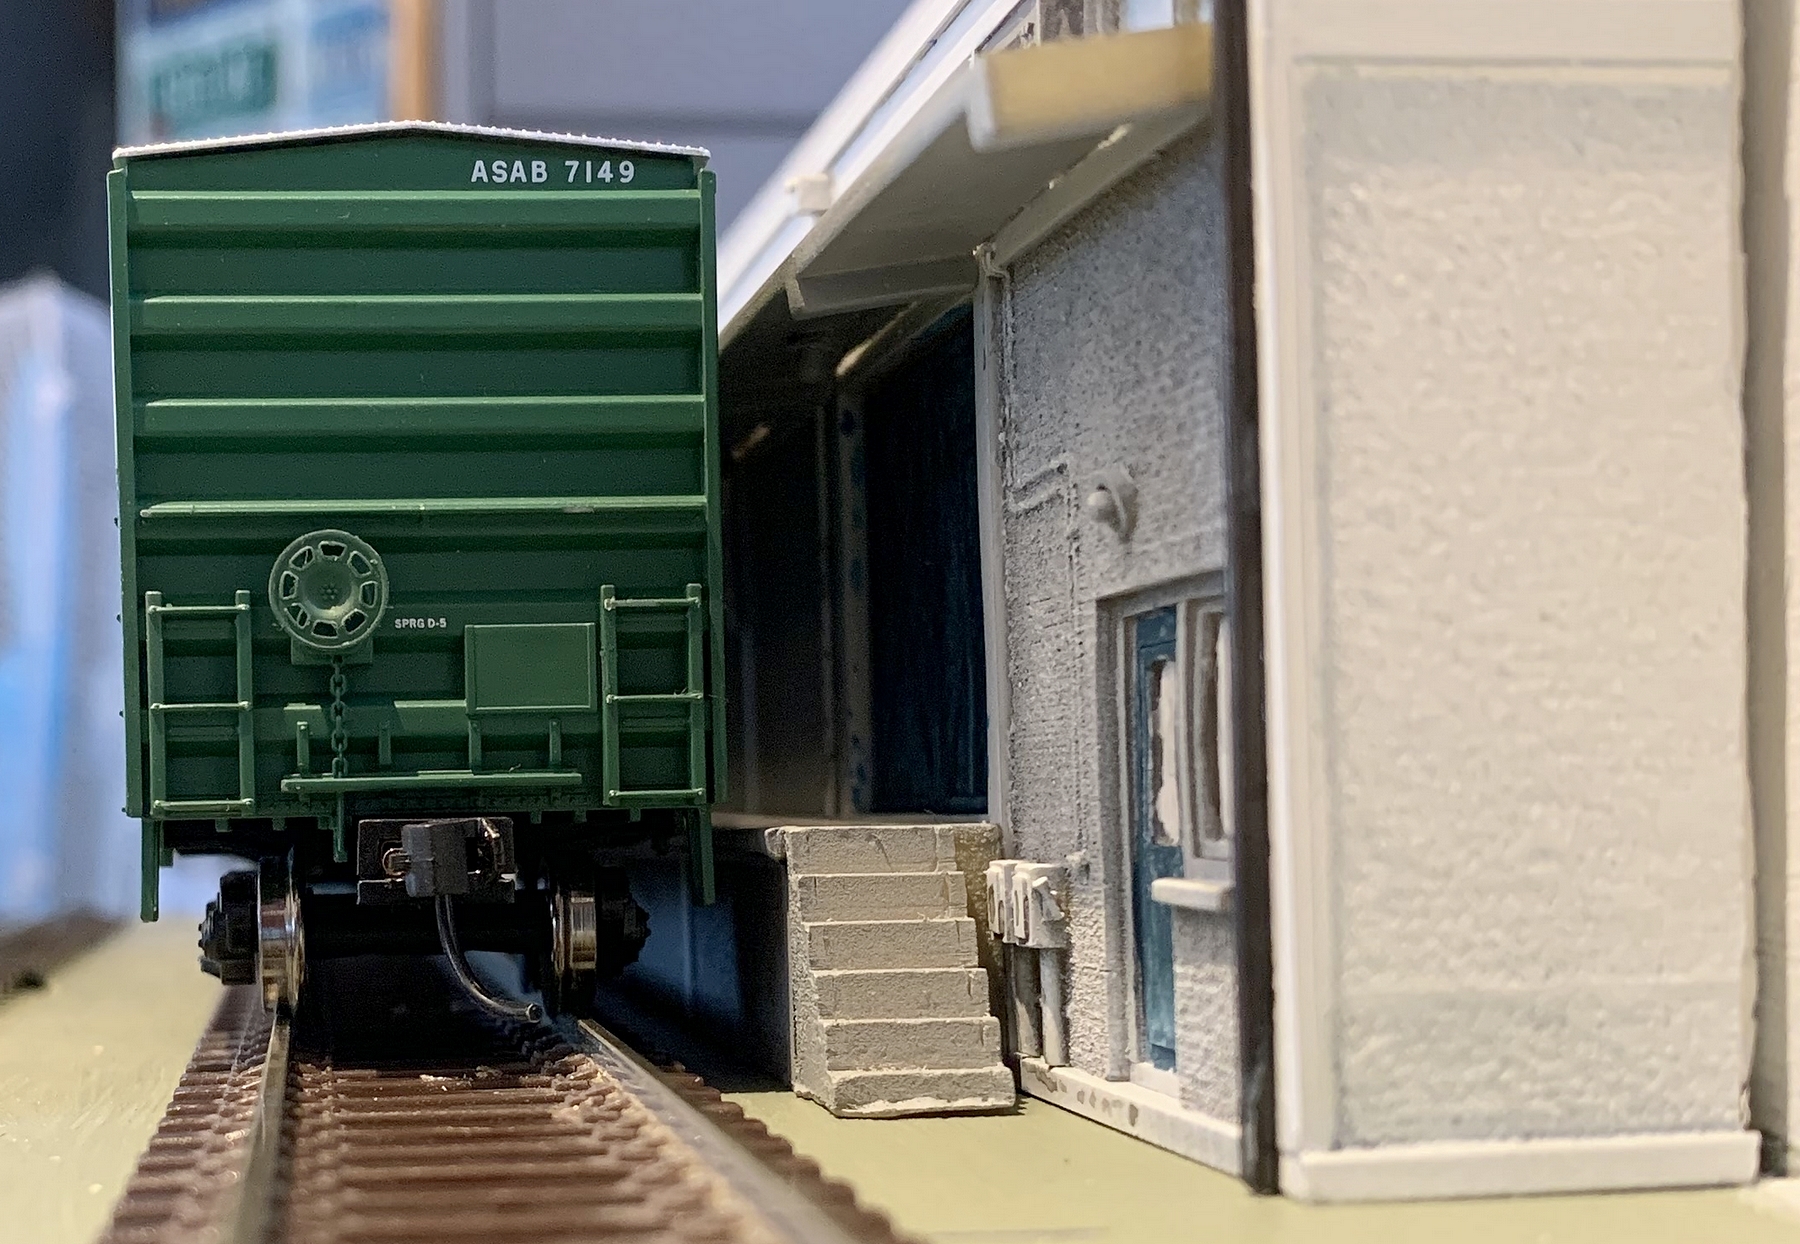
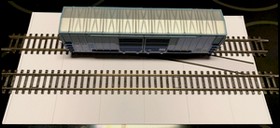
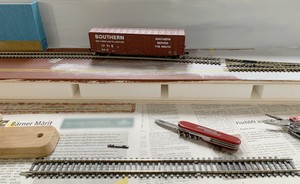
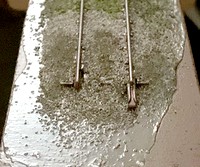
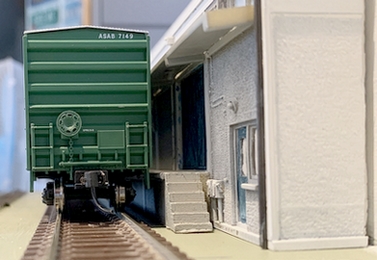
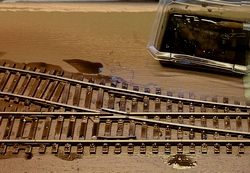
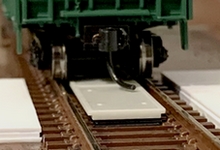
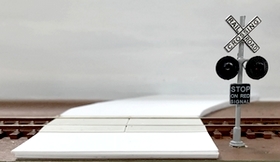
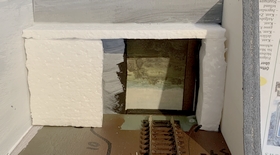
| The prime question that needed to
be answered was what two tracks within a depth of
only 6 inches actually looked like in the real
world - something that no track planning software
is truly going to be able to show. A piece of paper cut to the
required width served as a simple set-up for this
"proof of concept". It was always clear
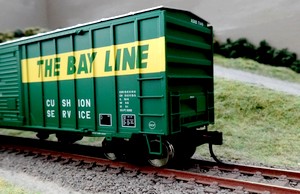
that it was going to be tight, but the one thing
I didn't want was for it to feel overly cramped
(which is why a boxcar was set up on one of the
tracks).
|
|
 |
|
| |
| This is one of those
"instant moments": either it clicks, or it
doesn't. In this case, I was happy to move on and
actually start building the layout. |
| |
| |
|
|
| |
|
|
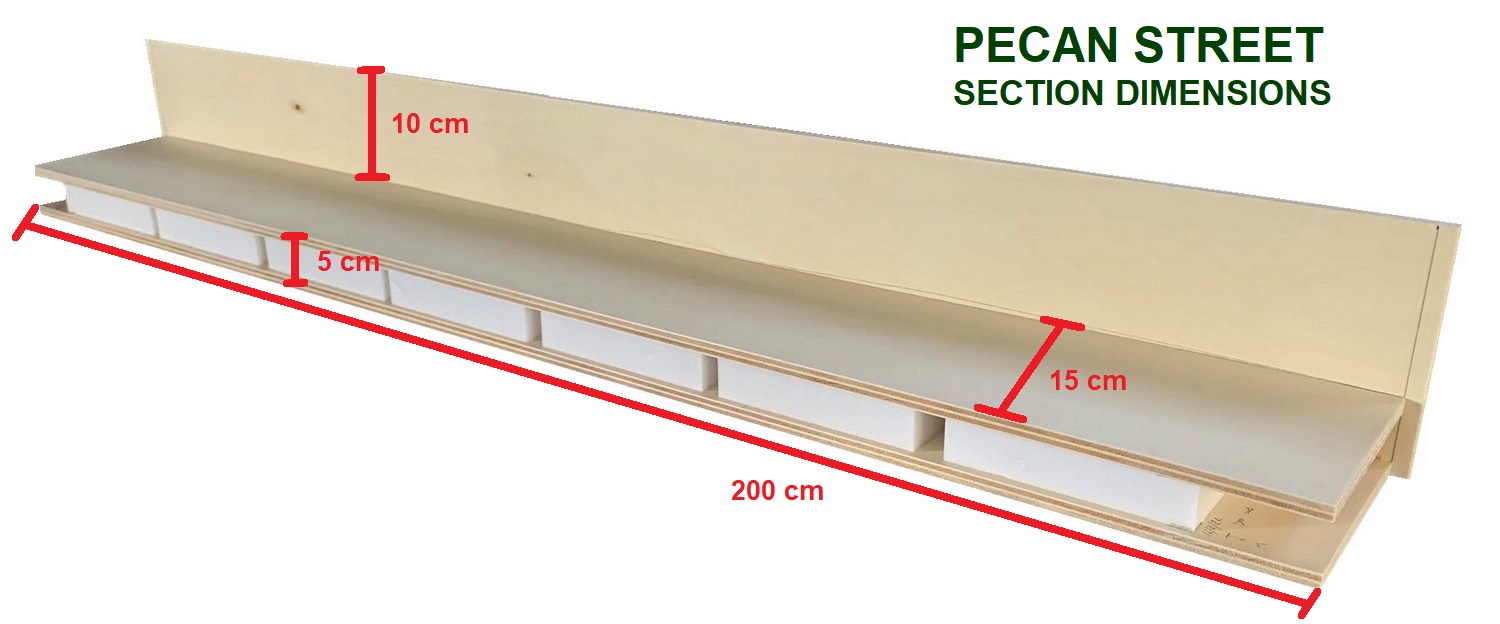
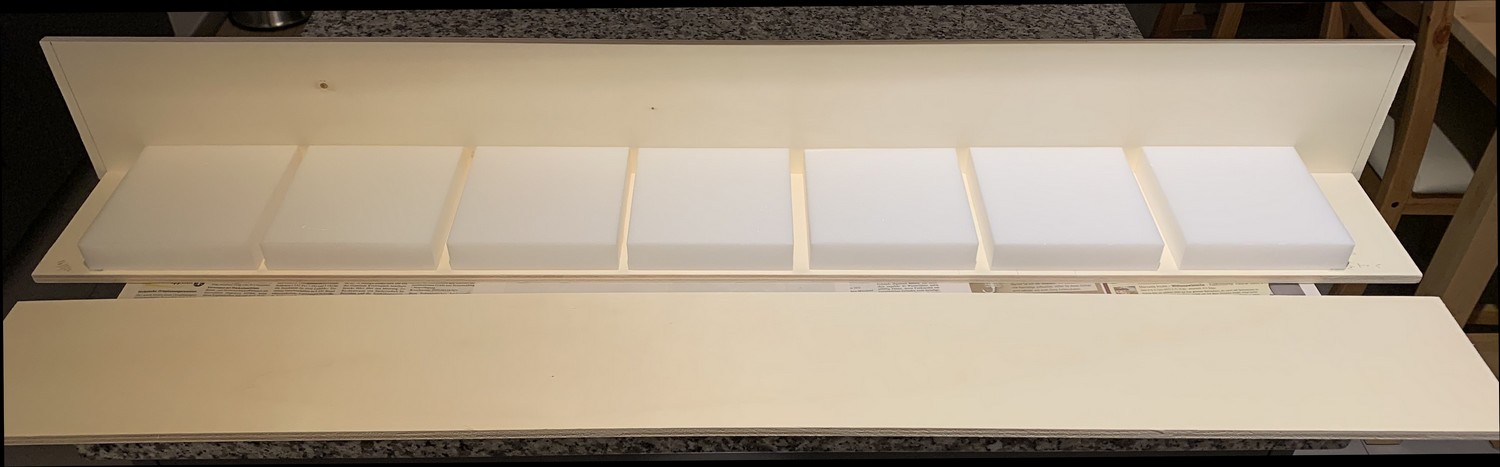
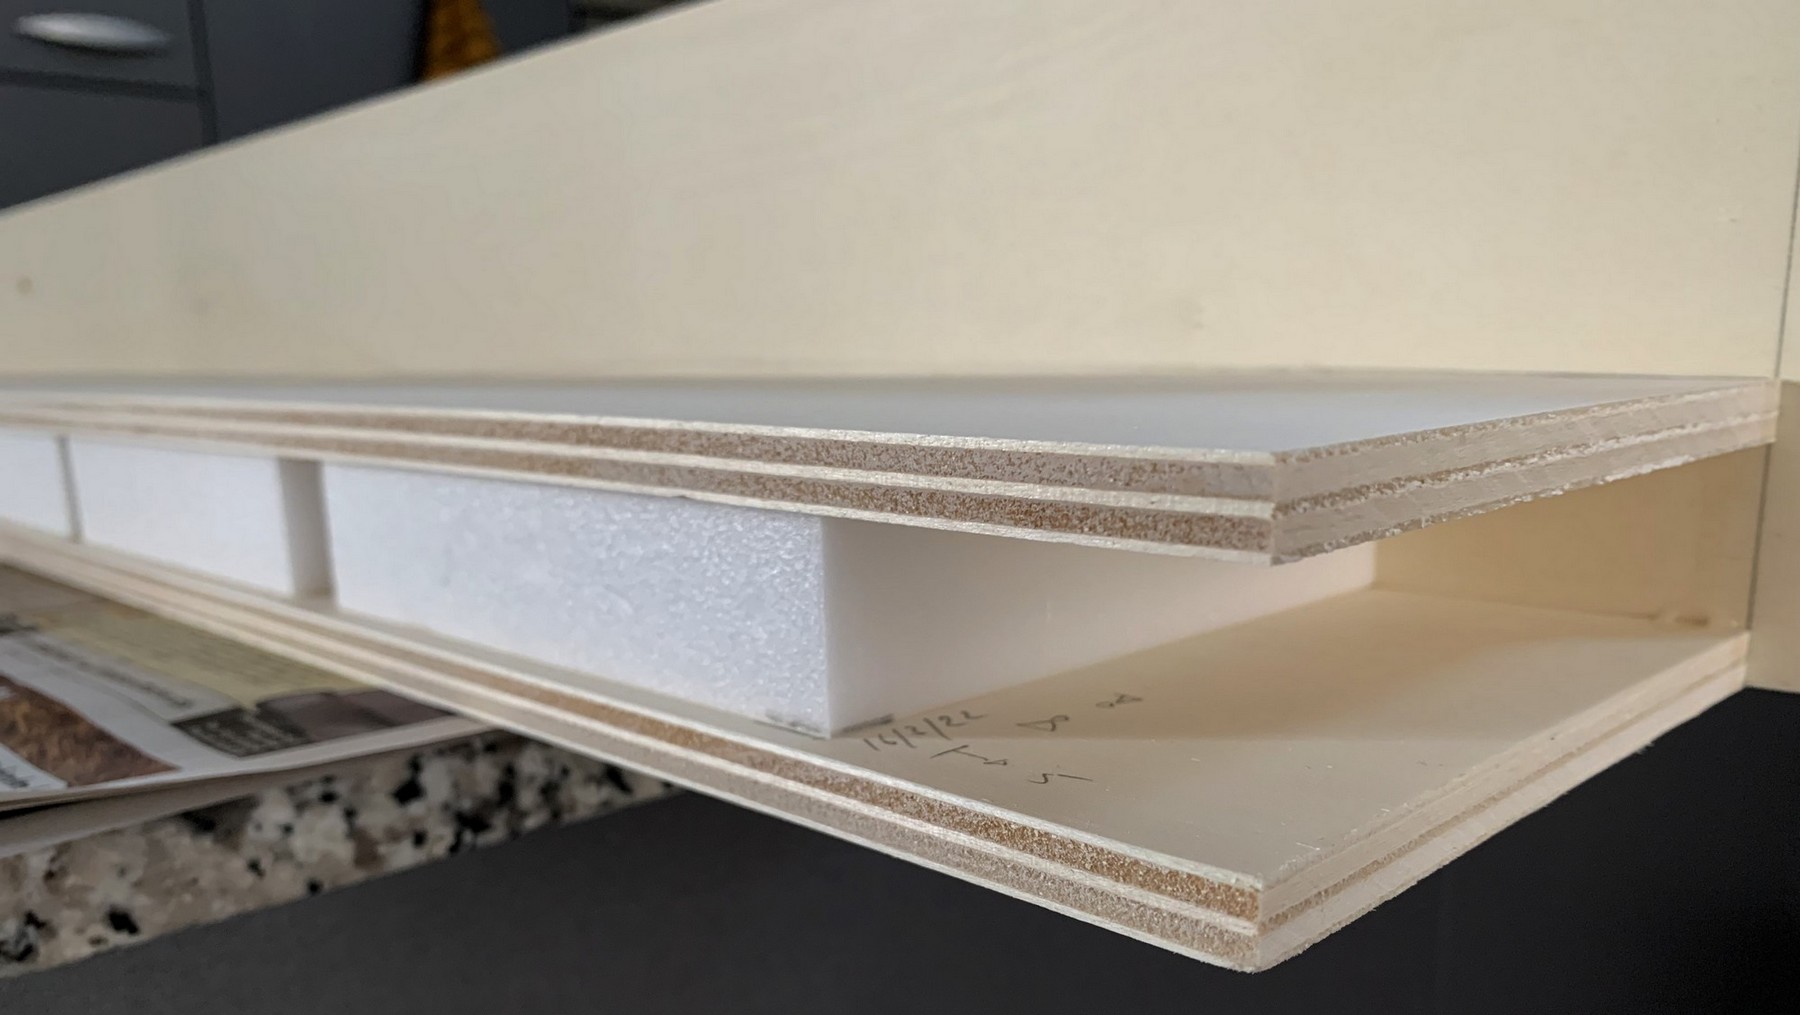
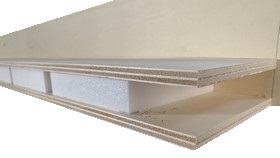
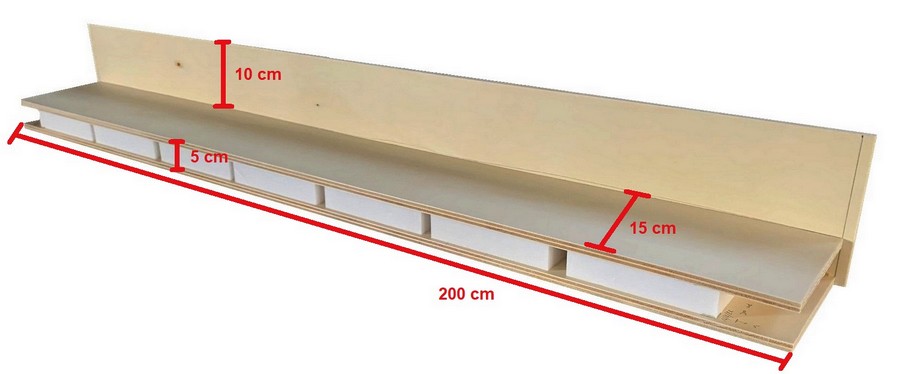
For the two
baseboard segments I returned to the construction
method used on Little Bazeley Mk2 which provided a solid yet
lightweight layout framework. Using a sheet of
10mm poplar plywood as the base, pieces of 20mm
styrofoam insulation are glued to that board,
which in turn is covered by another sheet of 10mm
ply in "sandwich style". Once
the side- and backdrop are added, this results in
a very sturdy yet lightweight layout frame and
basebaord (which also results in comparatively
silent running of trains).
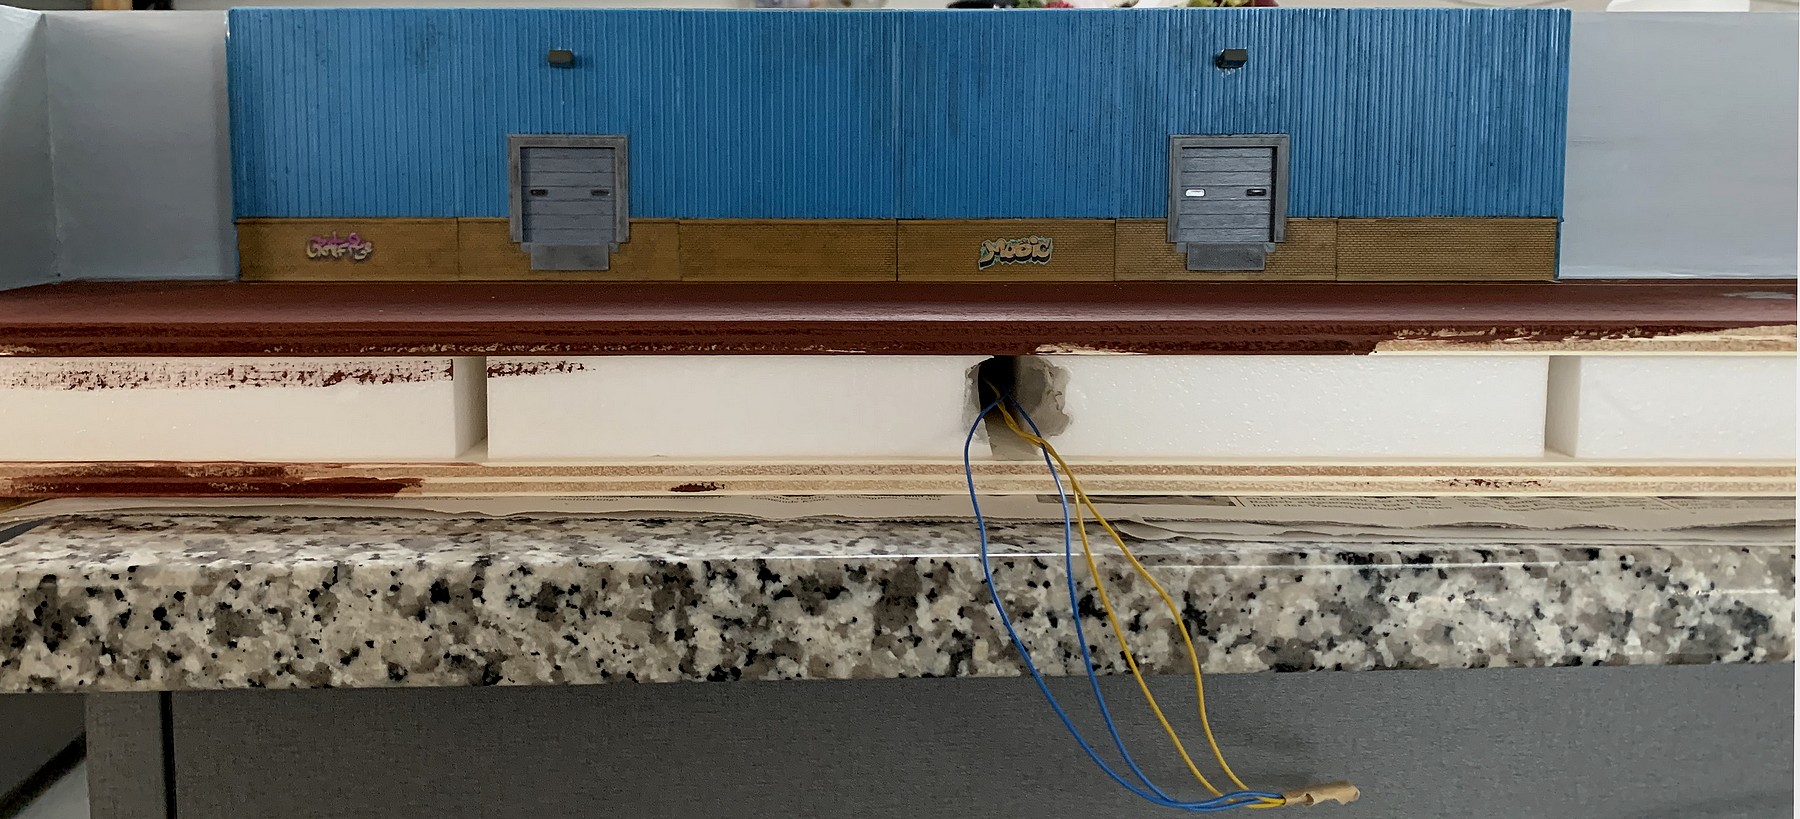
There
is, however, one obvious problem with this
approach - there is no real cavity underneath the
trackbed-baseboard. In order to be able to run
cables underneath the baseboard top, the
styrofoam blocks are set back slightly, providing
some space at the front.
|
|
| |
 |
| |
| |
|
STRUCTURE #1: THE WAREHOUSE
|
|
|
| |
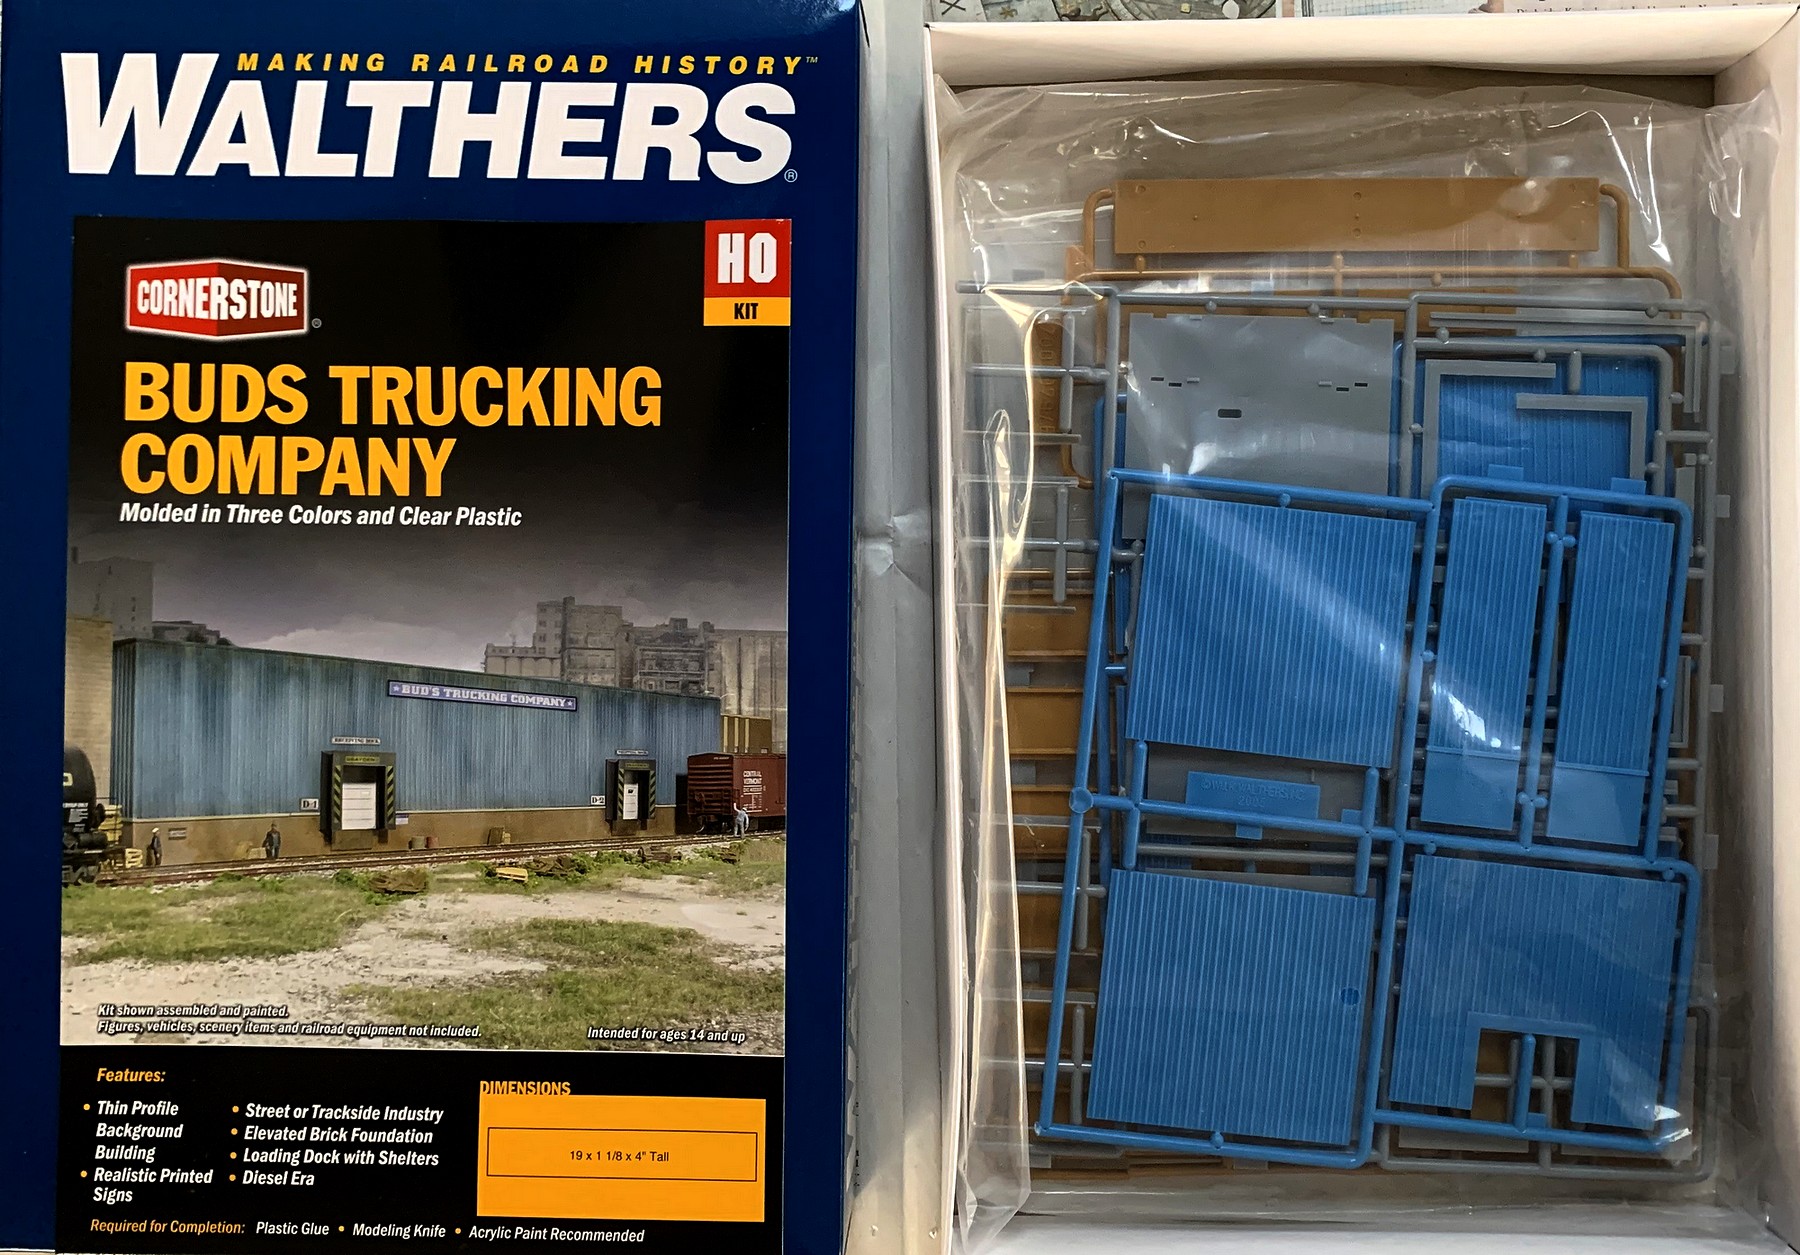
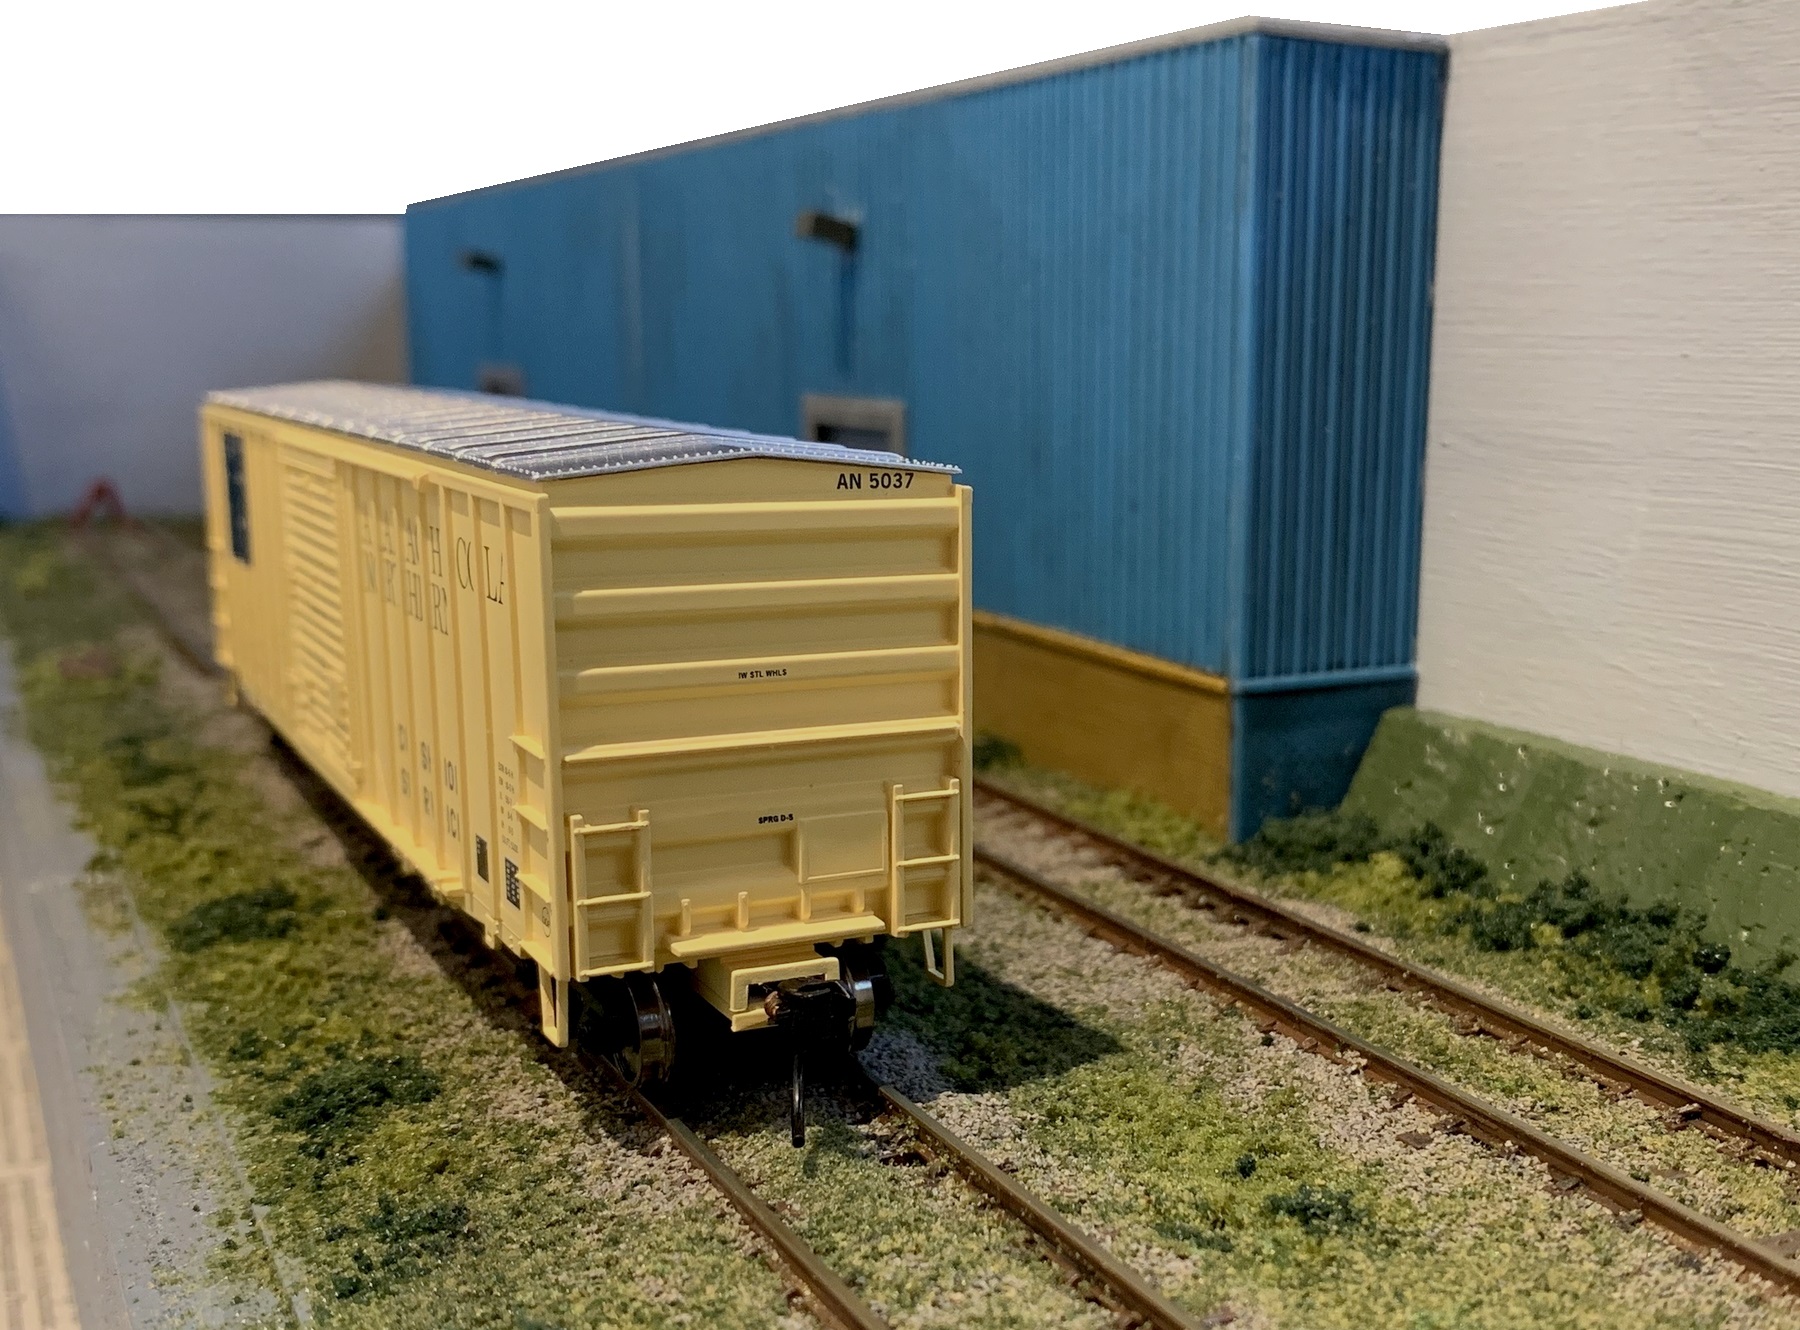
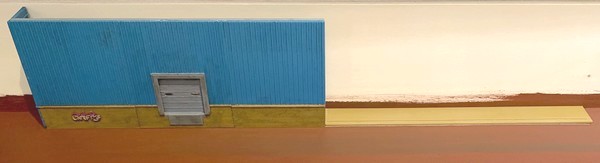
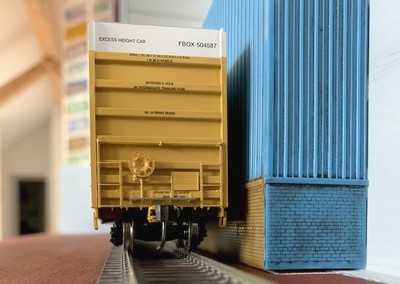
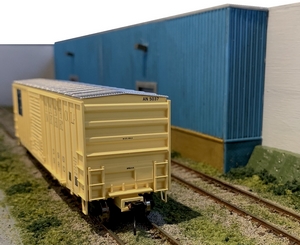
| Even though the restricted size
of the layout clearly limited the possibilities
for structures, I wanted the two tracks and the
shuffling of rolling stock to convey a certain
meaningfulness. Having a modern-style warehouse
as a backdrop and a "destination"
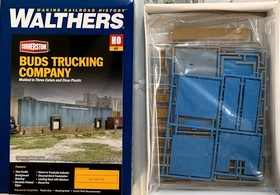
wasn't very orginial, but since I already had the
Walthers "thin profile background
building" (something I would call
"low-relief") it was both an easy and
convenient choice to make. At
1-1/8 inches (2.25 cm) the structure has a very
shallow footprint, yet its length of 19 inches
(48.3 cm) and its heigth of 4 inches (10 cm)
result in a fairly sizeable building, making it
all the more ideal for Pecan Street.
|
|
|
|
| |
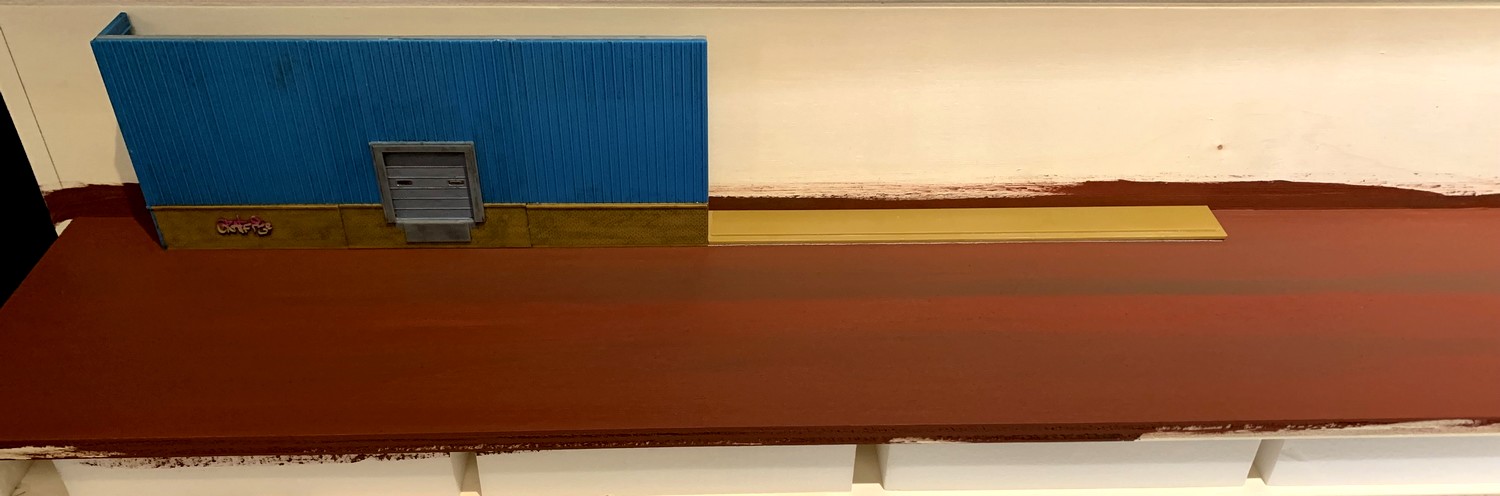
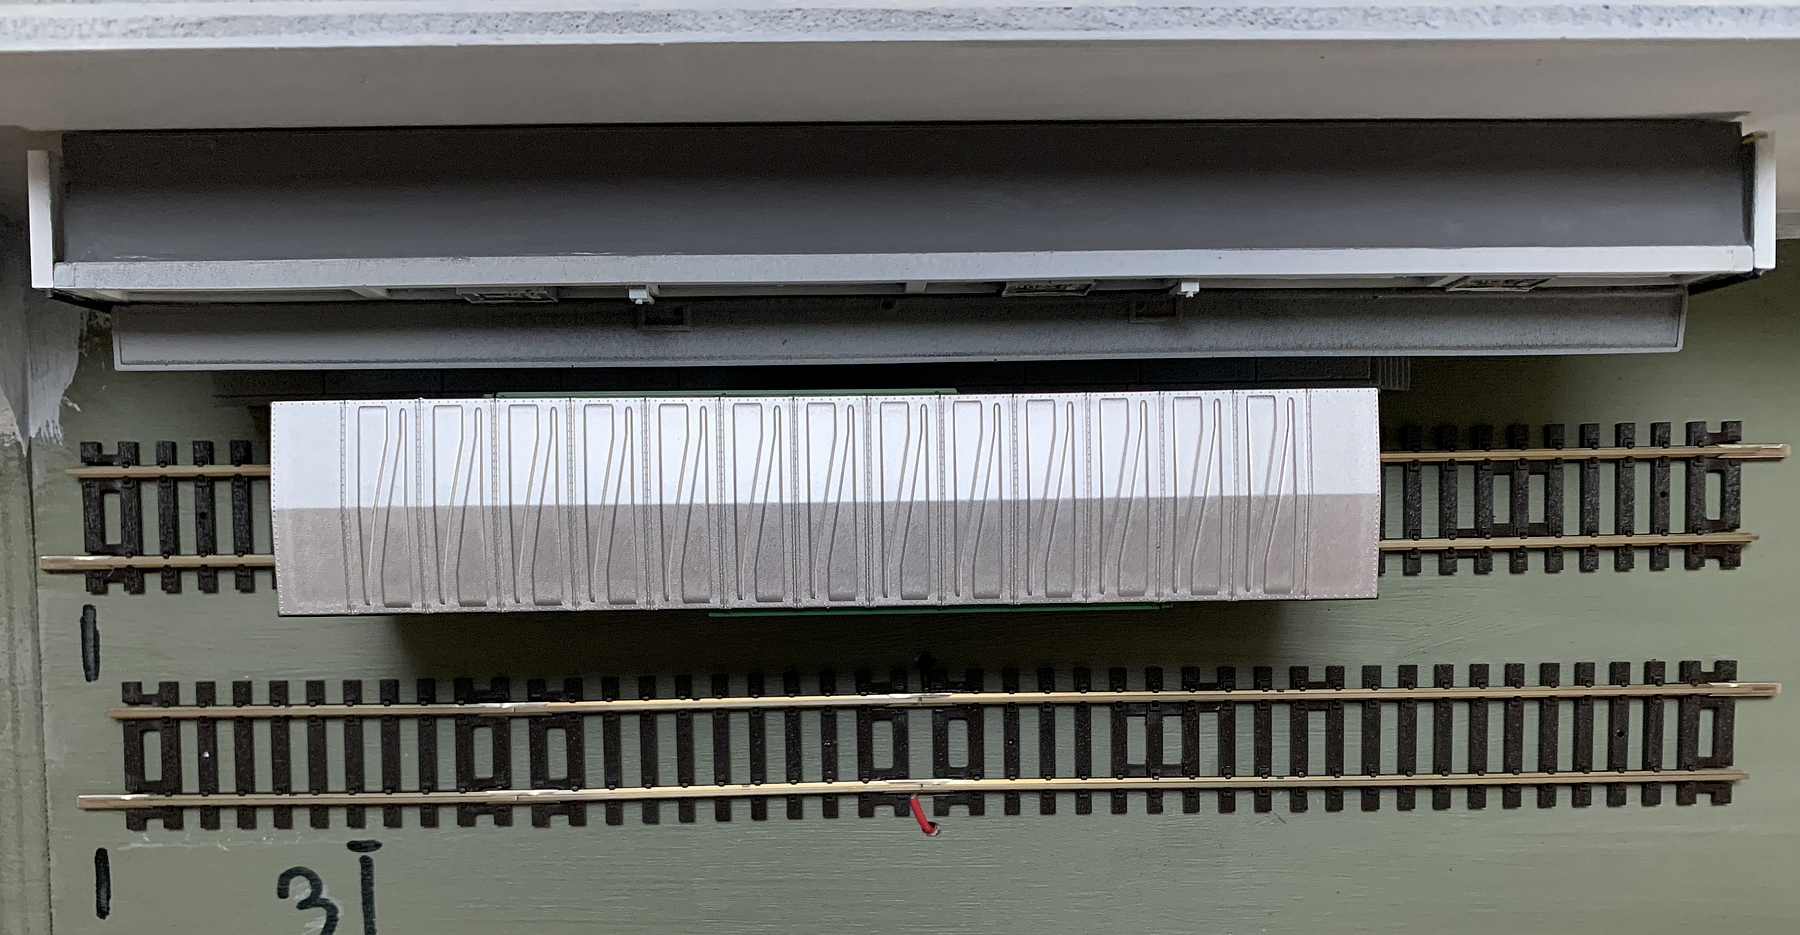
| Since clearances are all
important (and especially so if you only have 6 inches to
work with), assembling the warehouse was the first step
needed to provide a point of reference for where exactly
the tracks could go. At the same time, the baseboard
sides were added, and then a liberal coat of acrylic
paint sealed the baseboard top - track ballasting and
scenicking involves no small amount of a mix of water and
glue to fix it all in place, and baseboards that haven't
been sealed this way may well start to warp. |
| |
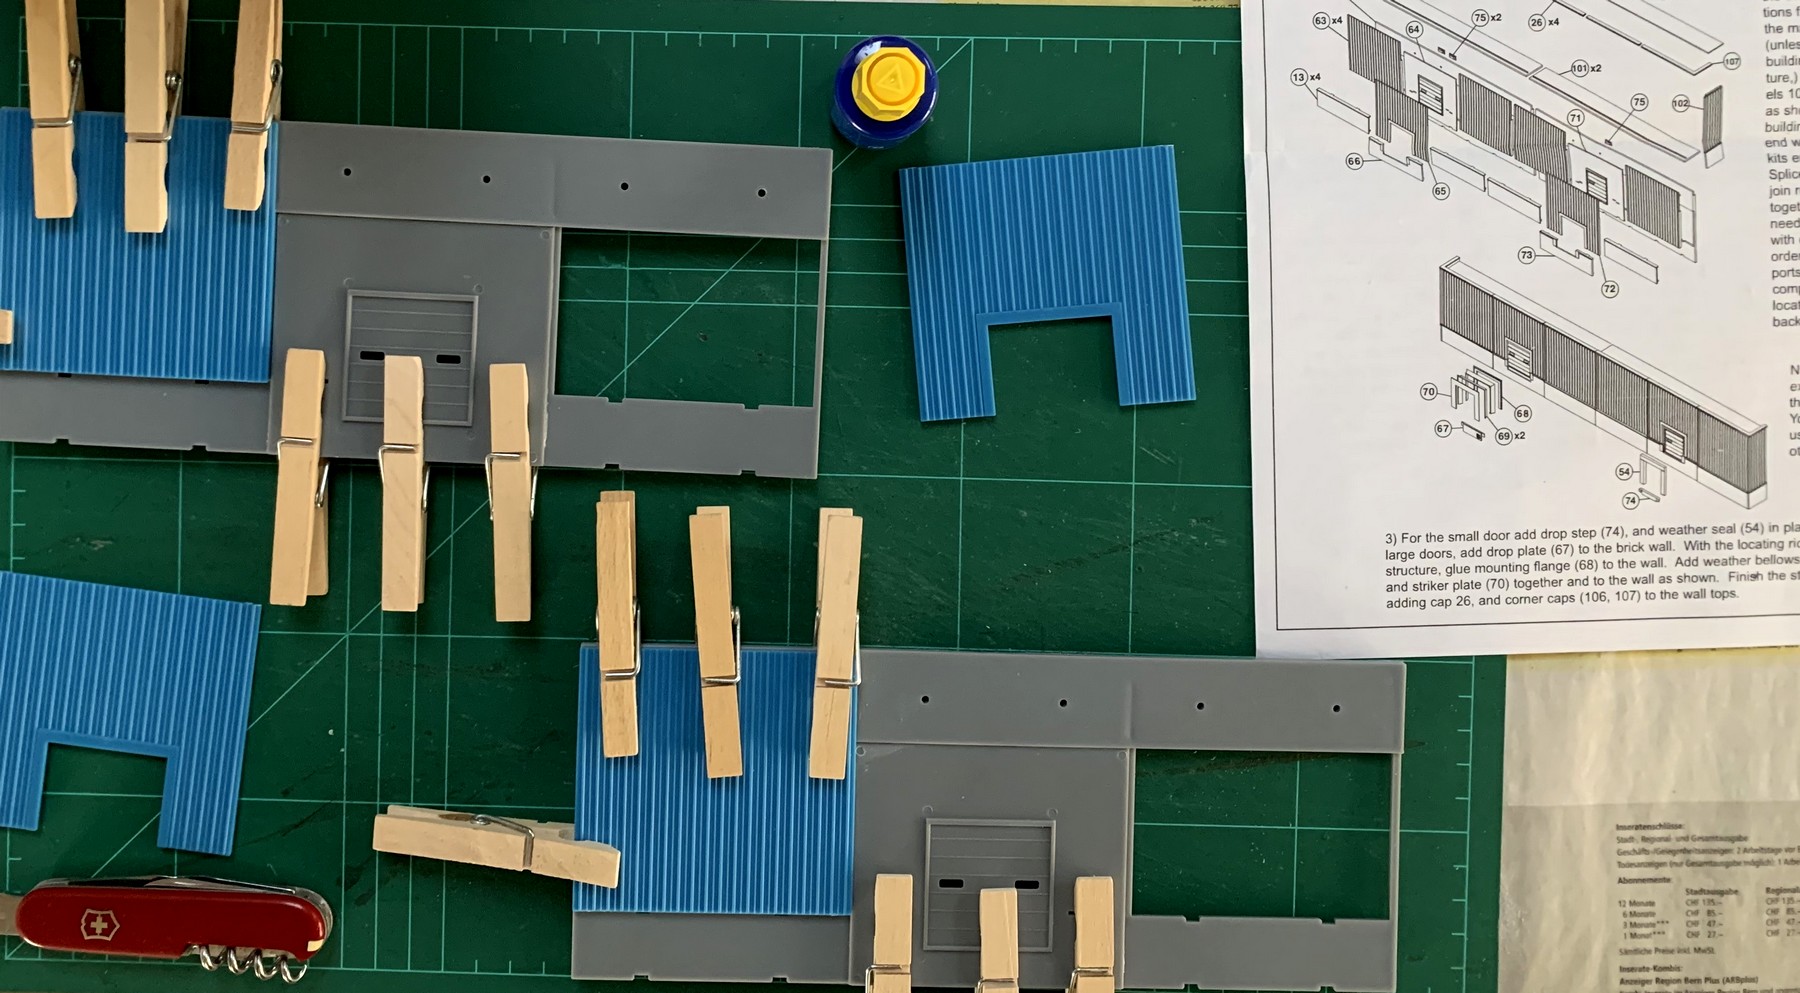
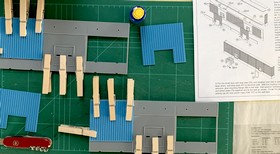
| The low-relief warehouse kit is a
very straightforward build, as was adding two
Walthers SceneMaster modern-style wall lamps
along with some initial weathering using Vallejo
grey and black wash. 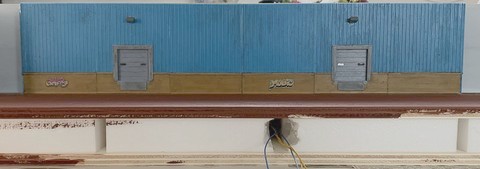
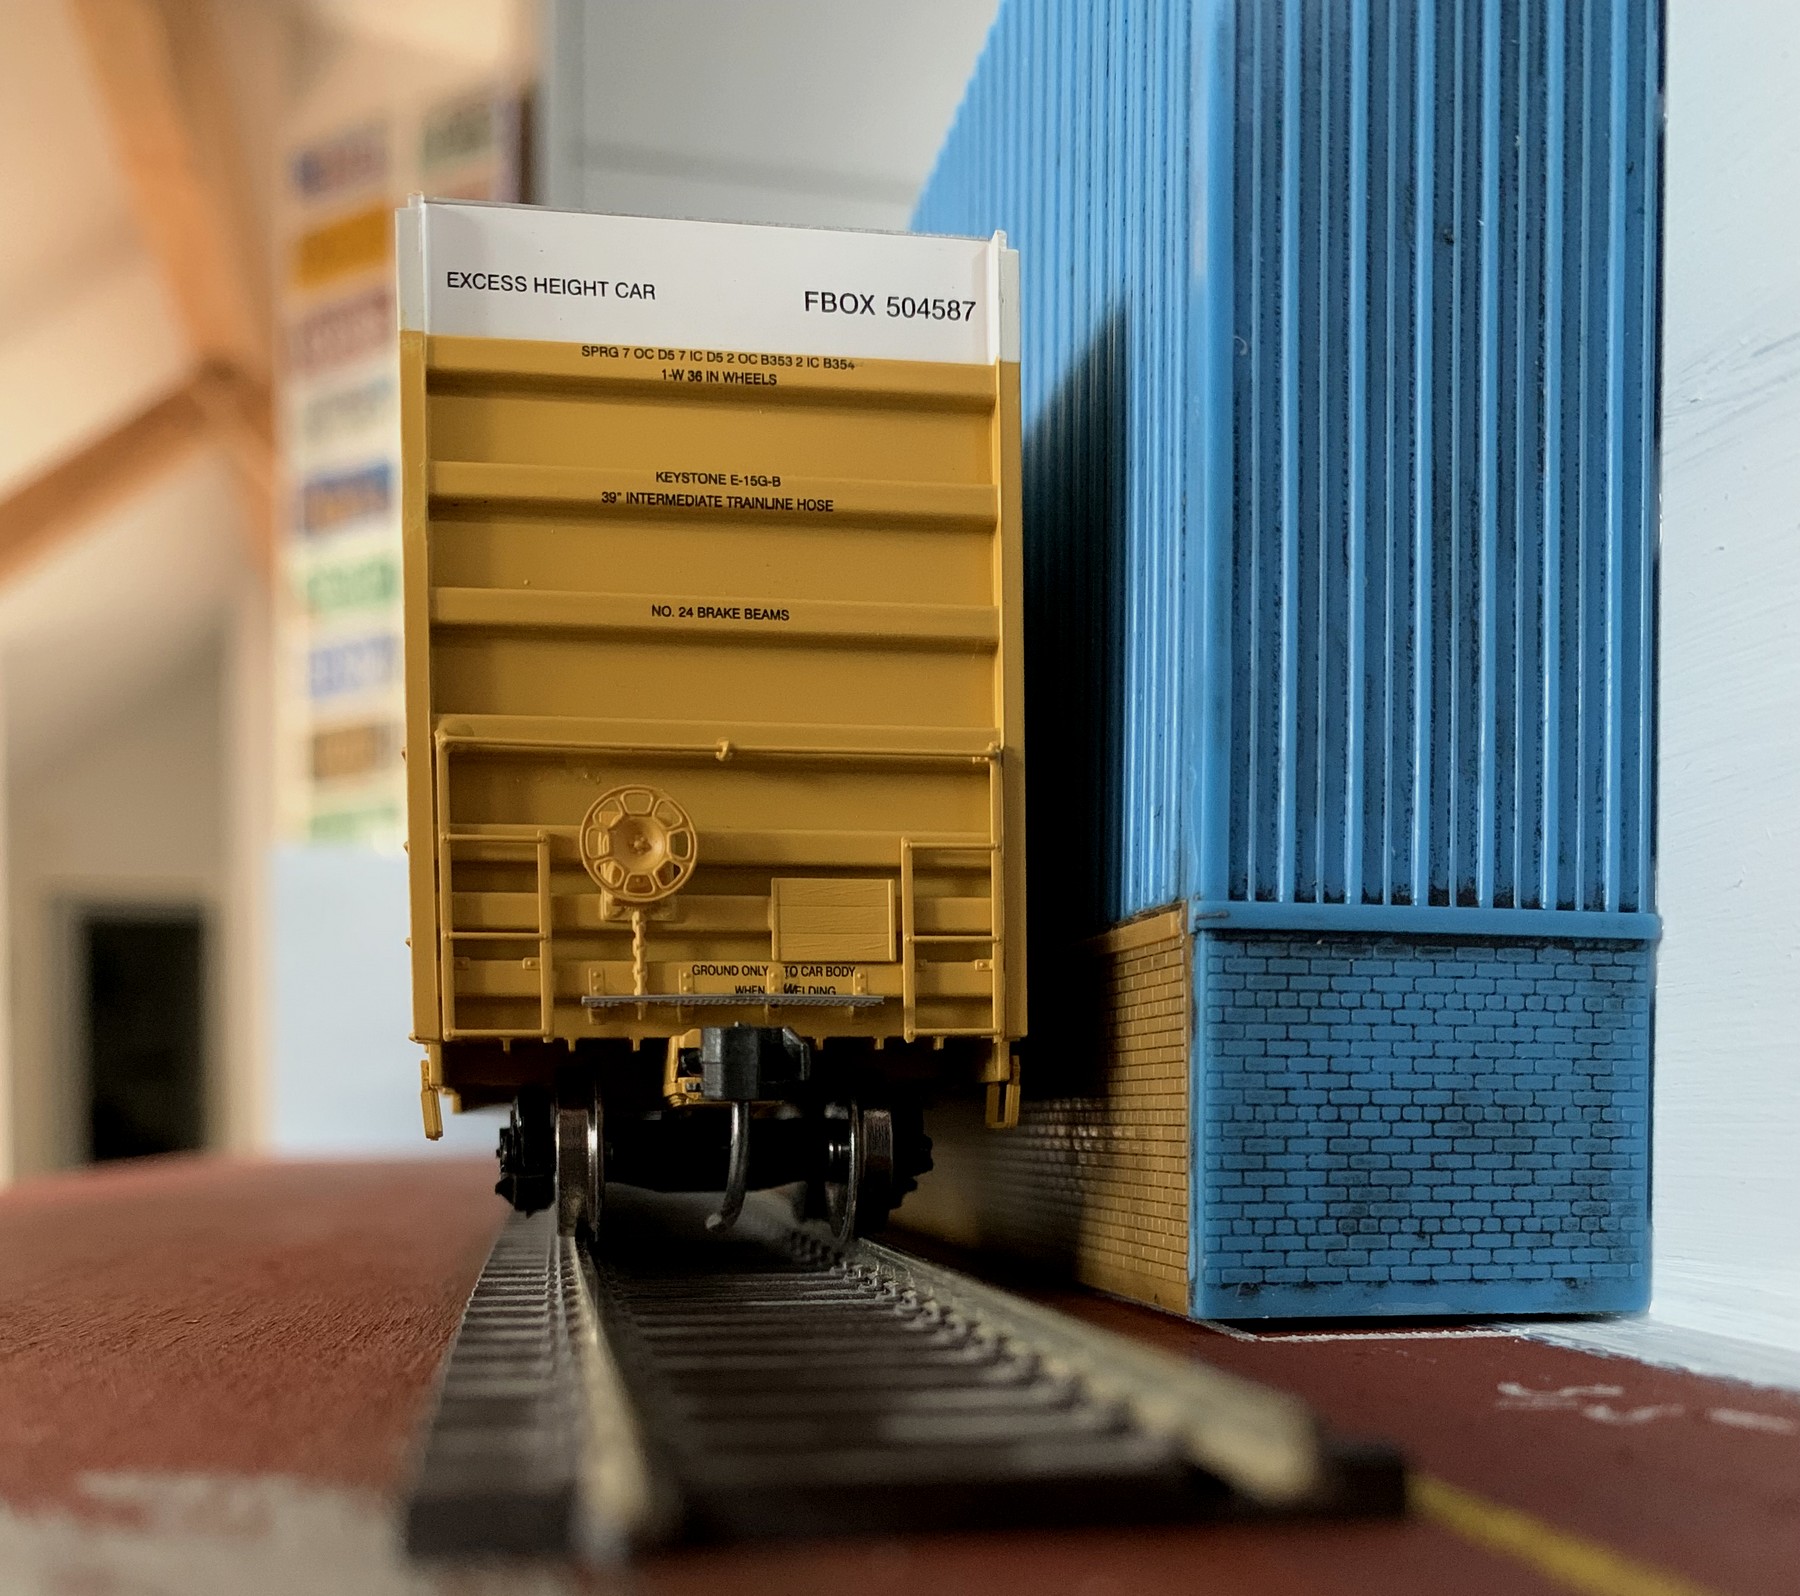
Having
a narrow gap between rolling stock and the
warehouse front not only results in a more
prototypical appearance, it also provides more
room to space out the two tracks a bit, making
operation easier.
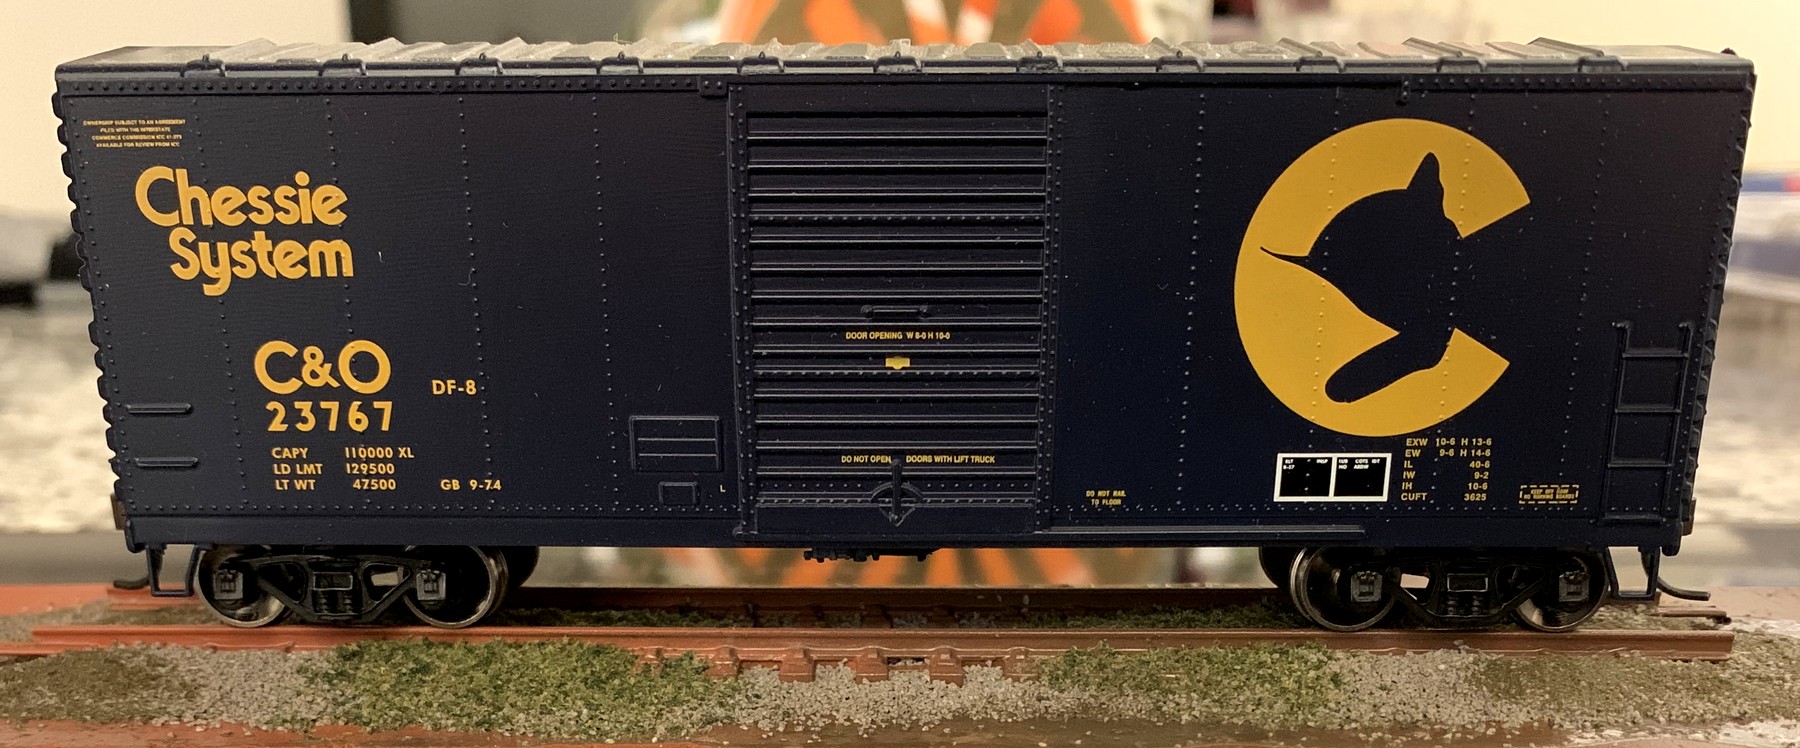
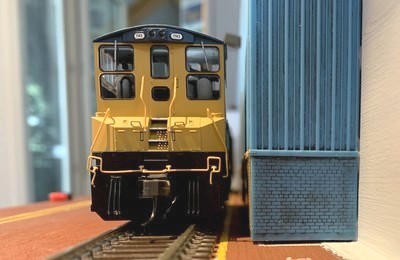
It
is important to be very diligent in this step,
using the widest and tallest item of rolling
stock along with all locomotives intended for use
on the layout, to ensure none of them fouls the
warehouse.
|
|
 |
|
| |
| |
|
|
|
| |
| With all the clearances worked
out and marked down, it was time to lay the track
- once I decided which track to use. Peco is my track of choice
(due to decades of trouble-free running) but that
still left me with two options for an HO scale
layout: regular code 100 or code 83 US style
track.
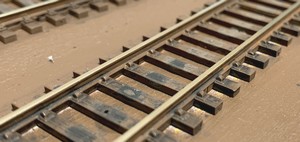
While the code 100 track
has a slightly chunkier rail profile, the most
noticeable difference is the smaller size and
closer spacing of the ties, giving the code 83
version a distinctly more authentic
"American" look.
So why even hesitate?
|
|
 |
|
| |
| The
sturdiness of Peco code 100 track is simply unsurpassed,
and since Pecan Street would require joining two segments
every time it would be set up (and then disconnecting
those segments again for storage), this seemed to be an
aspect worth taking into consideration. |
| |
 |
|
Not that
Peco code 83 is overly delicate, but the finer
rail profile does make it feel somewhat less
bombproof in comparison. As an added bonus, using
code 100 track would allow me to fall back on a
short piece of Peco setrack - the ultimate means
of connecting the two segments in a sturdy and
reliable way. Code 100 track would also allow me
to run some older models with oversize wheel
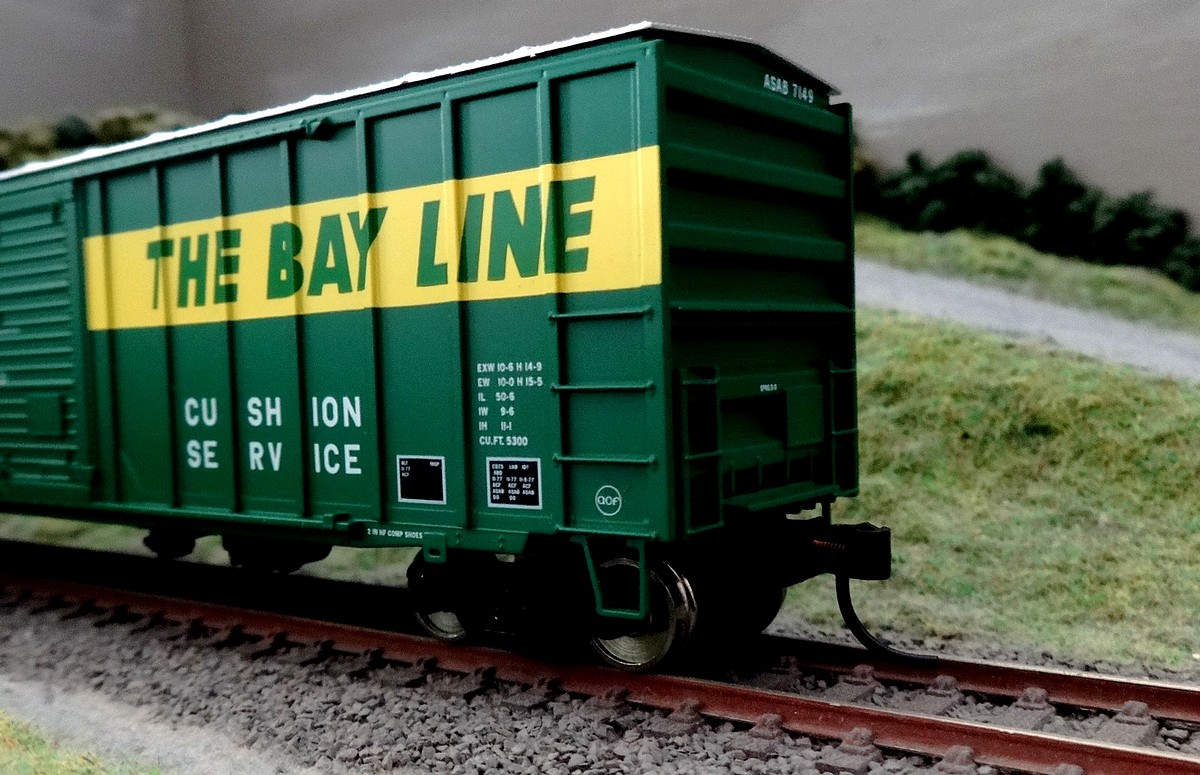
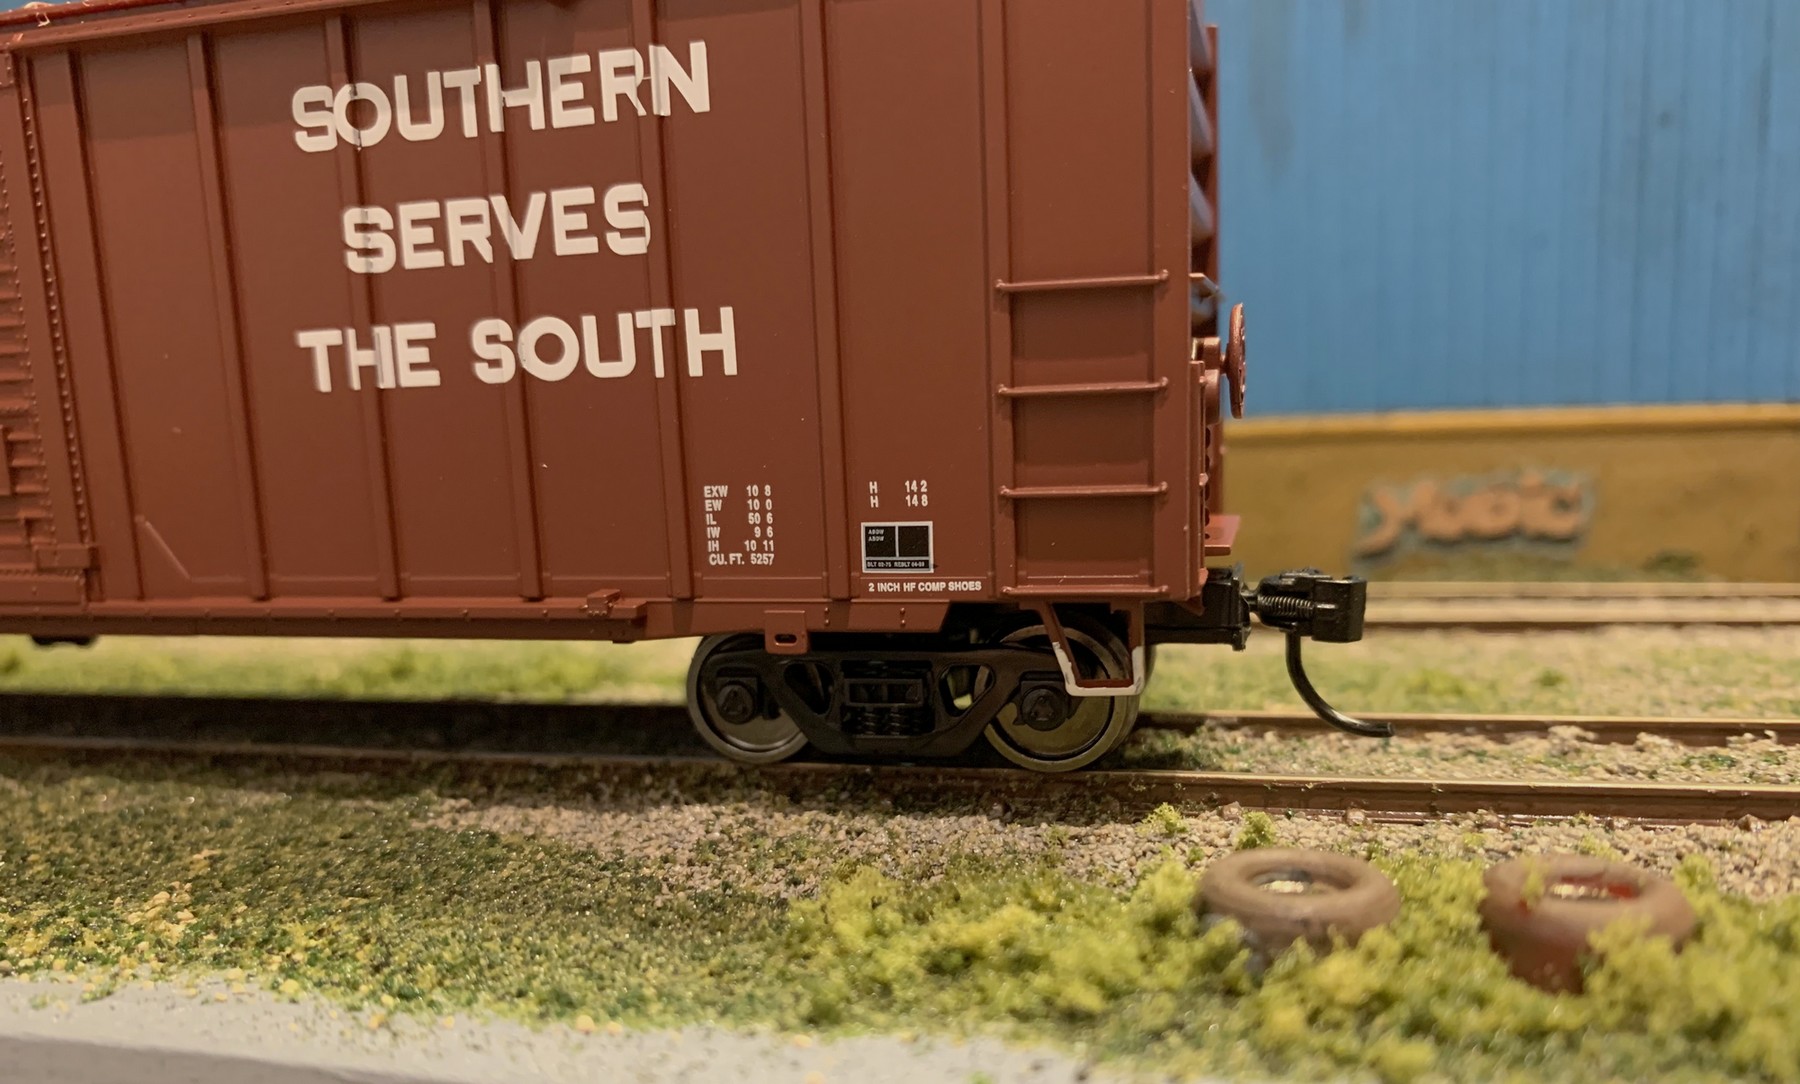
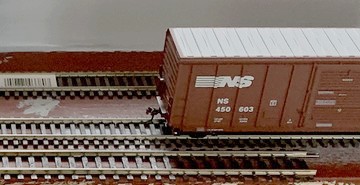
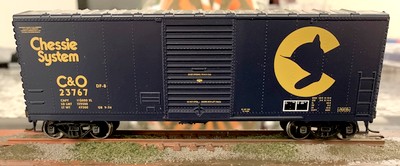
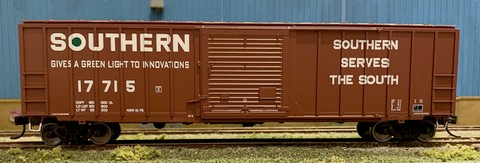
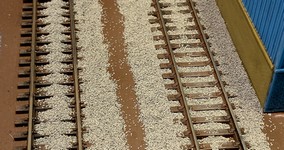
flanges. As for the visuals, I had looked
into that a few years prior (for a US layout that
ultimately never materialized) by setting down a
50' boxcar on the code 100 track of my Little
Bazeley Mk1 layout. Not surprisingly, with no
code 83 track right next to it for direct
comparison, the weathered and ballasted code 100
track didn't look too bad, in spite of the
"wrong" size and spacing of the ties.
|
|
| |
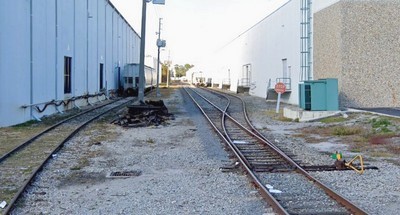
| Ultimately, my decision was
helped by looking at prototype railroad locations around
warehouses - and seeing a clear and distinct potential
for hiding any perceived visual shortcomings of code 100
rail, since the tracks in those places often convey an
entirely different look than what can be seen on a
through traffic line. |
| |
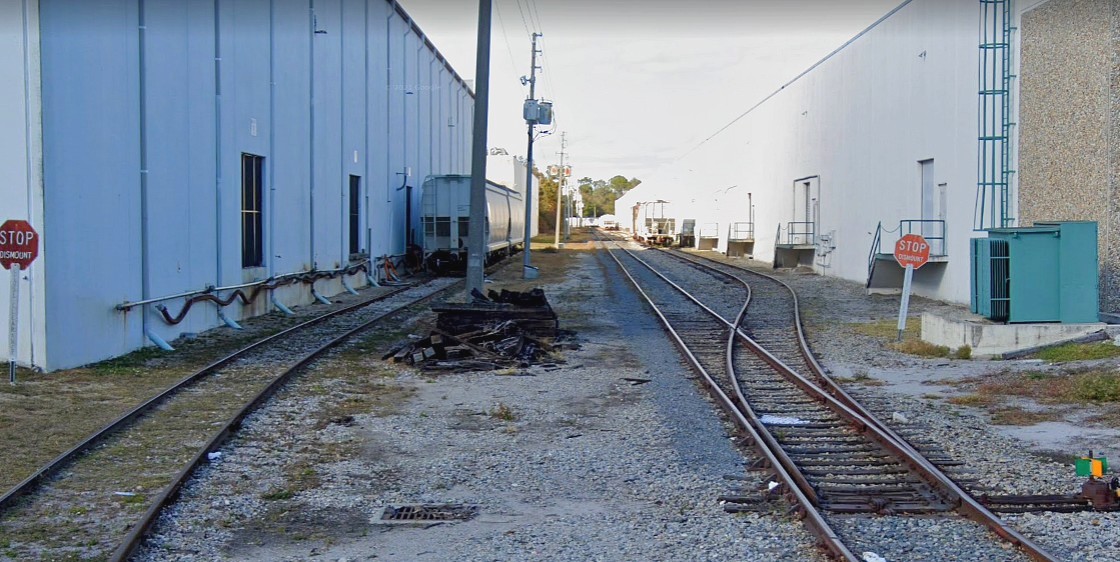
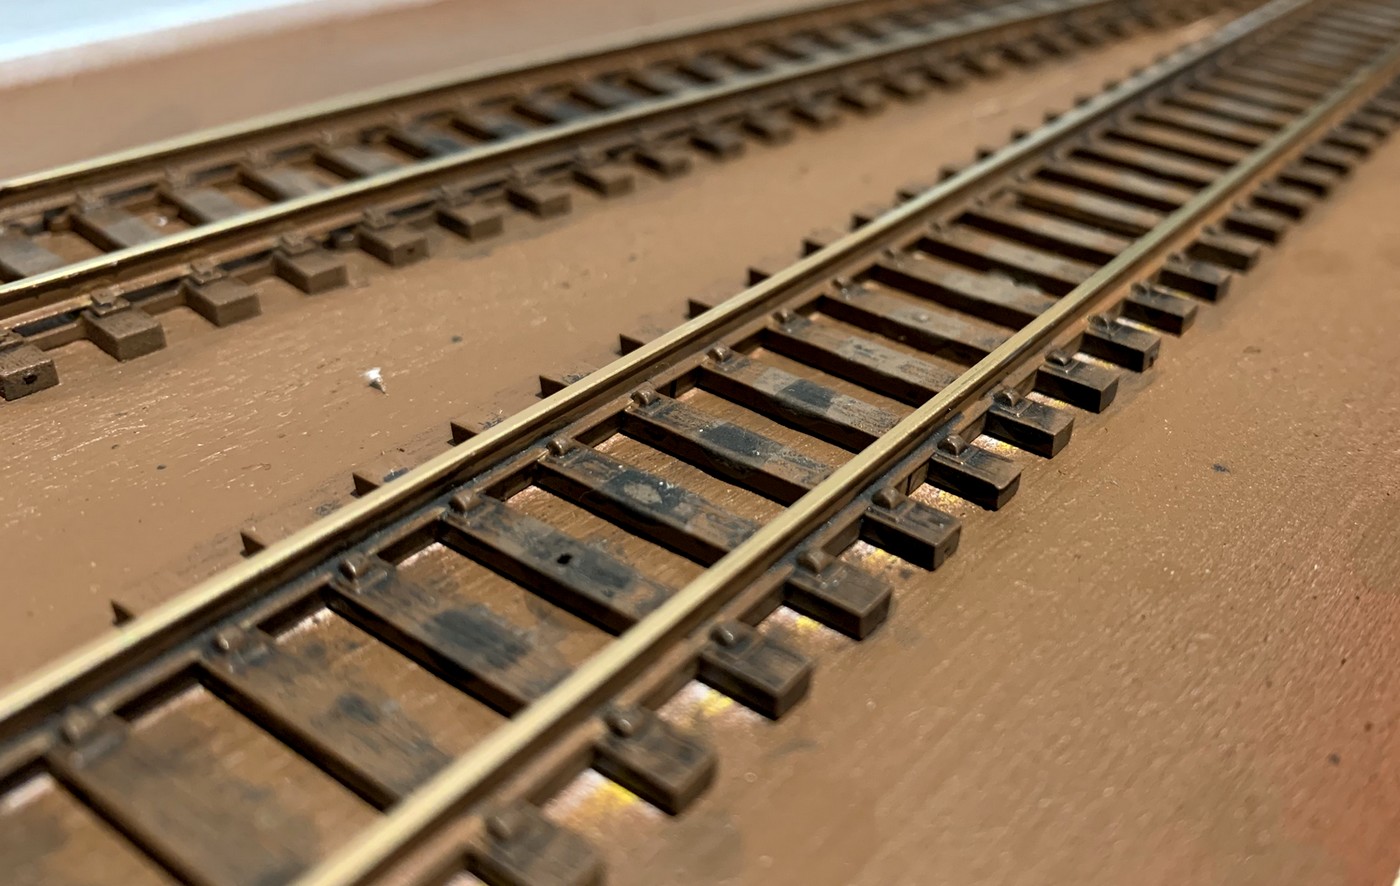
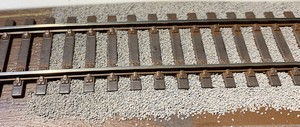
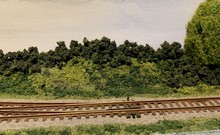
| Looking north from a road
crossing on Titan Row in Orlando FL in 2021, we
see two modern warehouse structures served by two
sidings, along with a line that runs on to serve
more customers. The track
here is far from being dilapidated, in fact the
through track seems to have been re-ballasted
recently and ties replaced. But ballast on
industrial trackage often doesn't get tamped and
regulated the way it would on busier stretches of
railroad track.
As a result, ties often
get covered by ballast both to the sides of the
rails as well as in their center, and over time,
grass and weeds will grow up in places.
A dry run using a piece of
Peco code 100 track showed that emulating this
appearance on Pecan Street would minimize the
visual impression of the larger and more spaced
out ties.
As a result, I opted for
sturdiness and proven trouble-free running
qualities and chose Peco code 100 track for the
layout.

|
|
|
|
| |
| |
|
|
|
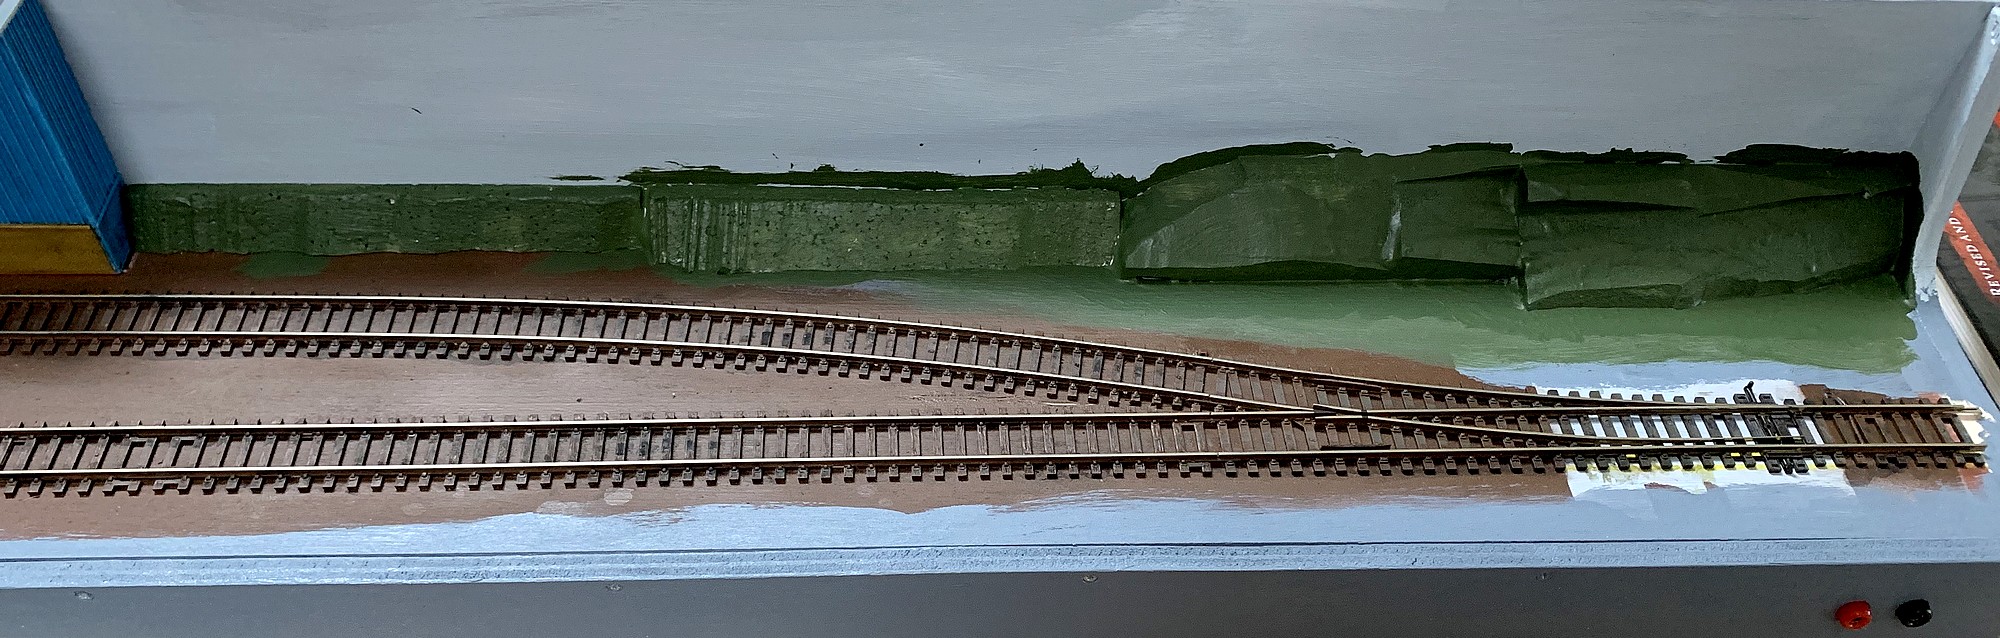
| |
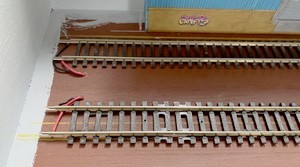
| The simple track
configuration involved in a "tuning fork"
layout was thus laid using Peco code 100 track; Streamline
flextrack for the siding in front of the warehouse (since
this curves away from the single switch on this segment),
and pieces of Setrack "snap track" for
the siding running along the front of the layout (simply
because I had quite a stash of this available, and it
does make putting down a segment of straight trackage a
breeze). |
| |
 |
|
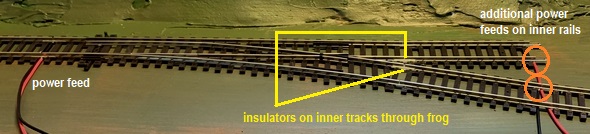
The switch is a Peco Streamline
medium radius "Insulfrog" point,
meaning it has an electrically insulated frog and
- unlike "Electrofrog" switches (that
have an electrically live frog) - requires no
extra wiring to operate, being DCC-friendly
straight out of the packaging.
The only snag that "Insulfrog"
points can throw up with DCC operation is a
potential shorting problem with some metal wheels
as they travel through the frog. Even though this
only seems to be the case with a very limited
number of wheelsets, I decided to play it safe
and add insulator joiners to the inner rails past
the frog (as per the instructions printed on the
Peco packaging of the switch).
The illustration below is
taken from my Little Bazeley layout, but the
principle remains the same for any layout.
|
|
| |
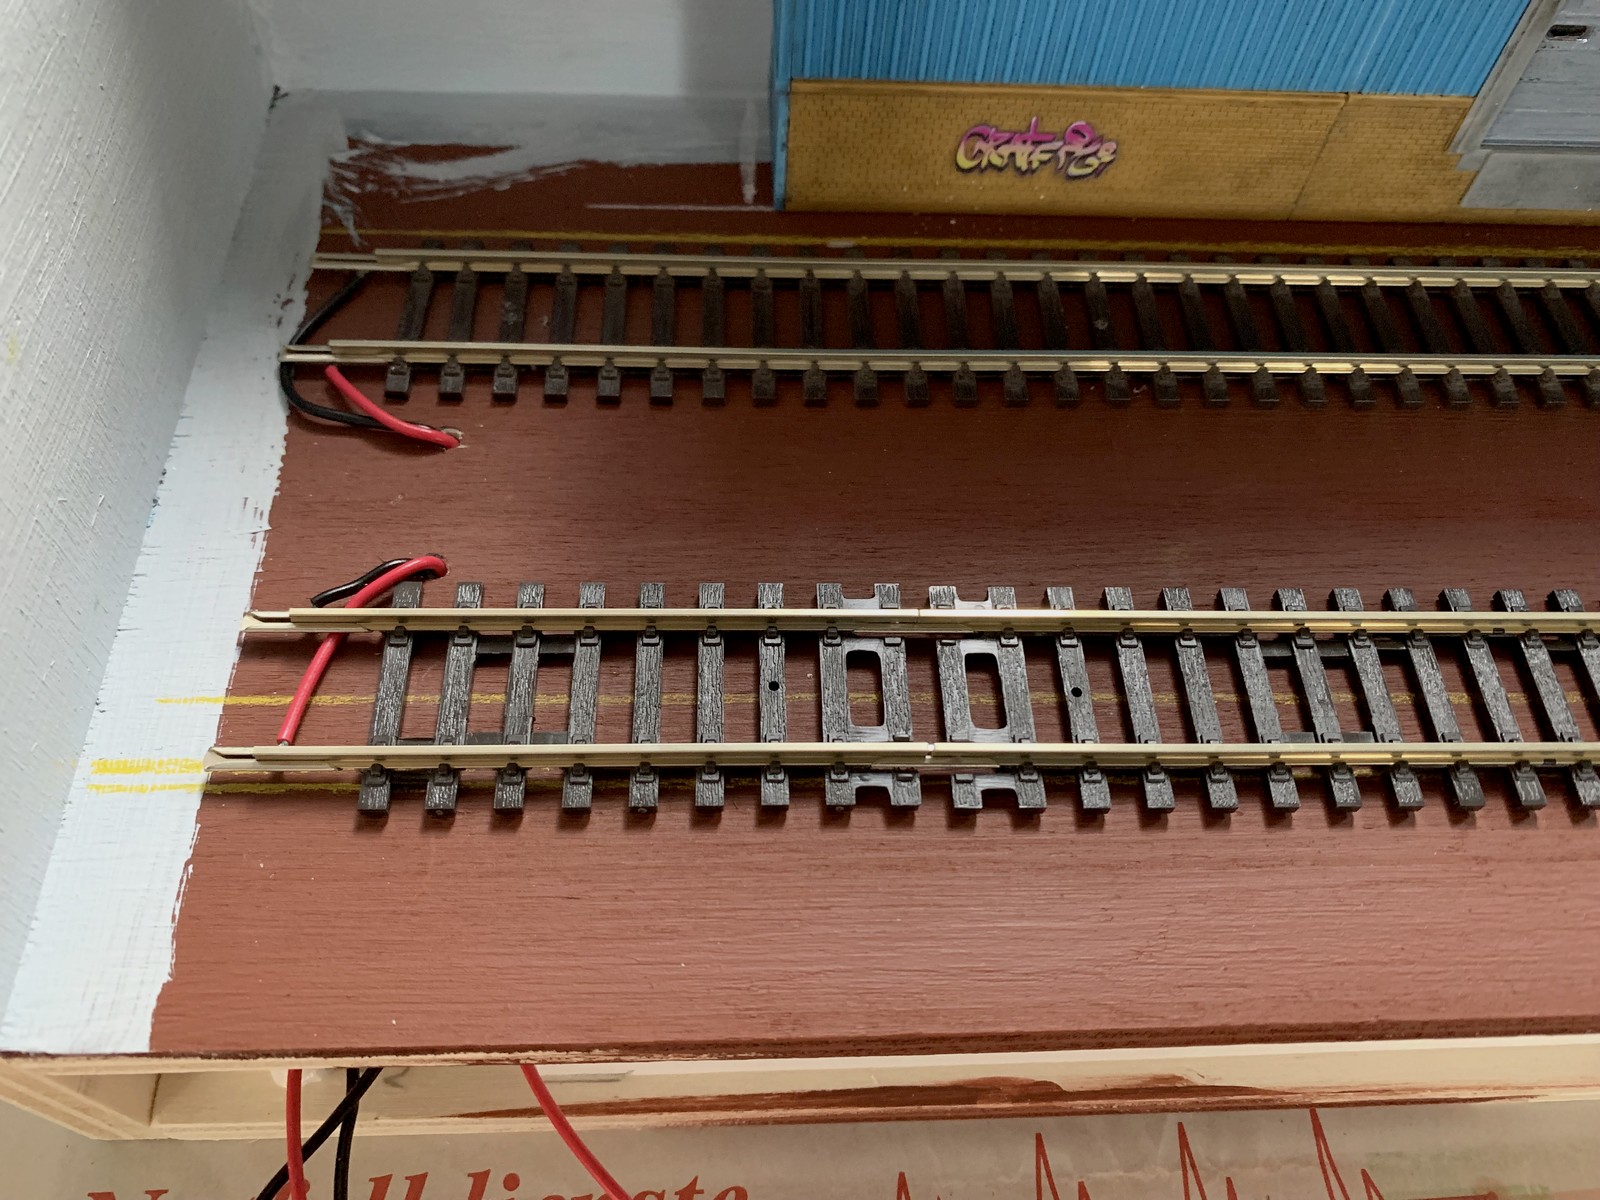
| Once everything panned
out, the simple track configuration was laid down in
virtually no time at all. I like to make sure that the
track is firmly and securely attached to the baseboard
(no roadbed needed for industrial tracks) before
weathering and ballasting, which is why I use Marklin Z
Scale track pins. Due to their very small size these are
very inconspicuous yet still hold the track down
perfectly well.
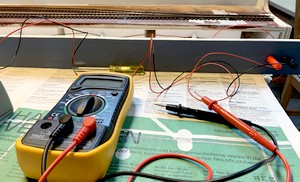
A
test run then makes sure that all electrical connections
work properly.
|
| |

|
| |
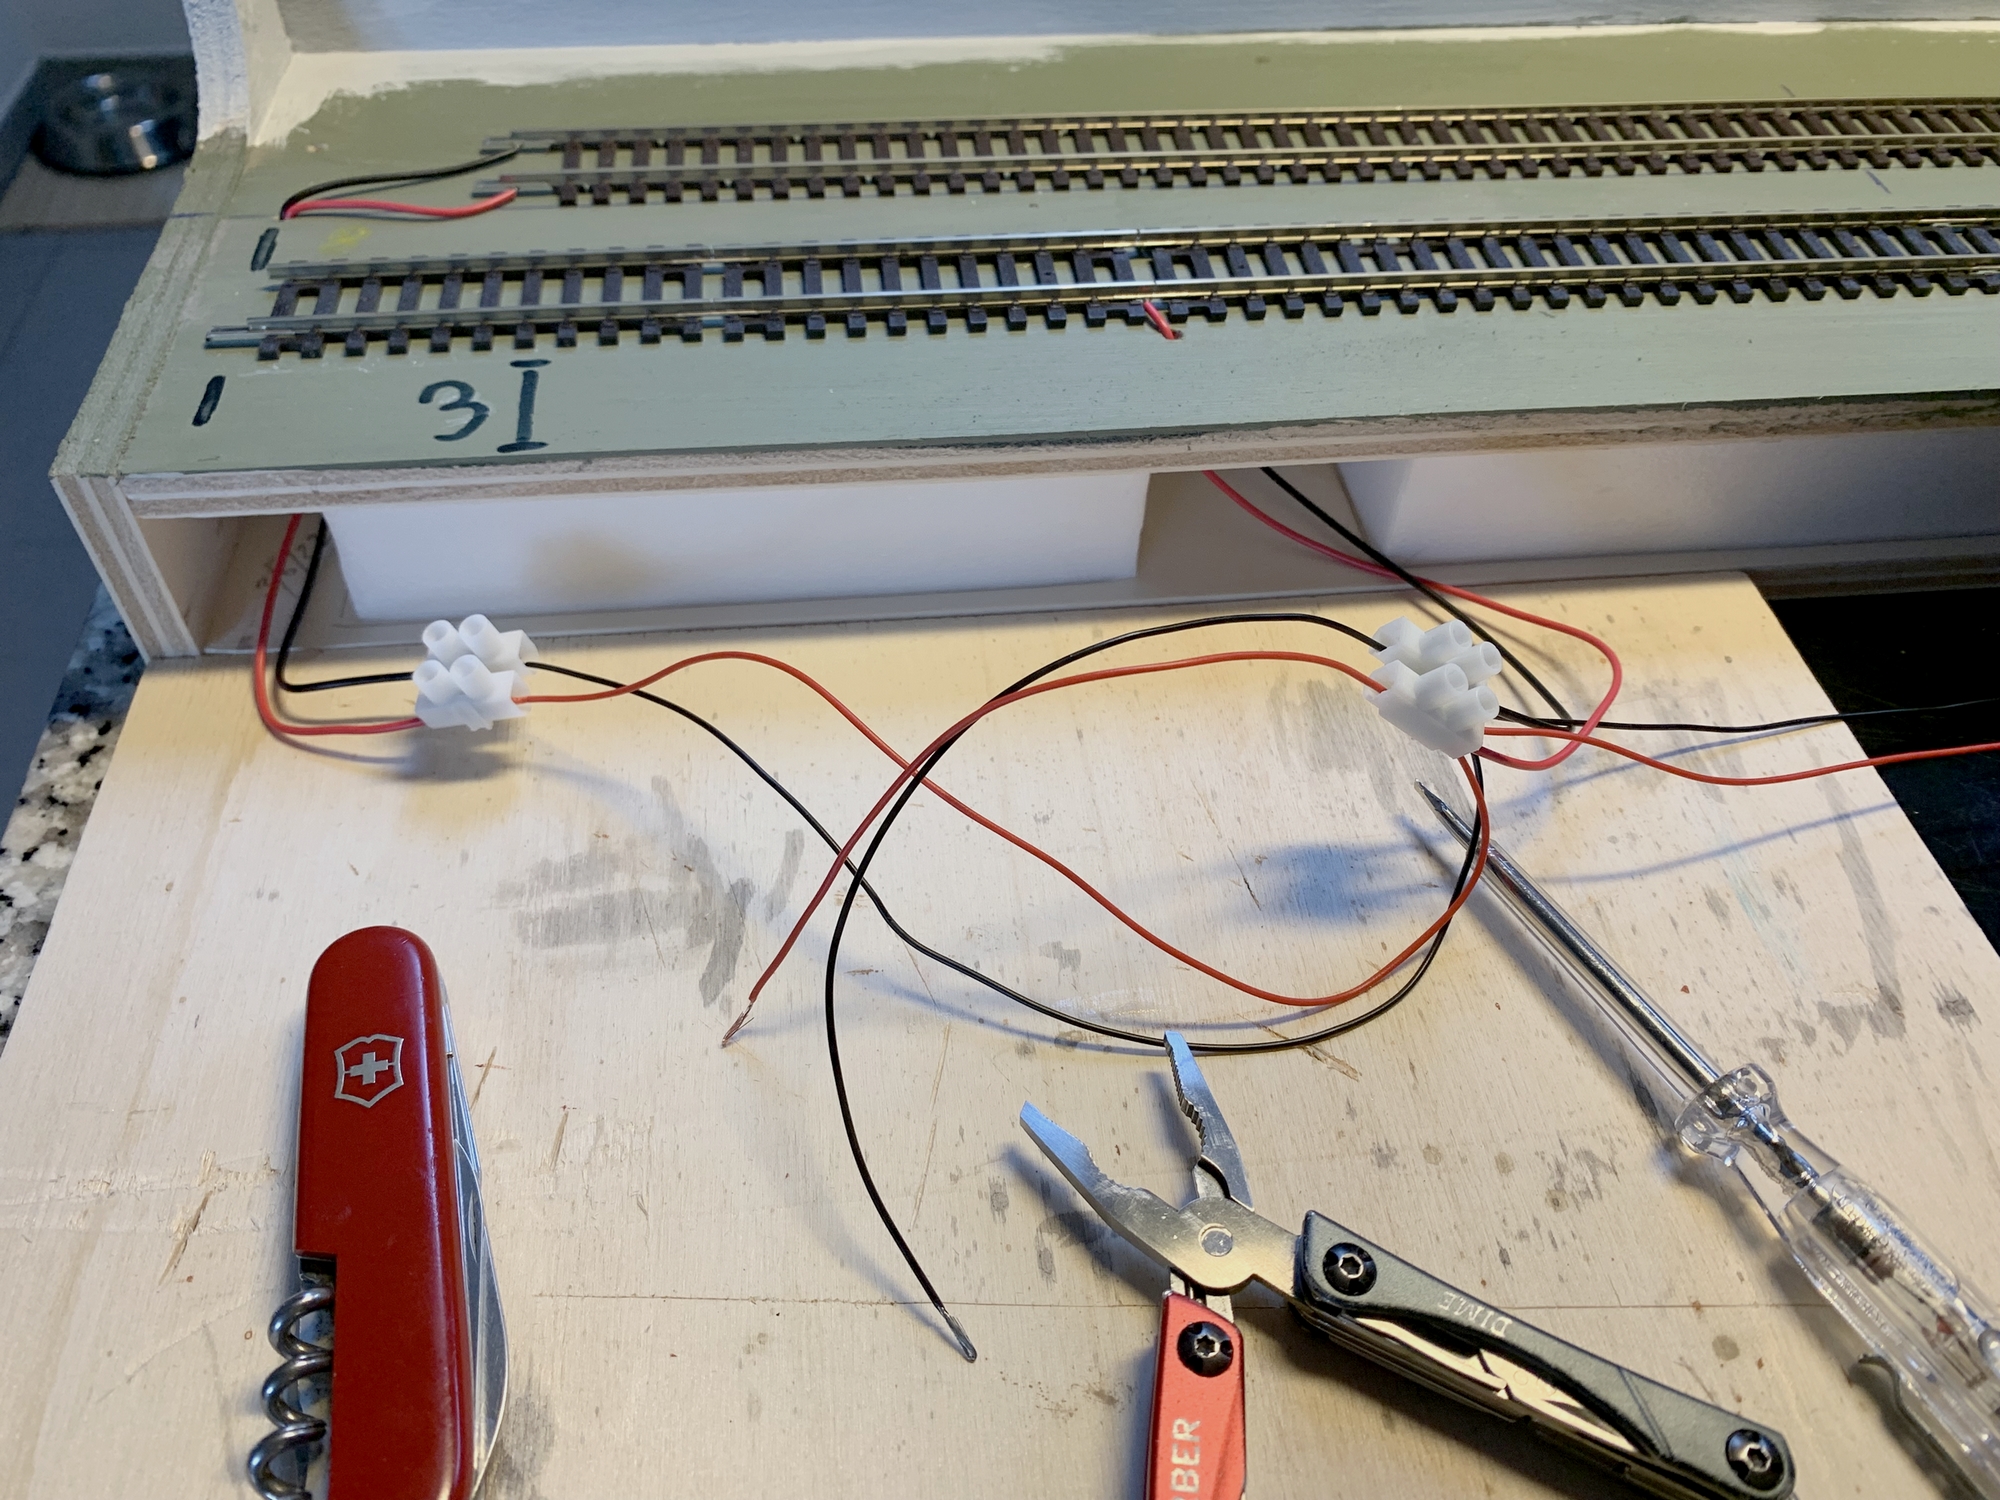
| There is also really
no difference in this case between an old-fashioned DC
wiring approach and a DCC friendly one. The only
difference are the additional feeder tracks
required due to the aforementioned insulator rail joiners
on the inner rails past the frog of the switch; I went
ahead and added additional feeders to both tracks at the
end of the two sidings to give this layout segment an
added boost in terms of feeding power to the track. All the wiring follows the common
colour coding of "black is at the back" (and
therefore red wires to the front rails).
|
| |
| |
|
|
|
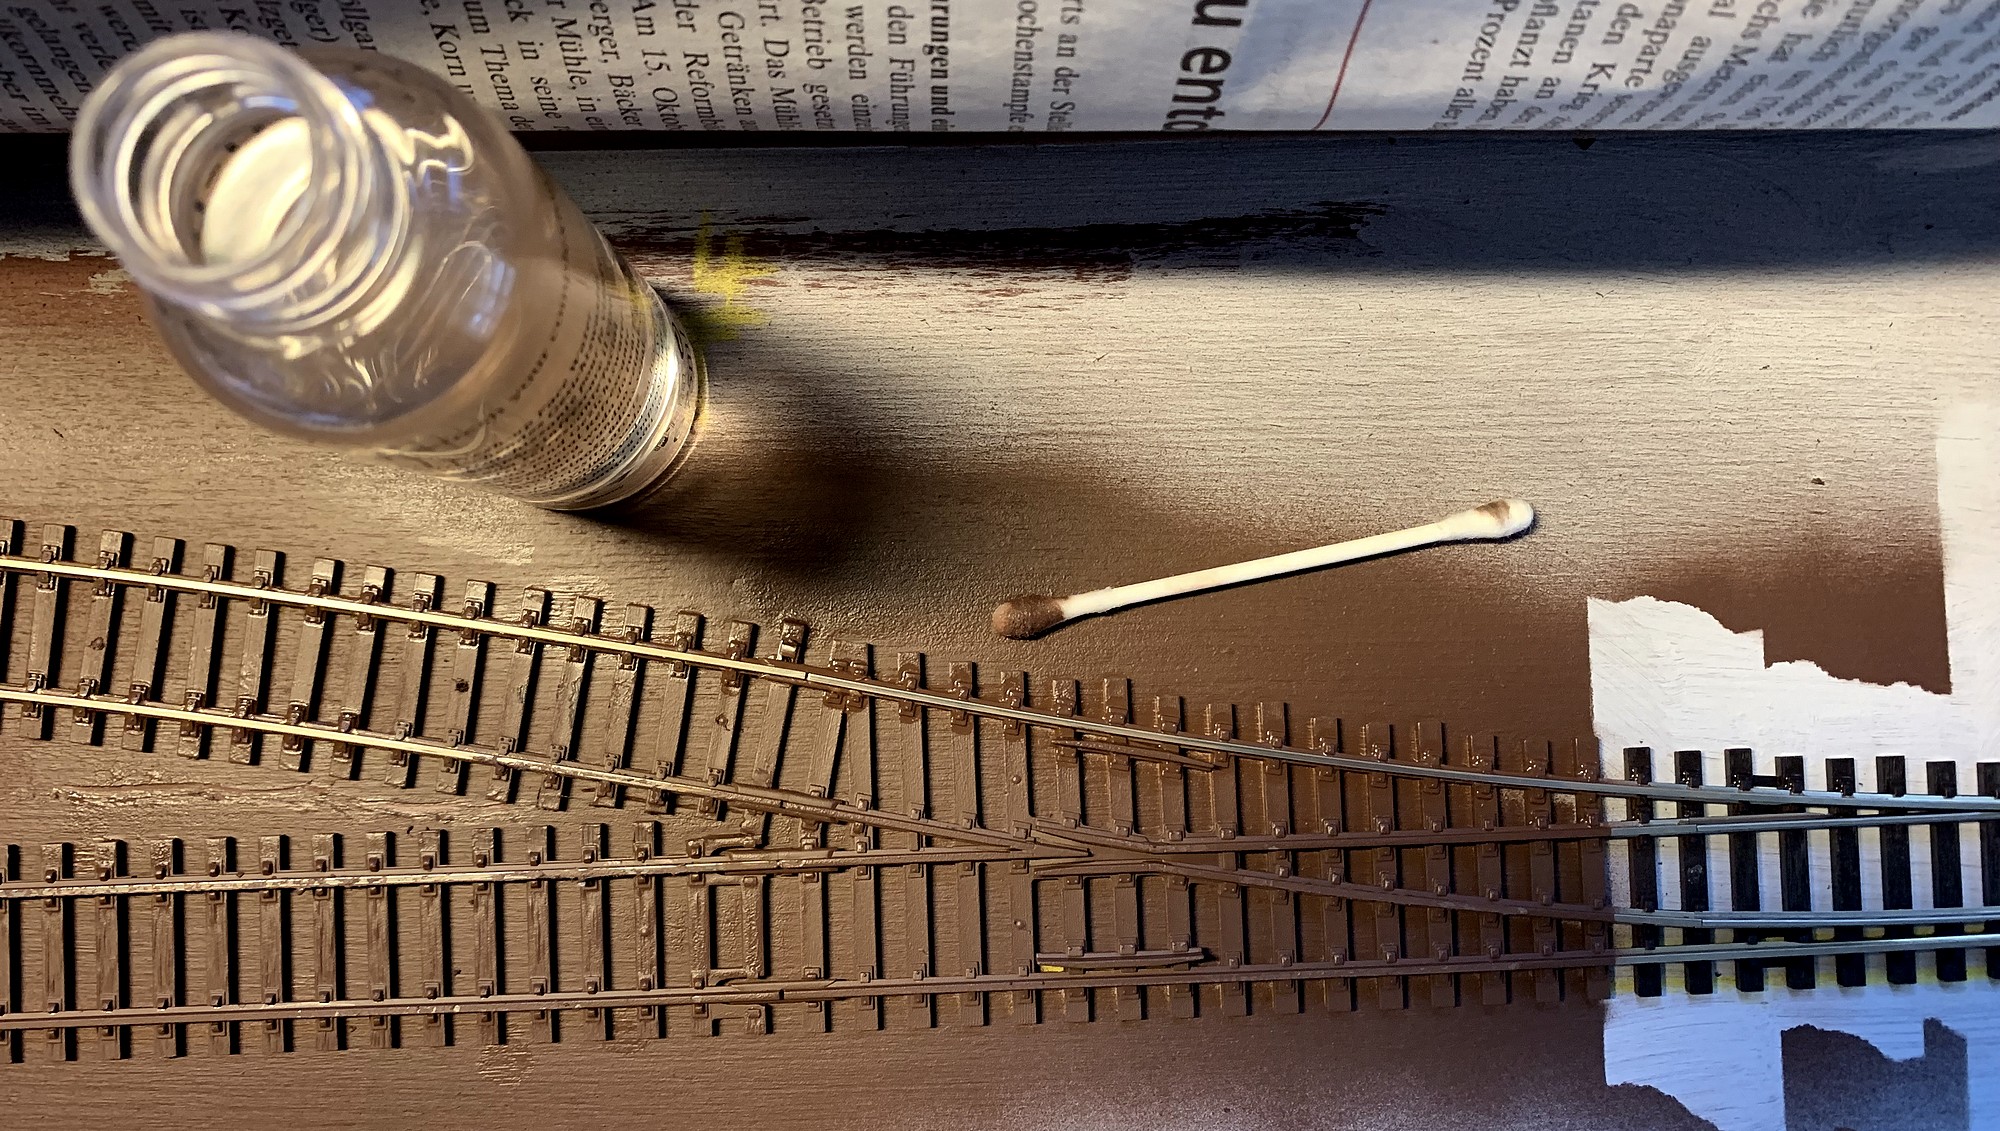
| |
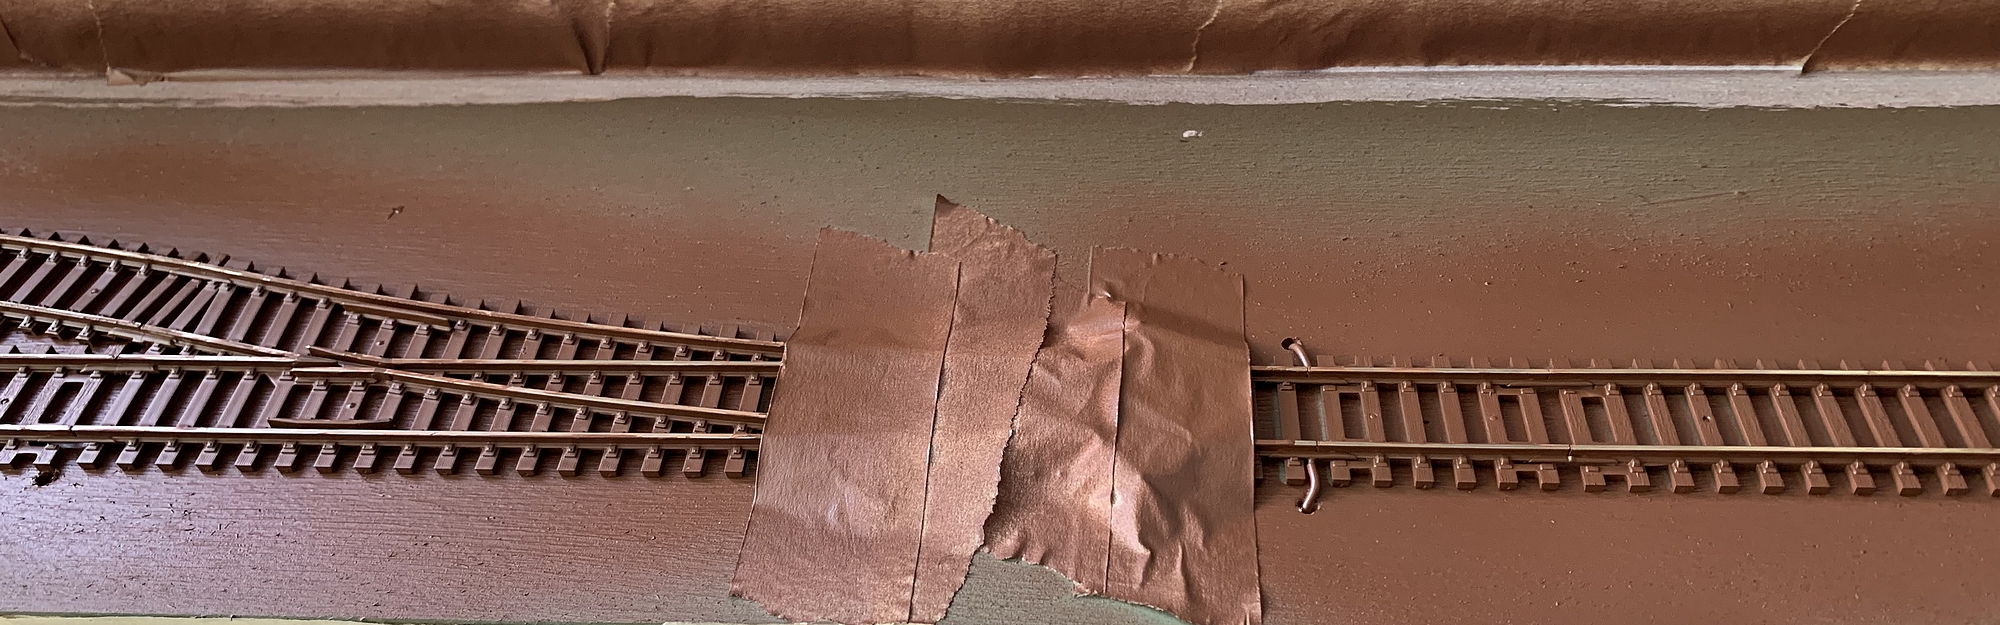
| As
a first step in weathering the tracks, I took the
baseboard outside and sprayed them a dark matt brown
colour using an aerosol spray can from the DIY store,
masking parts of the switch in order to avoid
conductivity problems. |
| |
 |
| |
| Like
most modellers, I have accumulated lots of
"spare" items over the years, and I felt that
Pecan Street would be an excellent opportunity to use
items from this stash. |
| |
| However,
the rattle can that I still had left over from my
Little Bazeley Mk2 layout build a few months
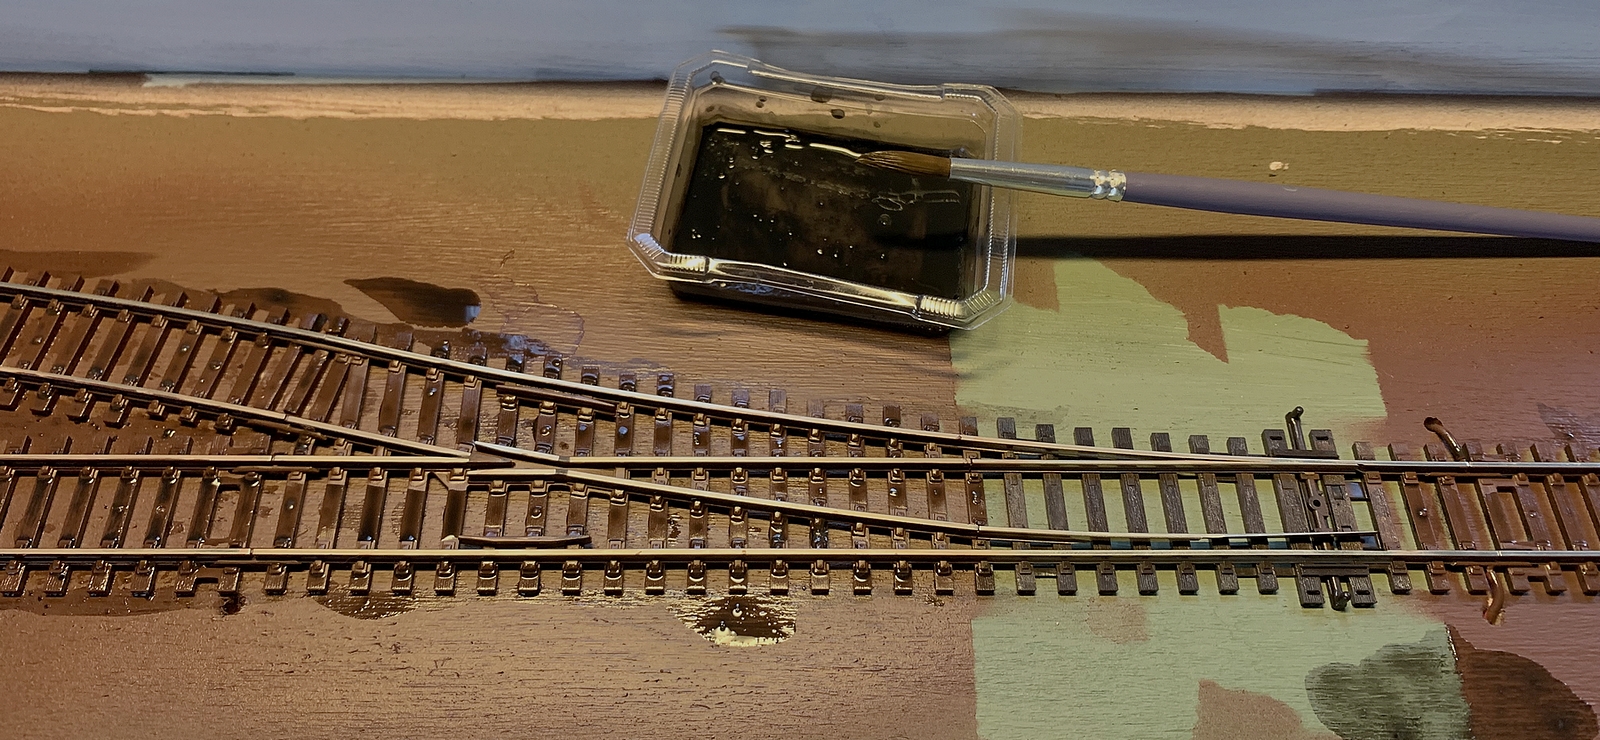
back, proved to be a bad choice. The spray paint went on as usual and
without any problems, but when I tried to wipe
the top of the rails immediately after, I found
that the paint was too sticky to come off neatly
- or even refused to do so at all.
I suspect that the aerosol/paint/solvent
mix had deteriorated inside the half-empty rattle
can, but whatever the exact reason, I had to
apply a different approach than I usually would.
Deciding to let the paint dry completely, I left
it alone for a good 48 hours. After this, I used
swabs saturated with isopropyl alcohol to wipe
the top of the rails clean.
|
|
 |
|
| |
|
|
This
worked well (and without the damage abrasive
tools inflict on the rail surfaces), although the
paint was a bit more stubborn in some places,
requiring two or even three swipes. In the end, however, this unexpected
problem was solved and all the rails had a shiny
surface (necessary to provide good electrical
pickup). The masked-off section at the switch was
then touched up with a fine brush and
rust-coloured acrylic paint.
In order to brake up the unrealistic
uniformity of the colour, I then added a few
touches of RailMatch's "sleeper grime"
(an acrylic paint) as well as some Vallejo
grey and black washes to the sleepers.
Even though this is a very
straightforward and simple way to achieve a more
realistic look, some (if not most of it) would
ultimately be lost - since I was planning to
"sink" the track and ties well into the
ballast. However, weathering the track really is
an essential part of recreating the atmosphere of
the real railroads, so I just went ahead with it
regardless.
More test running and checking of all
electrical connections after this stage is
essential to discovering (and if needed ironing
out) any bugs. Once the functional aspects of the
track are all settled, it's time to add ballast
to the weathered track.
|
|
| |
| |
|
|
|
| |
| Having ballasted model
track for a good thirty years in HO/OO, N and Z scale, I
felt confident that my array of proven methods
accumulated over that period of time would provide me
with a trouble-free part of putting together Pecan Street
- especially since for the first time I would not be
attempting to produce a well-maintained and neat looking
section of ballasted tracks. I was in for something of a
surprise - and an extended episode of accidental
modelling. Initially though, everything went according to
plan.
|
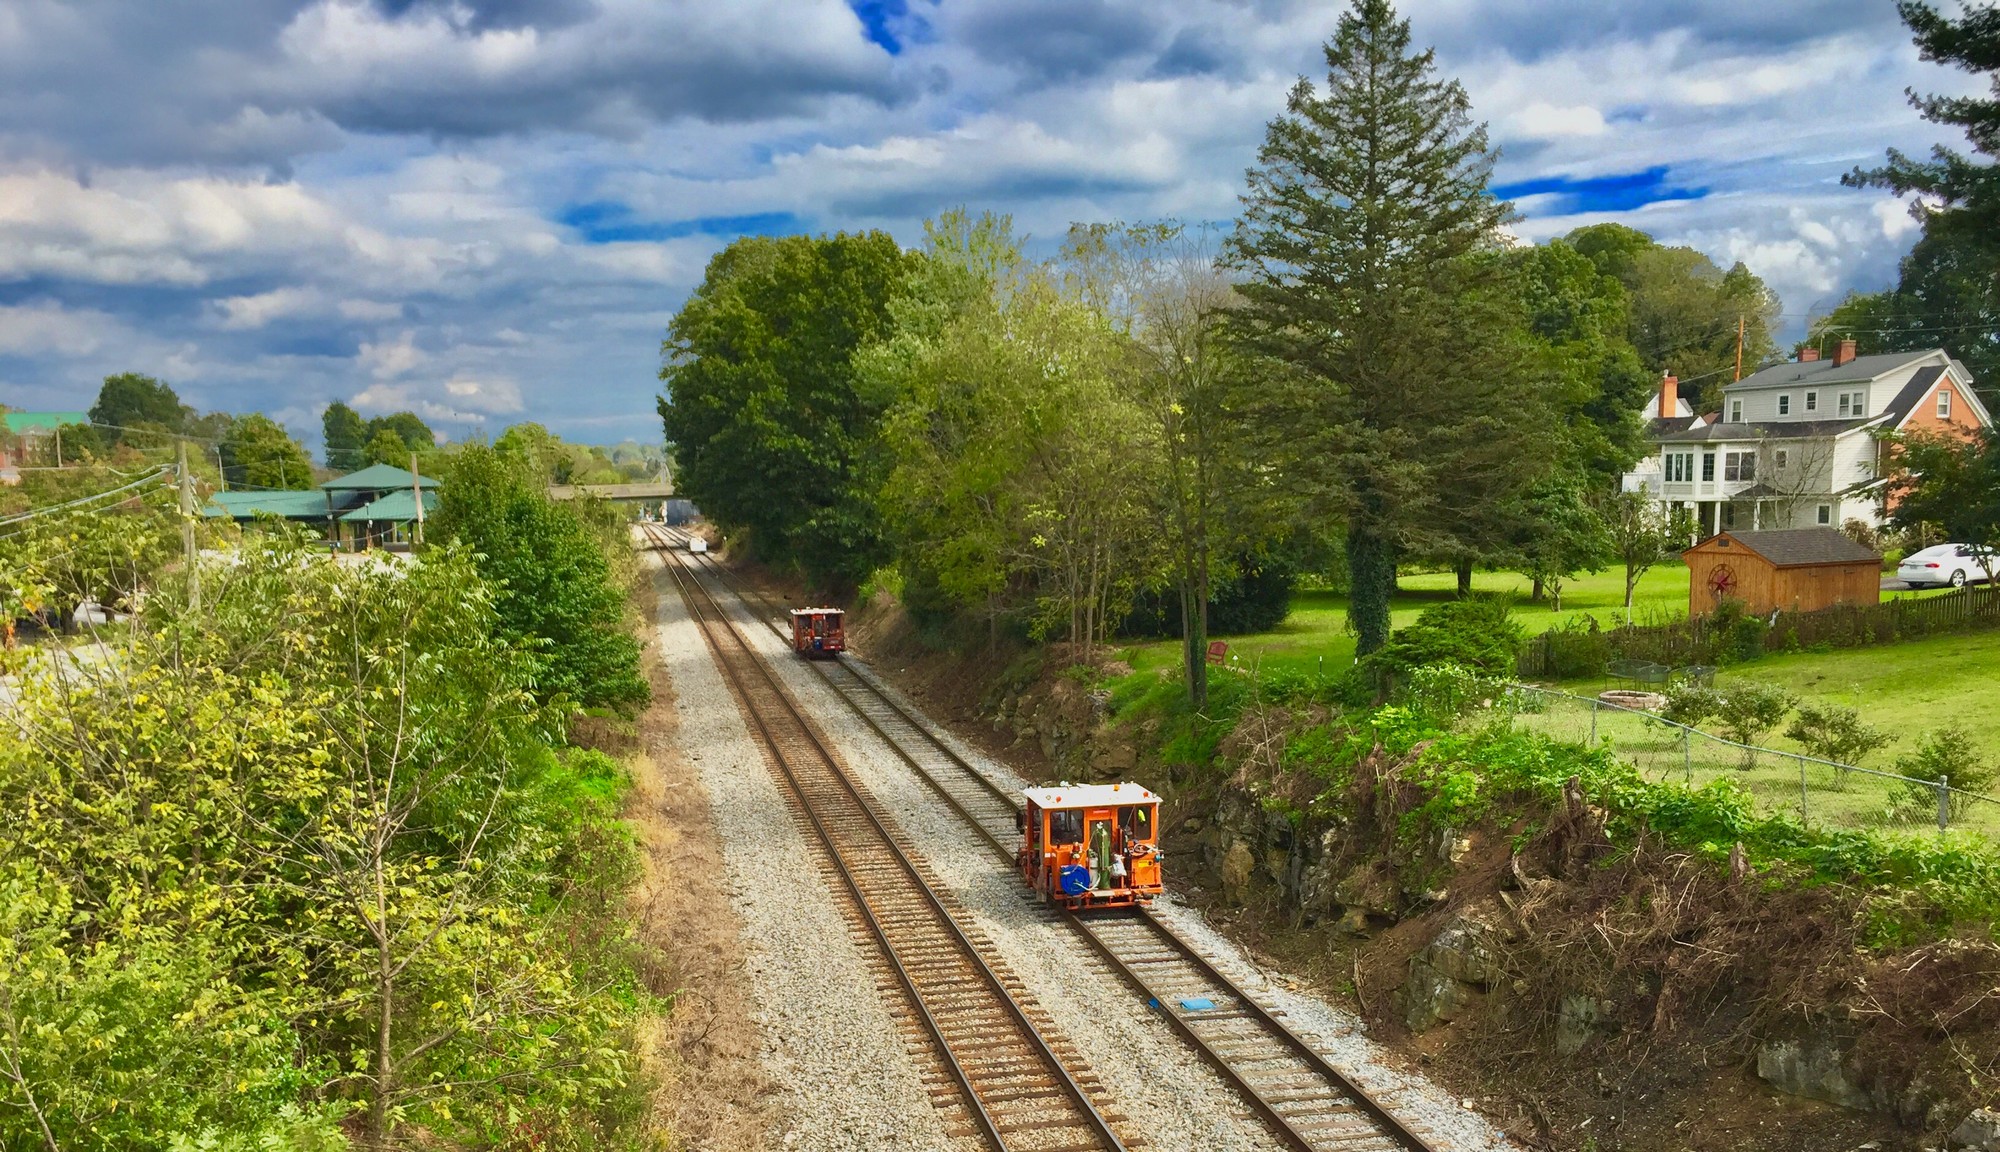
| |
Track
maintenance work at Abingdon Va, 15
October 2018 (Video)
|
|
The colour of ballast varies
greatly on the prototype, depending on
the type of stone used and how much soil
and rust is deposited on the trackbed by
traffic on the line. A little bit of
research into the area and era modelled
(on location if possible, otherwise
online and through books and other media)
really helps to get it right. Unless you are basing your
layout on a specific location with its
own unique characteristics, railroad
sidings serving warehouses in the US
commonly seem to use grey, light grey or
buff coloured ballast.
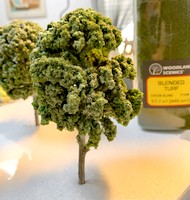
I have been
using Woodland Scenics ballast (actually
made from crushed walnut shells) for
decades and saw no reason to change that.
|
|
|
| |
| For
this layout, I opted for my favourite, the
"fine" grade light grey ballast (B74), which is
usually marketed for N scale and looks really good on HO
track. With Pecan Street, however, one fundamental aspect of
ballasting was different. |
| |
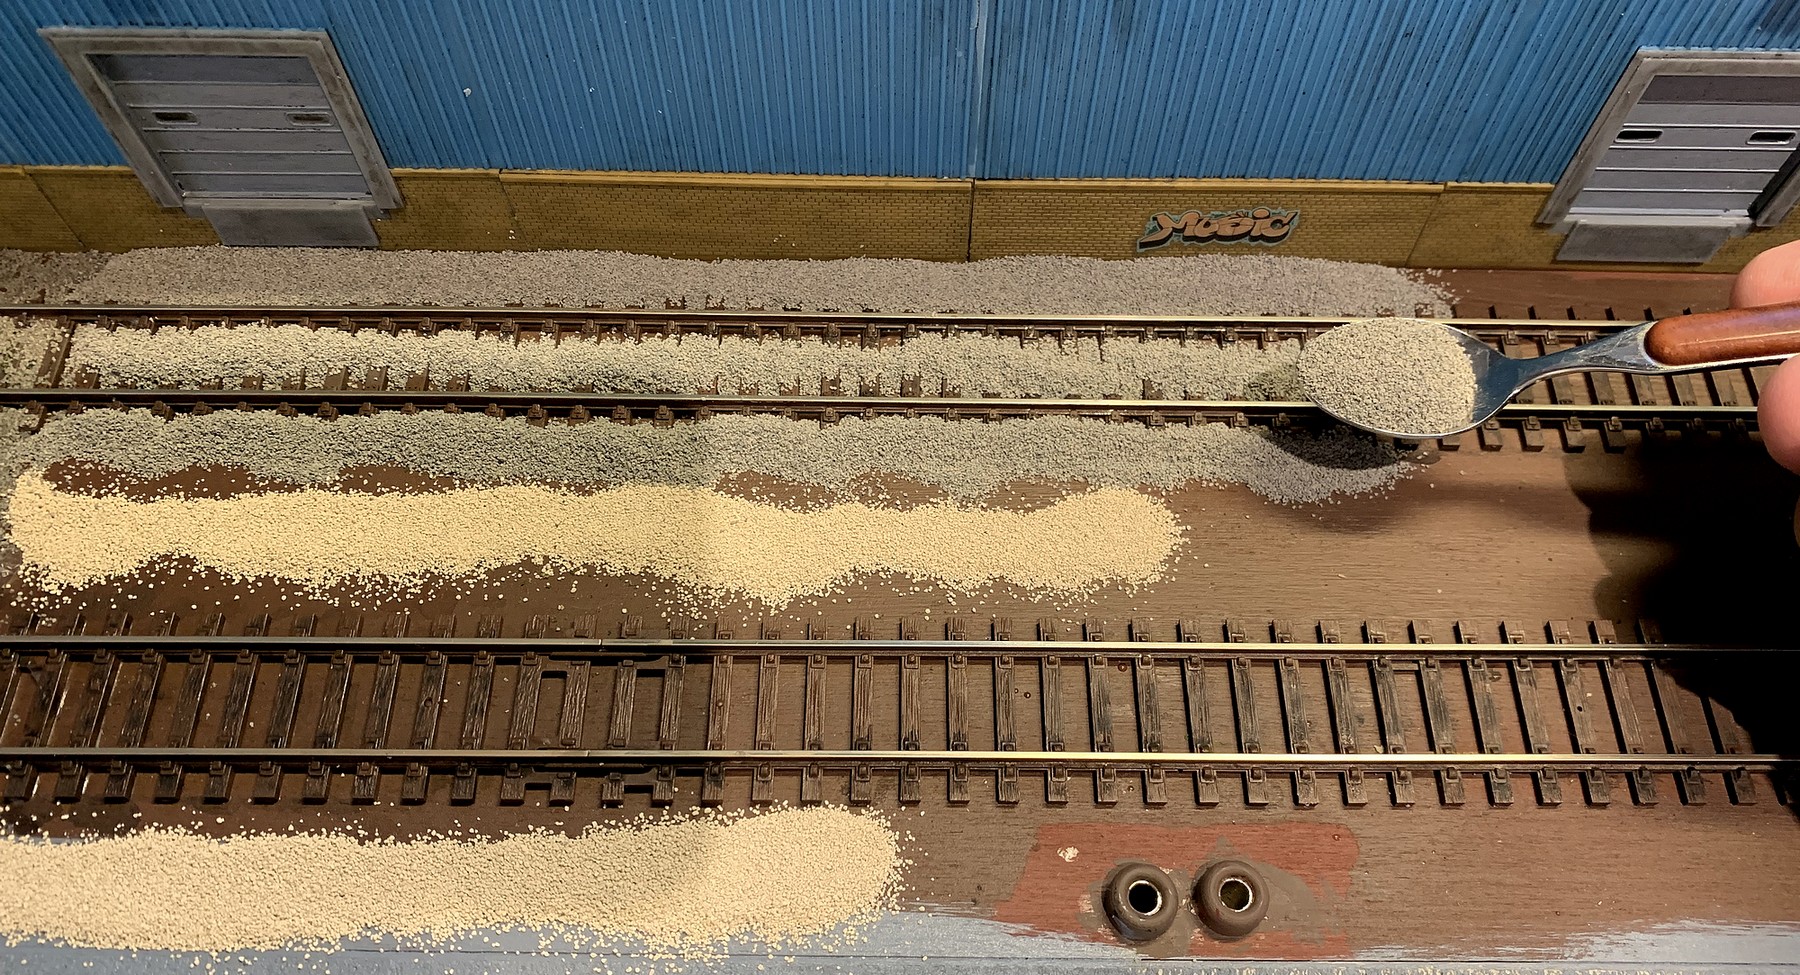
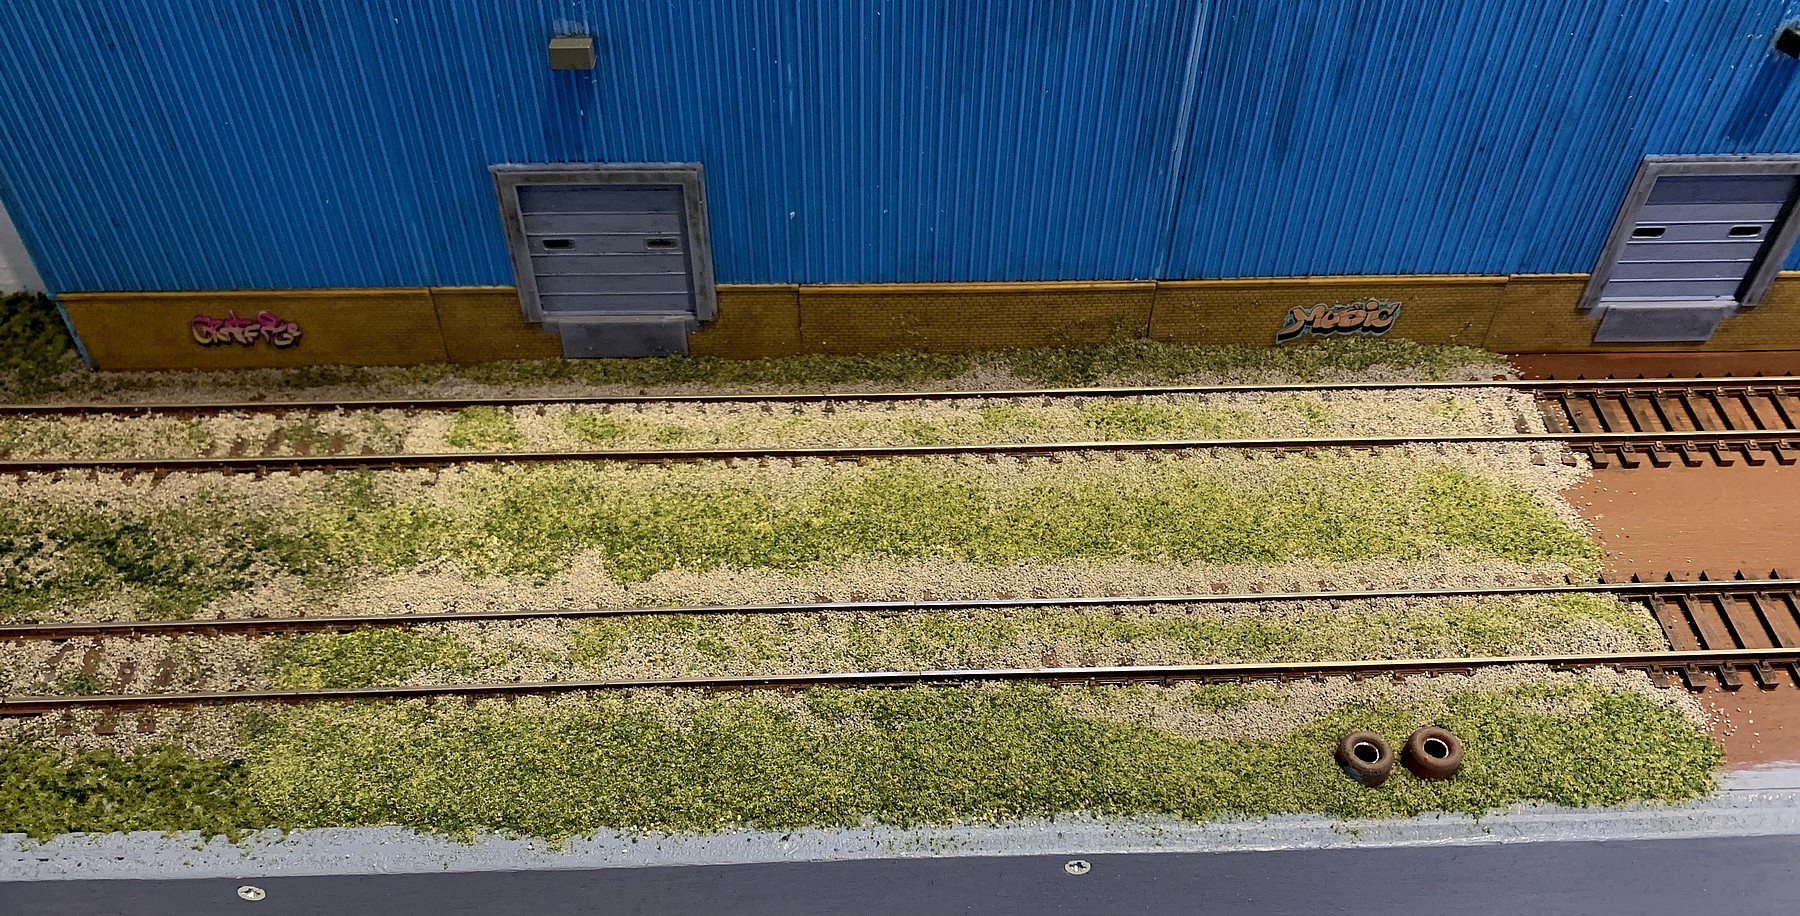
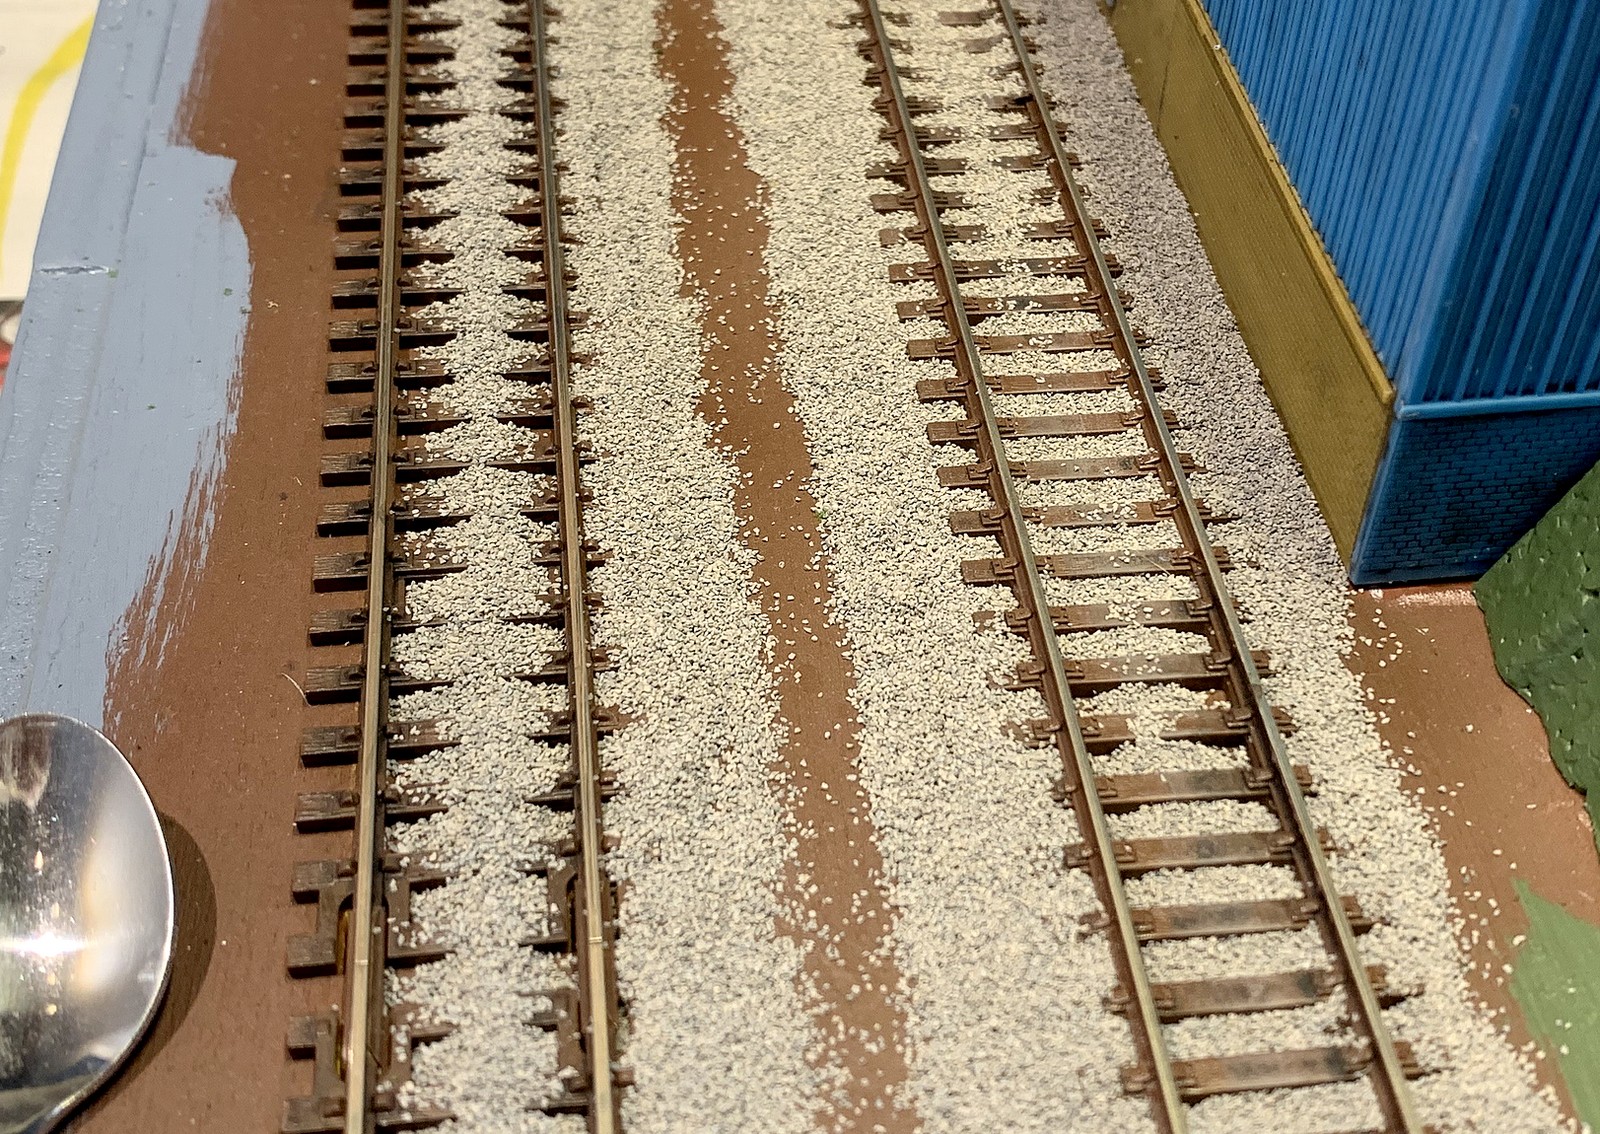
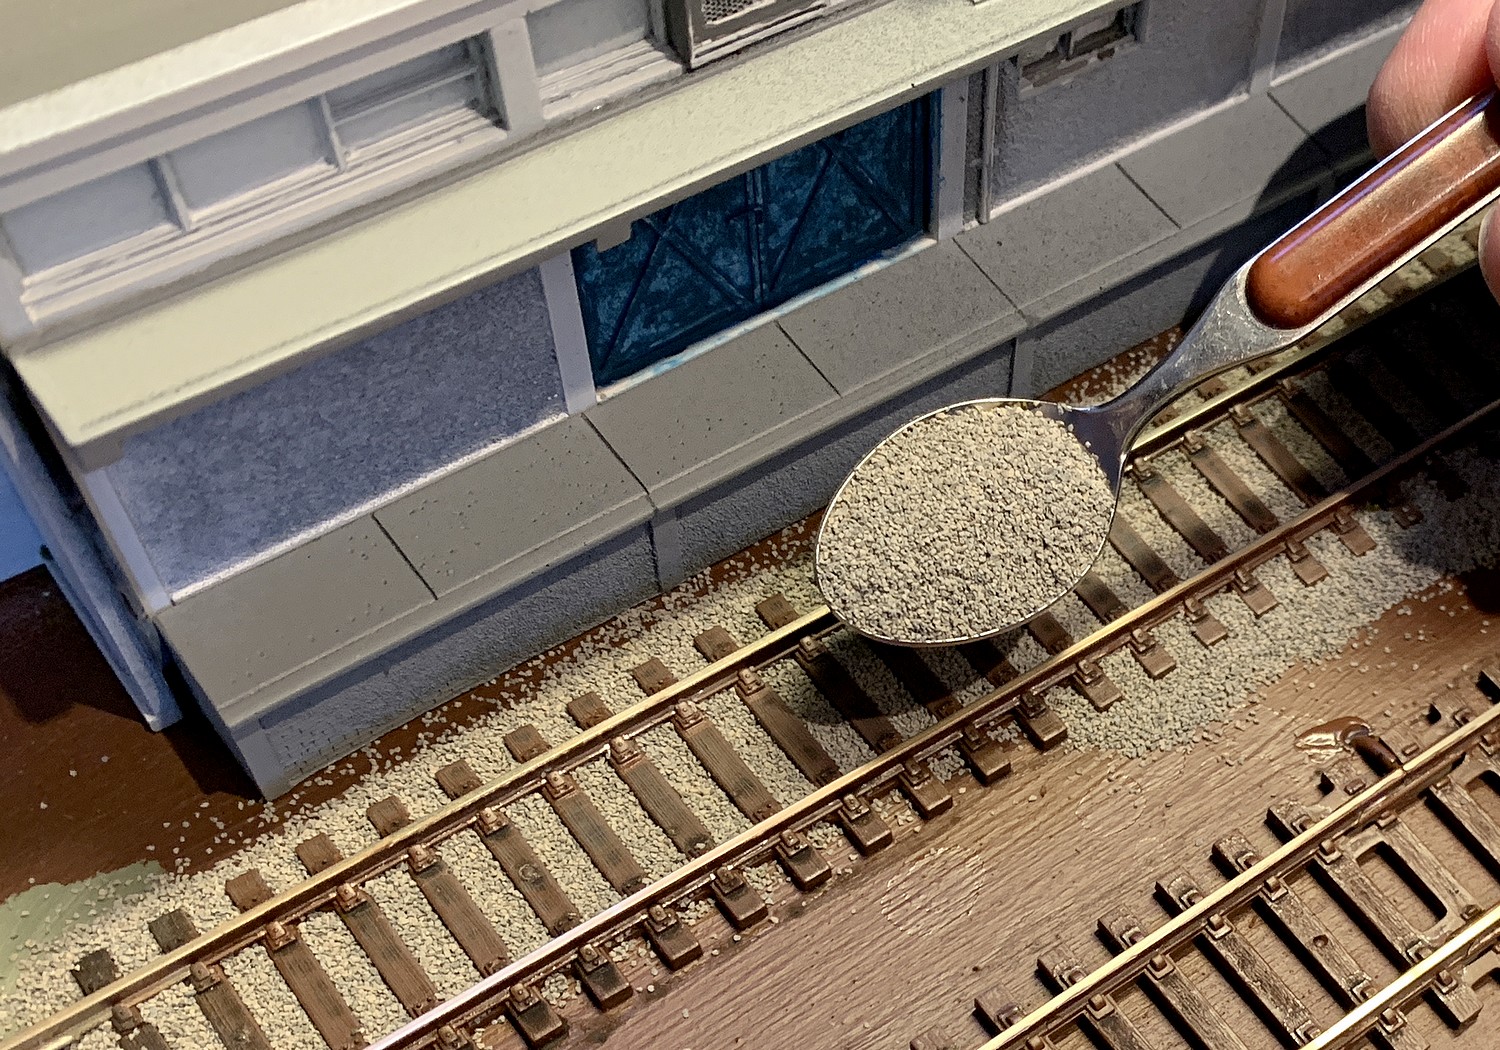
| Usually
(i.e. on all my previous layouts) I would try to
achieve a fairly neat appearance where the
ballast was evenly spread, with no loose
particles on top of the ties or clinging to the
rails. I would achieve this by sprinkling on only
small quantities from a teaspoon and then
straightening the ballast out using my index
finger, a fine paint brush, and a toothpick.
The basic idea is that you can always go
back for seconds and don't want to use too much
at once in order to avoid a mess. It's also at
this point that your Peco code 100 track
(dismissed as "toylike" by some
modellers) really starts to shine.
|
|
 |
|
| |
| This
time, though, that "mess" which I would always
try to avoid was exactly what I now wanted for Pecan
Street. |
| |
|
|
What
I didn't bank on was that I would find myself in
a little bit of a mess of a different kind. In spite of not having to worry about
not getting ballast everywhere, I still tried to
apply some amount of restraint.
Once I was happy with the general look,
I proceeded to permanently glue the ballast down.
For decades I have done this using what
most modellers use: a mix of water and white glue
(approximately at a 1:1 ratio) with a drop of
washing up liquid (to break surface
tension).
|
|
|
|
| |
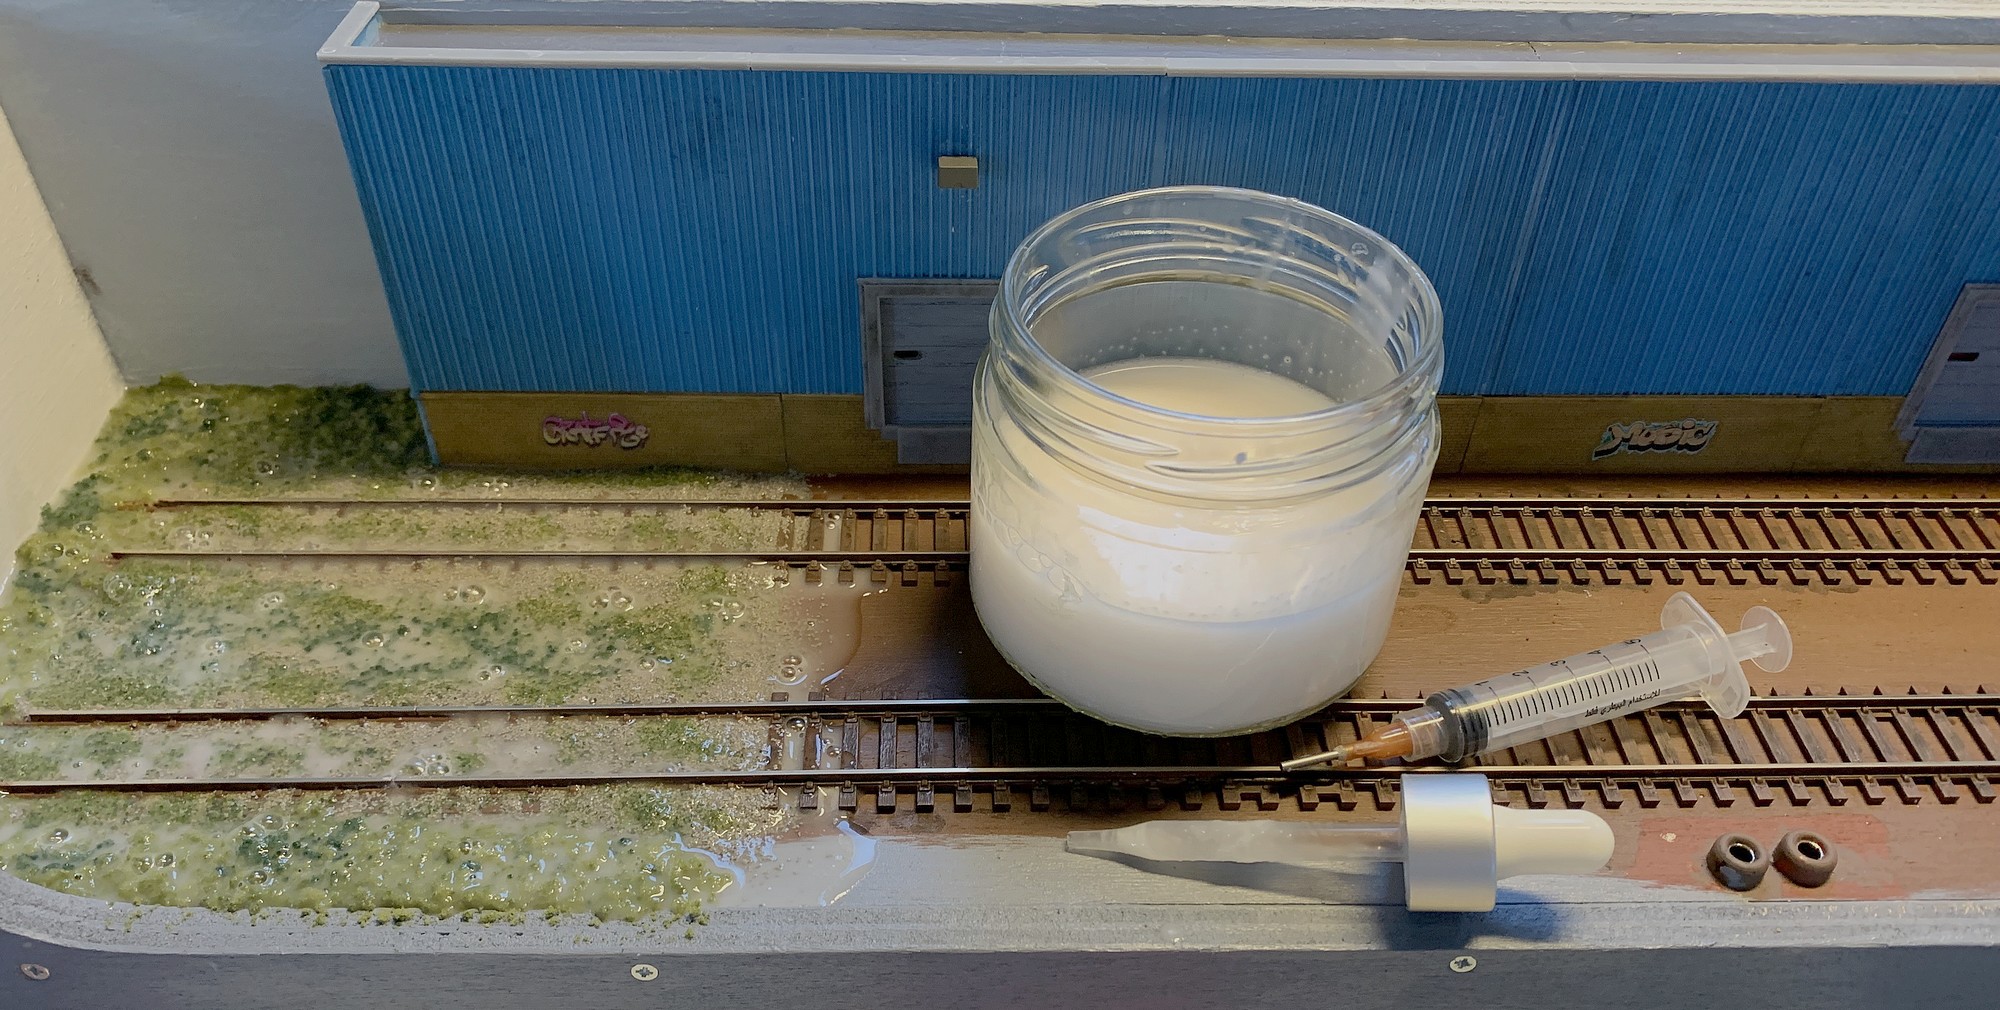
| The mix is then carefully applied
from a dropper, which proved a better choice here than a
syringe (both came from
the vet). The idea is to really soak the ballast, as this
ensures that the water/glue mix doesn't just cover the
surface. Mixing white glue
and water in this way is a time-tested method for
ballasting track, and once applied it's best to leave
everything to dry thoroughly for at least 24 hours. |
| |
 |
|
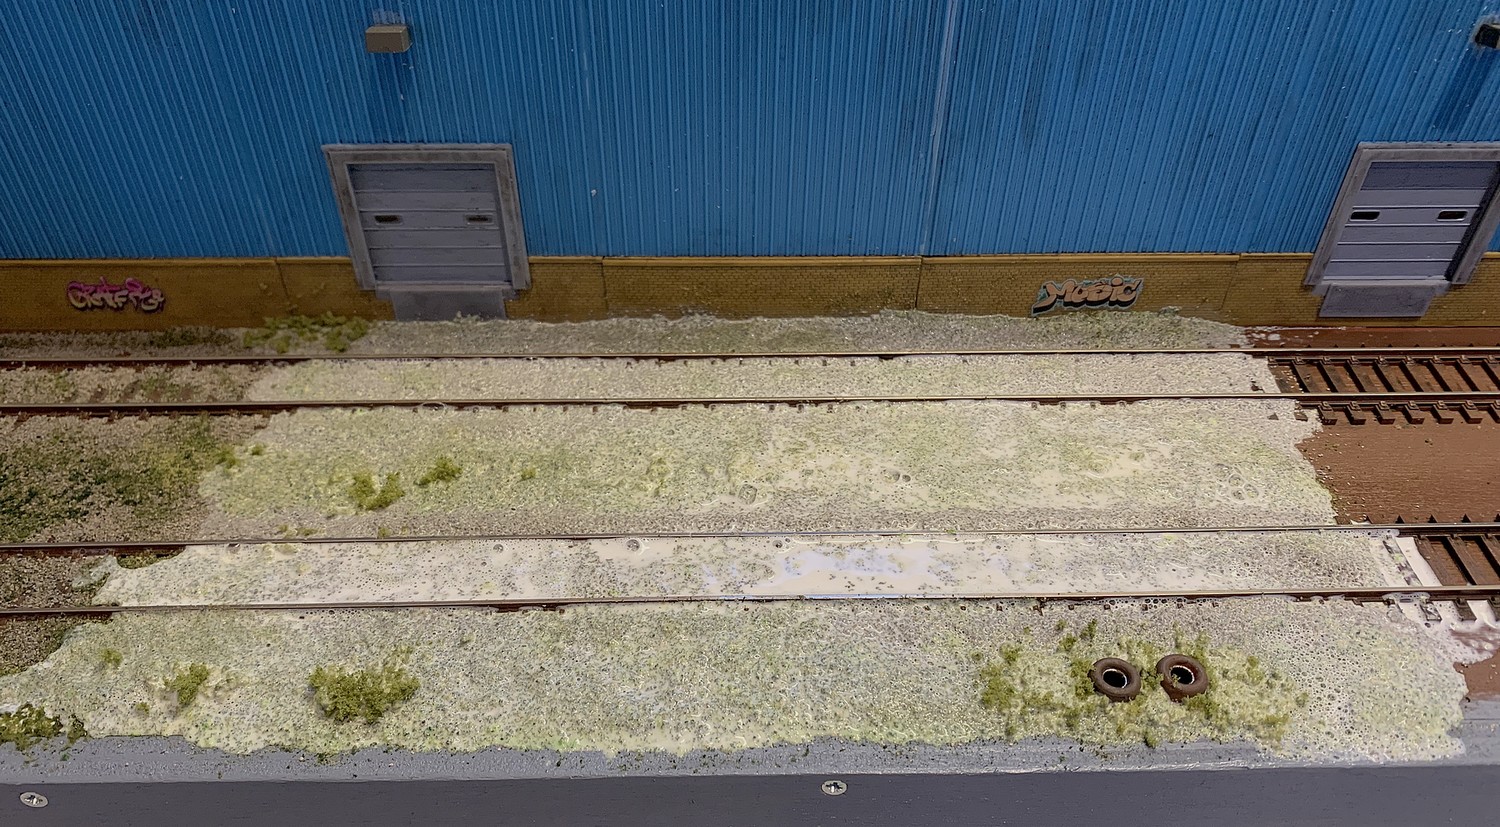
And this is
when things started to behave quite unlike what I
was expecting from my past experience. To kick
things off, I found that the white glue I was
using dried perfectly clear, but with a distinct
and very glossy shine. While this would be great
if you modelled a scene during or after a
rainfall, it was not what I wanted.
Maybe
it was just that make of white glue. Common
modeller's wisdom has it that the cheapest white
glue you can get is the best for this, but after
testing out an additional two or three brands I
found that none of them really dried with a matte
appearance.
|
|
| |
| I
noticed that all the labels only specified that the glue
would dry clear but made no reference to a glossy or
matte appearance. |
| |
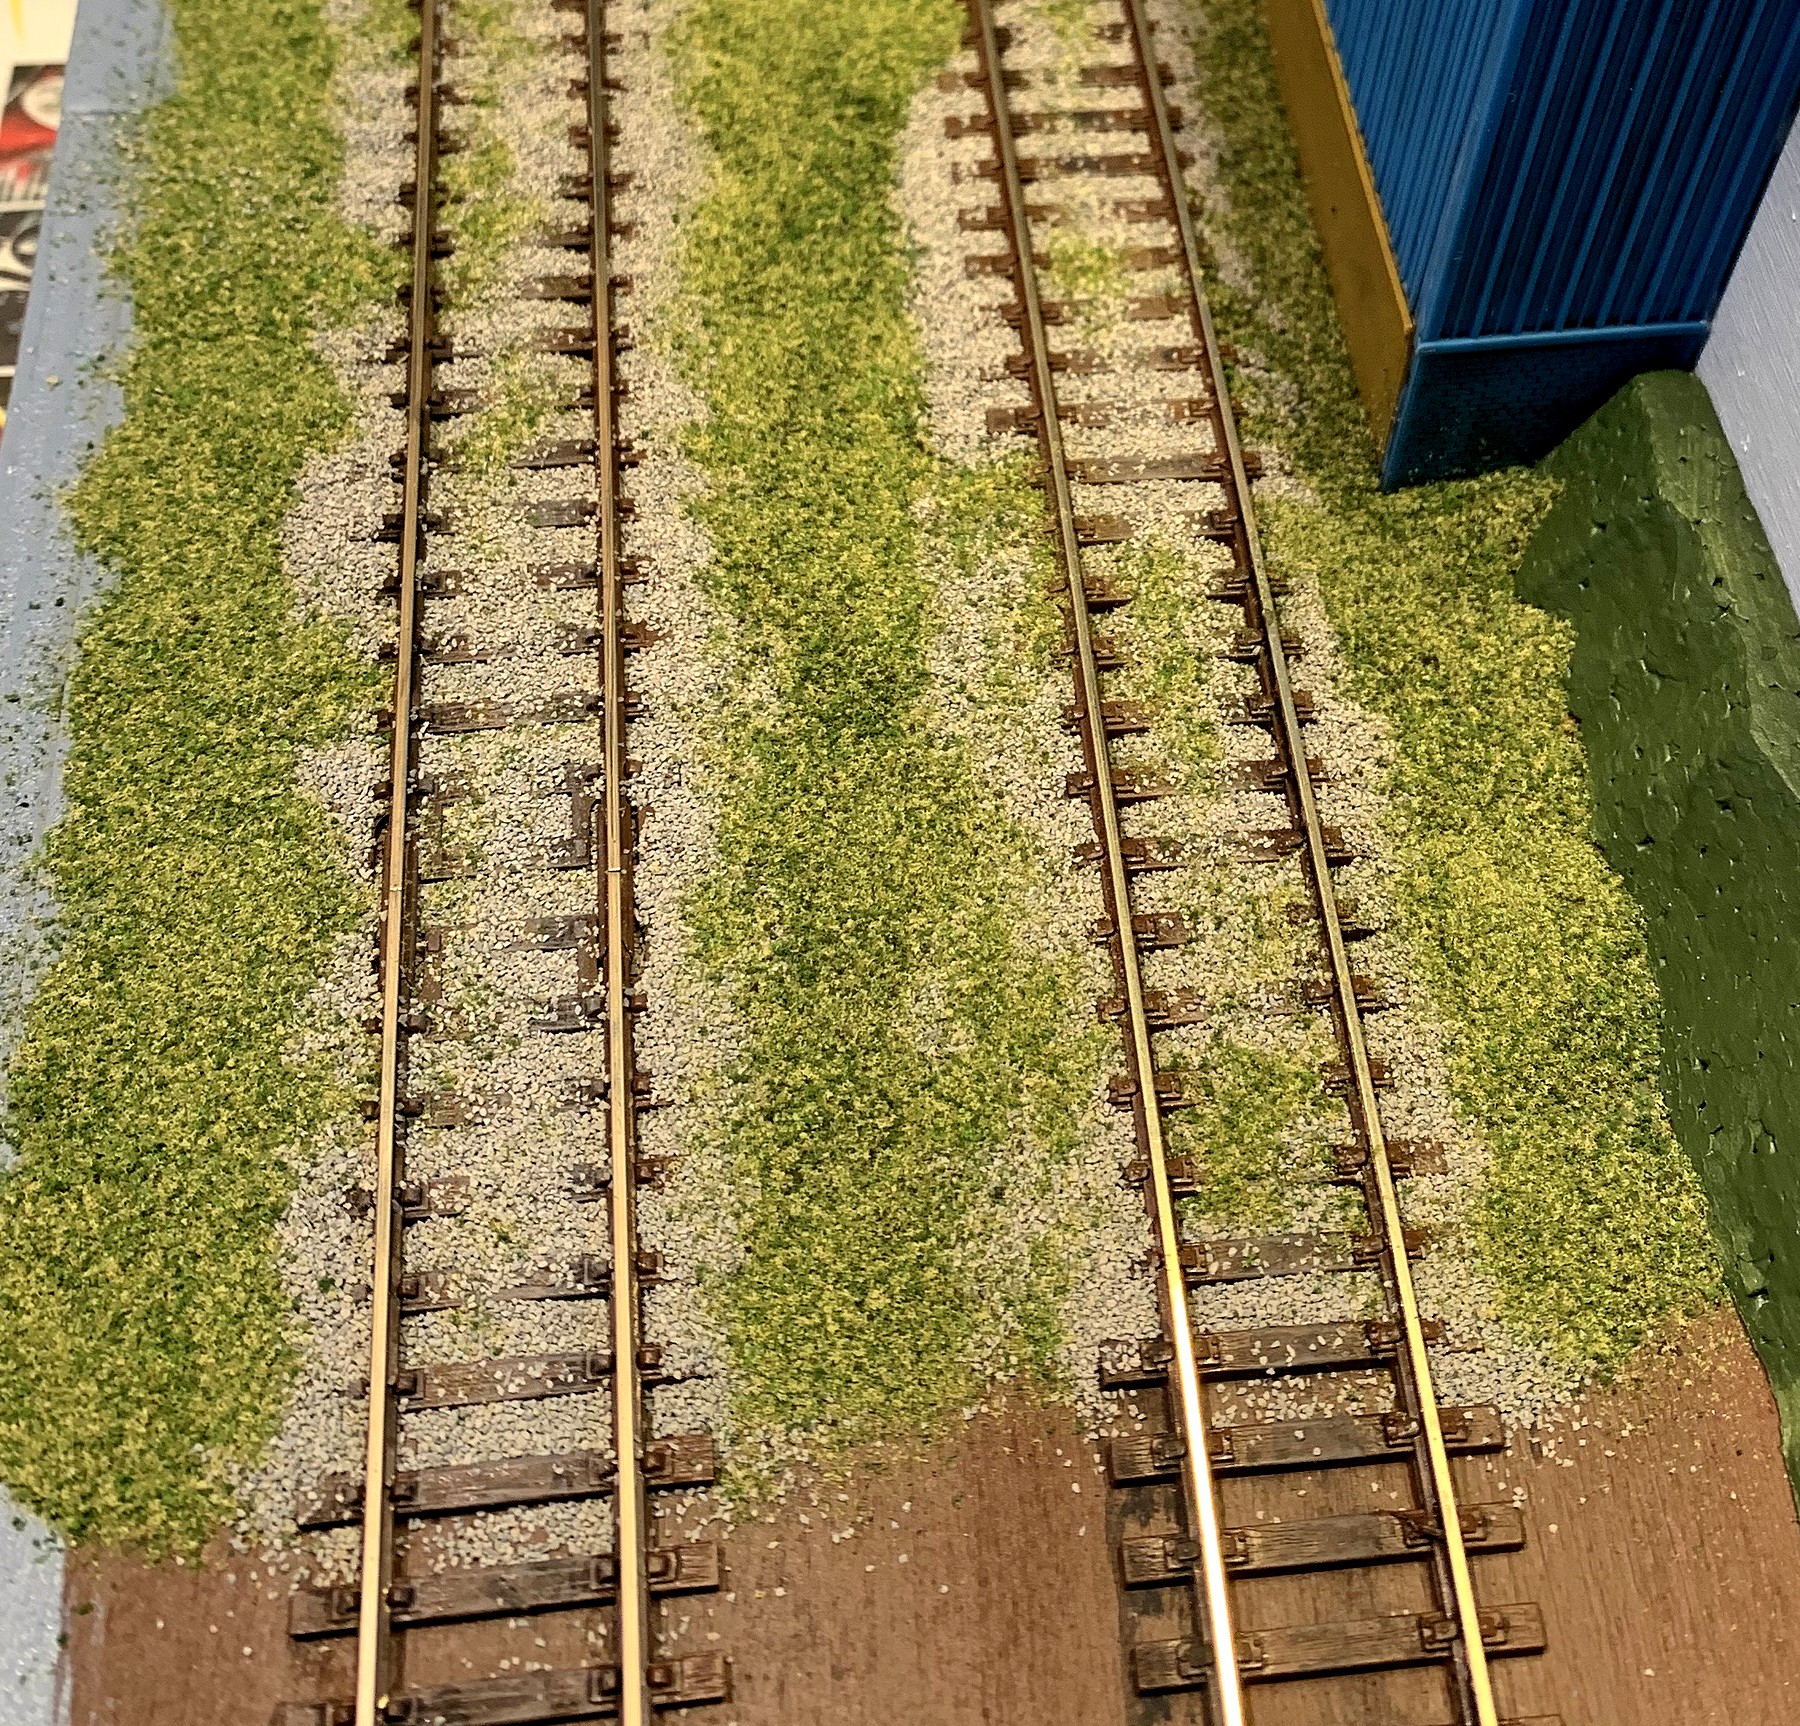
| On top of this, I then noted a
second, completely unexpected problem with the
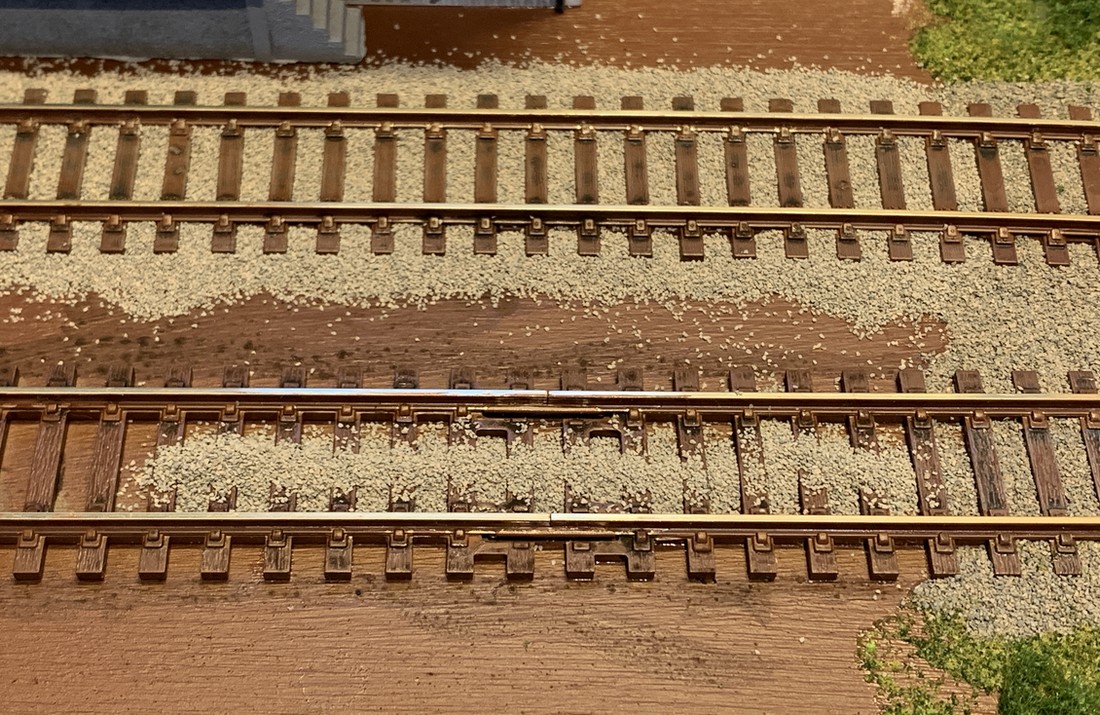
stretch of track that I had already ballasted. Even though I didn't just throw down the
ballast with wild abandon, I found that after I
had soaked the mix of Woodland Scenics ballast
and scenic scatter material (still using the
"trusted" mix of white glue, water and
a drop of dishwasher detergent), it had a light
but still distinct tendency of expanding compared
to what it looked like in its dry condition.
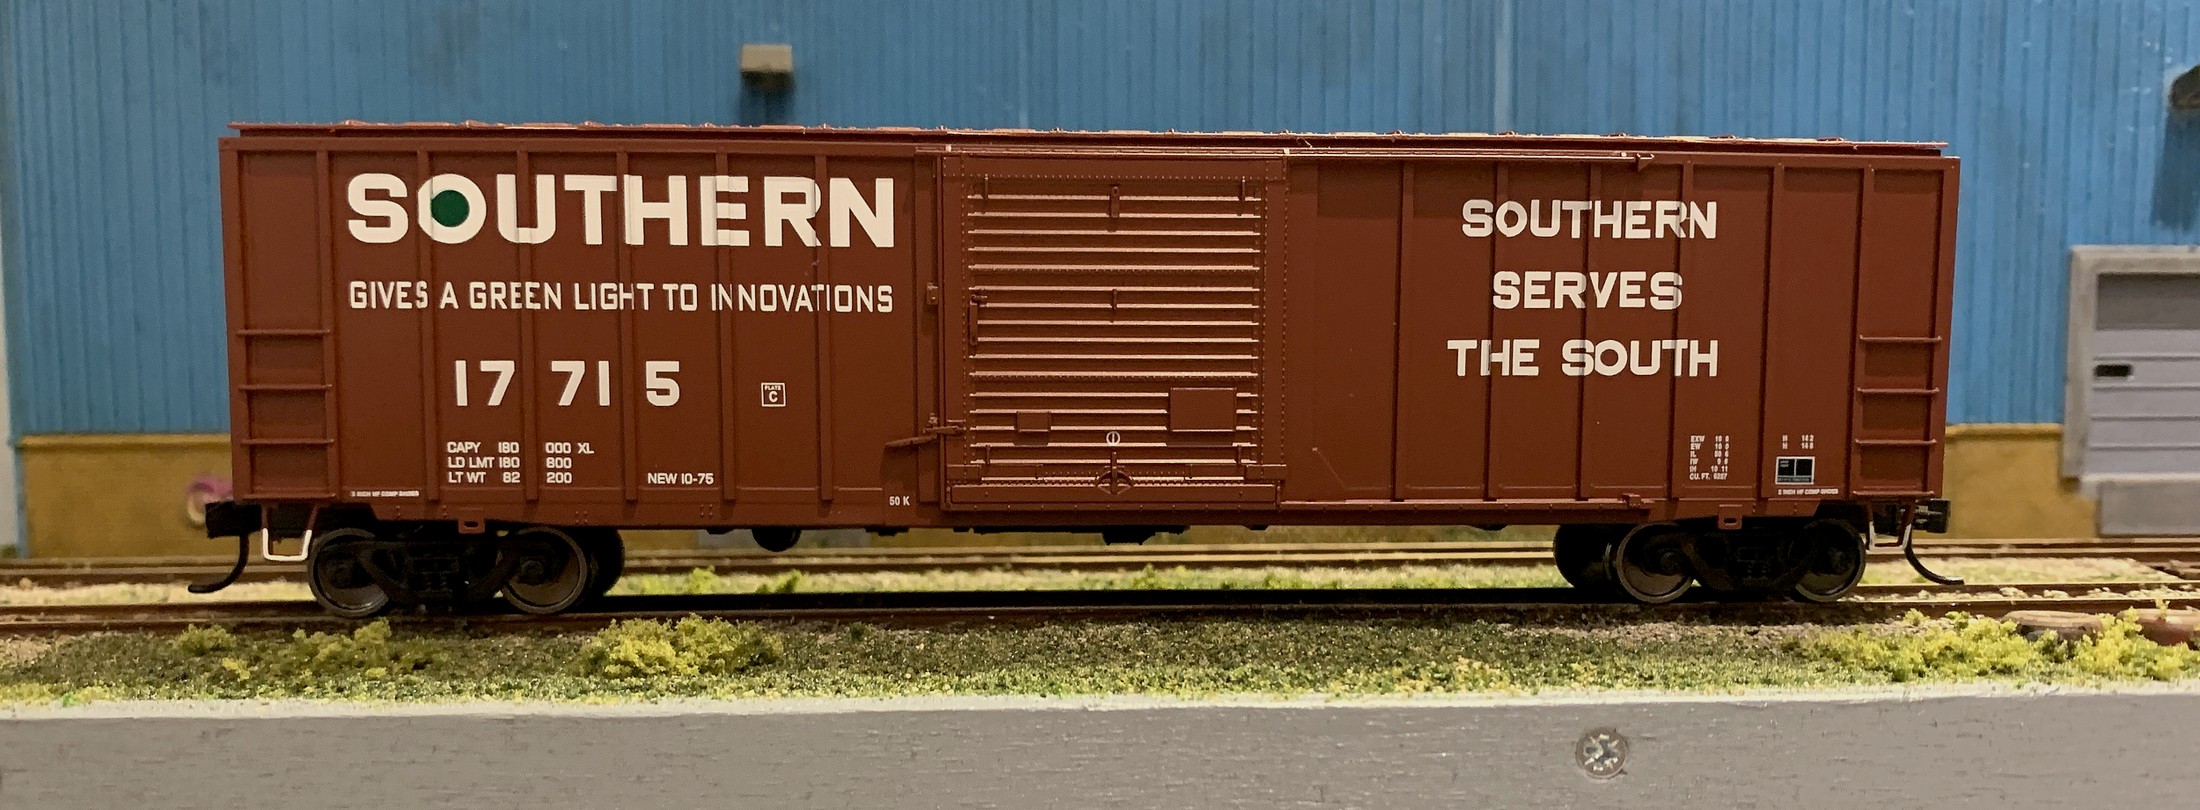
The result was a bit more "ballast
and weed cover" than I had aimed for. While
the visuals were fine, I found that running a
"test car" (in the form of a Walthers
boxcar) over the newly ballasted track did reveal
two or three spots where the ballast interfered
with the wheel flanges.
It wasn't that big a deal
and easily rectified by scraping away the few
grains of ballast causing the problem. Any small
screwdriver or similar tool will do the job.
|
|
|
|
| |
 |
|
In this case,
however, I used a cheap calculus scaler (I got
mine on eBay) that makes access easy and allows
for a pin-pointed removal of stray ballast. |
|
| |
| I was starting to realize
that, contrary to my initial assumption, covering
ties in ballast was actually more challenging
than creating a clean and neat spread of ballast
around the rails and ties. |
|
| |
| So
I made a point from this moment on of putting
down less ballast than originally intended,
especially between the rails. This would make sure there would be no
problems with wheel flanges, and potentially
"underdone" spots could always be
touched up later.
|
|
|
|
| |
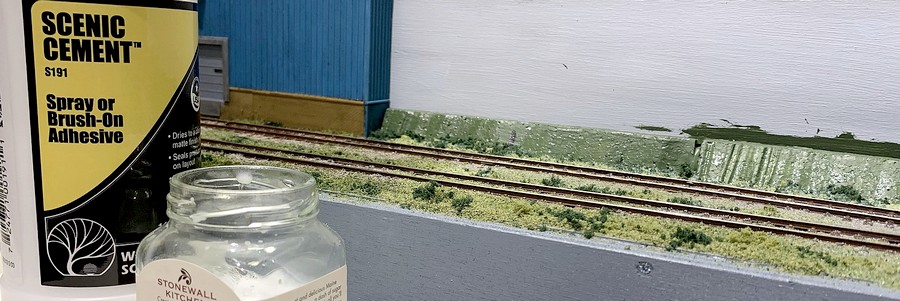
| This
did not, however, fix the "white glue glossy
finish" problem. Was it possible that the formula
for white glue had changed across the board? Whatever the
reason, I quite unexpectedly found myself having to look
for an alternative solution. There were several options,
but I wanted something that wouldn't be too far removed
from what I had been using previously. And so I found
myself purchasing a container of Woodland Scenics Scenic
Cement™. |
| |
 |
| |
| It solved my problem instantly, drying to a clear
matte finish and not "pushing up" the ballast.
For whatever reason (and it can't be too sophisticated),
this scenic cement worked while my trusted home-made mix
didn't. Of course there can't be too much of a difference
in terms of components (the scenic cement incorporates a
whetting agent, too) but since it worked and I wasn't
going to be needing gallons of it, that was all fine by
me. Sometimes there's nothing else to do but embrace
accidental modelling when it happens. From here on out, I
will be using Scenic Cement. Something
I never do, though, inspite of many positive reports from
other modellers, is "mist" the ballast with
isopropyl alcohol (IPA) before applying the water/glue
mix. Even when using a perfume atomizer, I have found
that no matter the distance from which the IPA is sprayed
on it tends to disturb the dry ballast - which is the
exact opposite of what this procedure is supposed to
achieve.
|
| |
 |
|
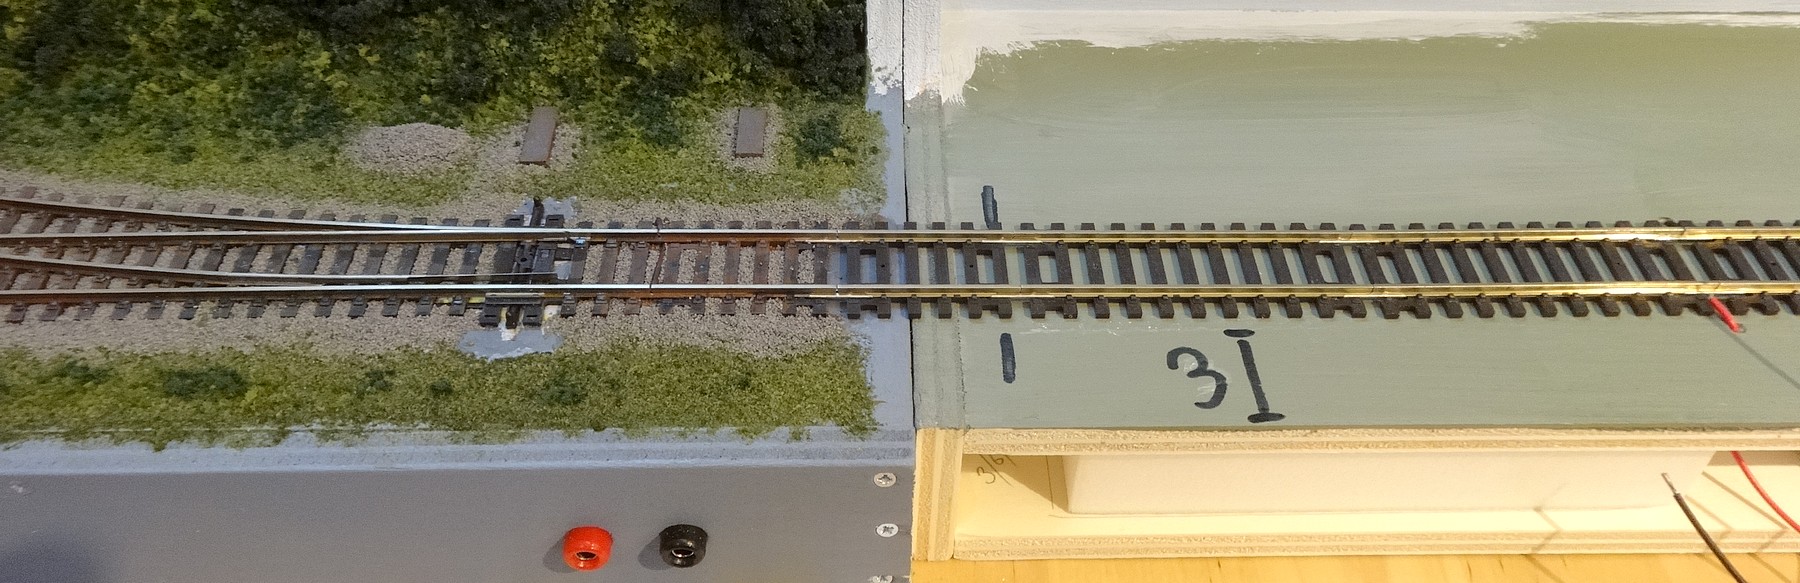
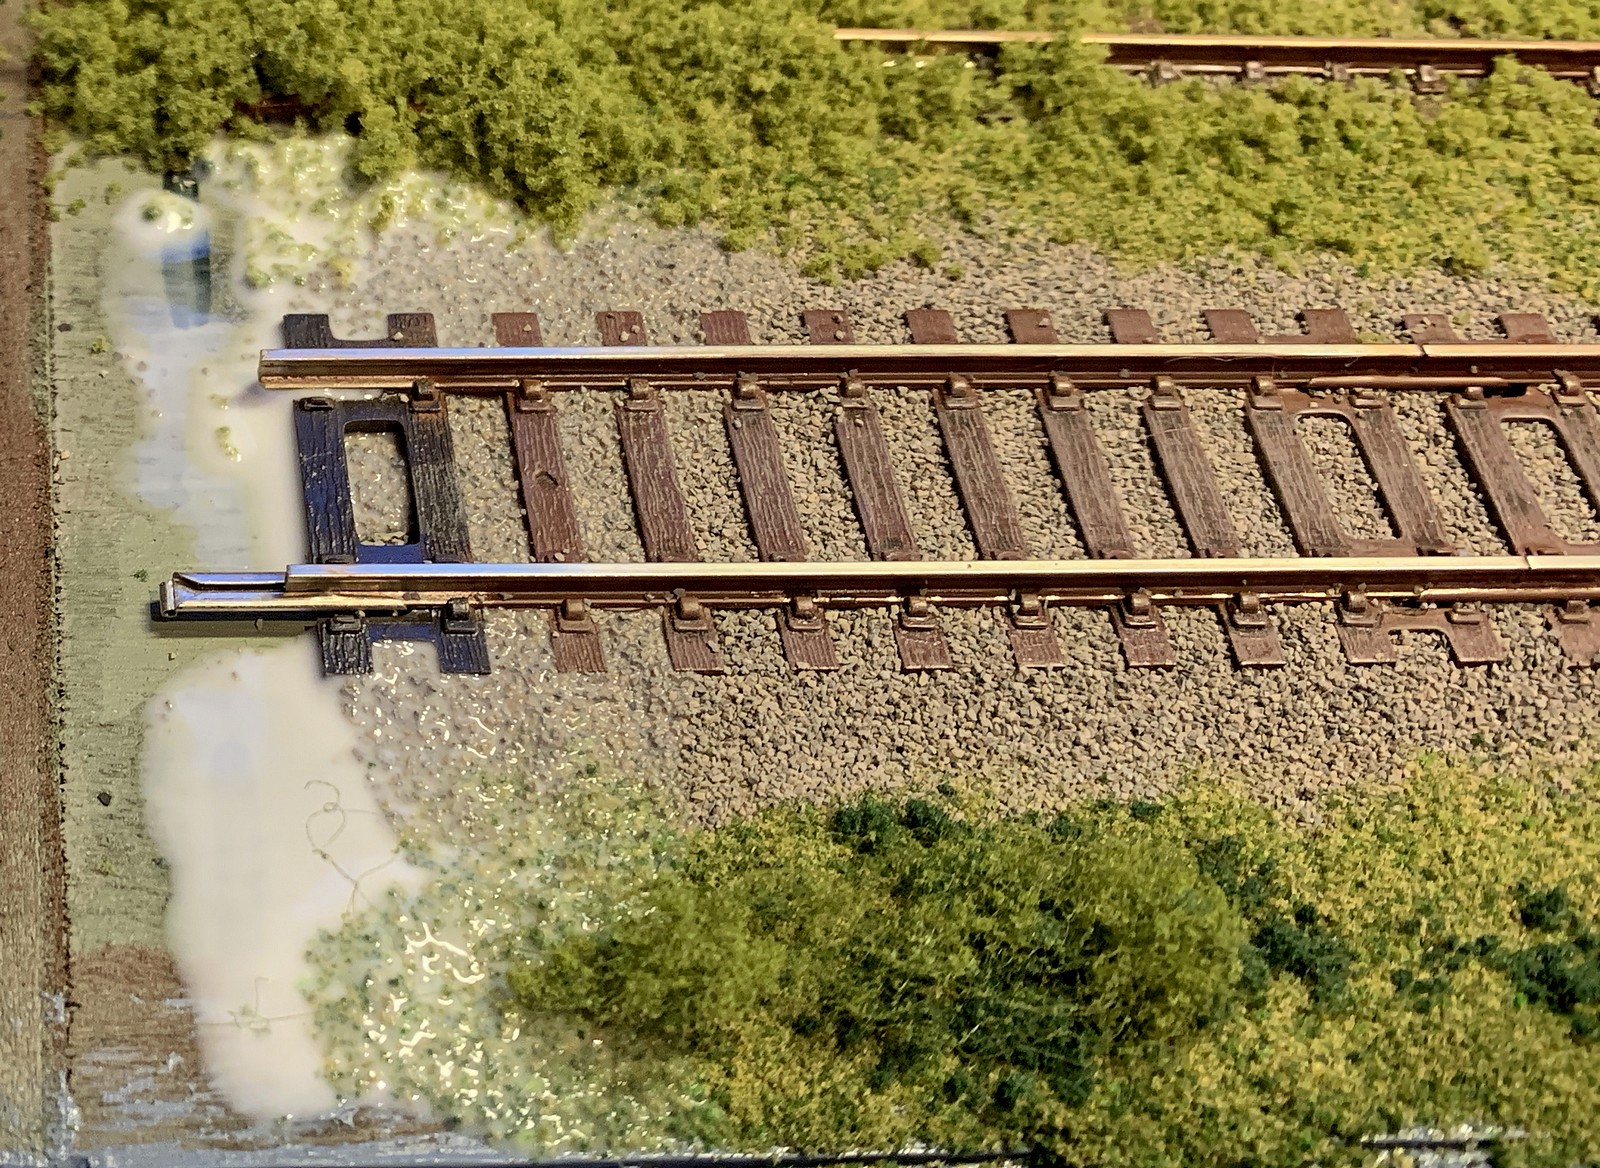
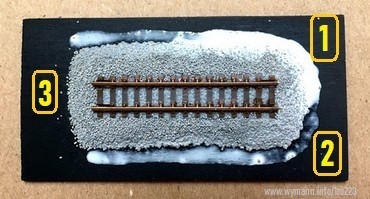
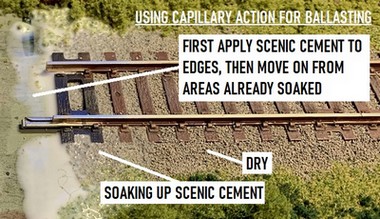
So instead of any
"pre-treatment", I simply apply the
scenic cement (or, previously, water/glue mix) by
taking advantage of its capillary force.
Because the scenic glue
has a lower surface tension than the ballast and
scenic material (thanks to the
"wetting" agent), applying the mix
close to the edge of the ballast (area #1 in the
picture) results in the watered down glue being
drawn in and seeping into the dry ballast by
itself - or rather by its capillary force (2).
Ultimately the effect is
similar to blotting paper or household tissues
sucking up liquids, and it leaves the ballast
almost completely undisturbed (3). The
illustration used here shows a piece of Z scale
track, but the principle obviously applies
regardless of scale.
|
|
| |
| Letting the capillary force do
its magic does however result in a slightly slower
procedure. Starting at the edges of the area to be
treated, patience is required to then let the scenic
cement work its way properly into the ballast and scenic
material (which might take a minute or two). Additional
scenic cement is then only applied to the areas which
have already soaked up the mix, saturating them to the
point where the mix then seeps into the adjoining area of
dry ballast and scatter material. It is definitely a
patience game, but then ballasting shouldn't be rushed
anyway. |
| |
| |
|
|
|
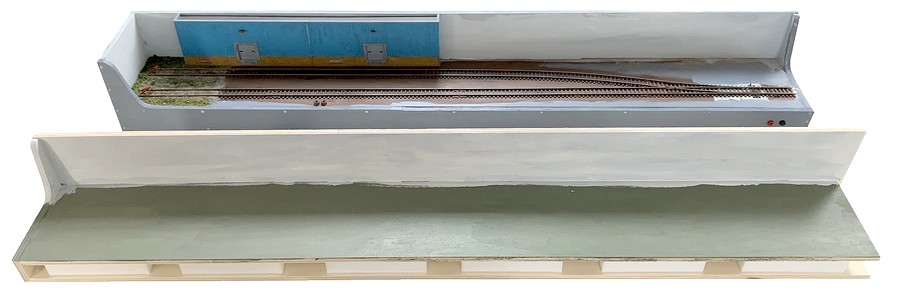
| |
| Since ballasting is best done in
stages over several days, I felt this was a good point in
time to assemble the second baseboard in-between
ballasting sessions. It's an almost identical twin,
constructed using the same methods a baseboard #1, except
that I opted for one less piece of styrofoam. Having six
of those instead of seven would give me more wiggle-room
to run the wiring. |
| |
 |
| |
| |
|
|
|
| |
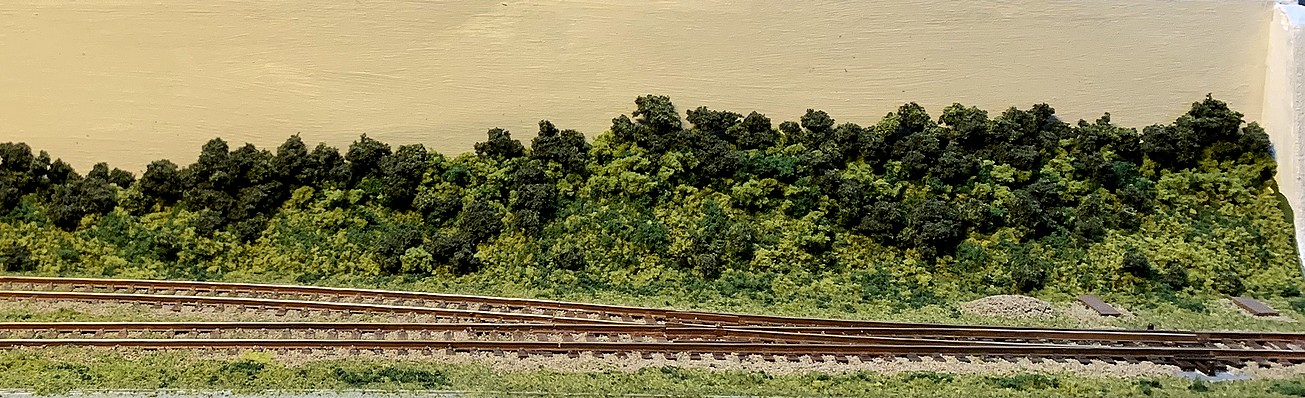
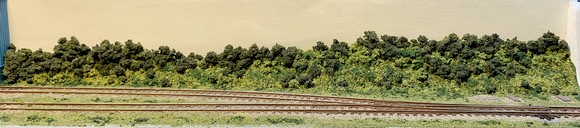
| Pecan Street obviously doesn't allow for a lot of
scenery, but what little could be done on segment #1
would be situated towards the backscene and fulfill two
purposes: convey an atmosphere of a more rural than urban
setting, and hide the fact that the warehouse is nothing
more than a flat frontage essentially just stuck right
onto the backdrop. Taken together,
those two points would ideally result in a number of
trees, but the layout simply doesn't allow for that, so
it would essentially have to be shrubbery and possibly
something akin to low-relief trees. It is this kind of
challenge that fuels my appreciation of theatrical
layout design, since art directors in the
entertainment business often have to work with similarly
restricted spaces, be it on a theatrical or a movie
production stage.
|
| |
 |
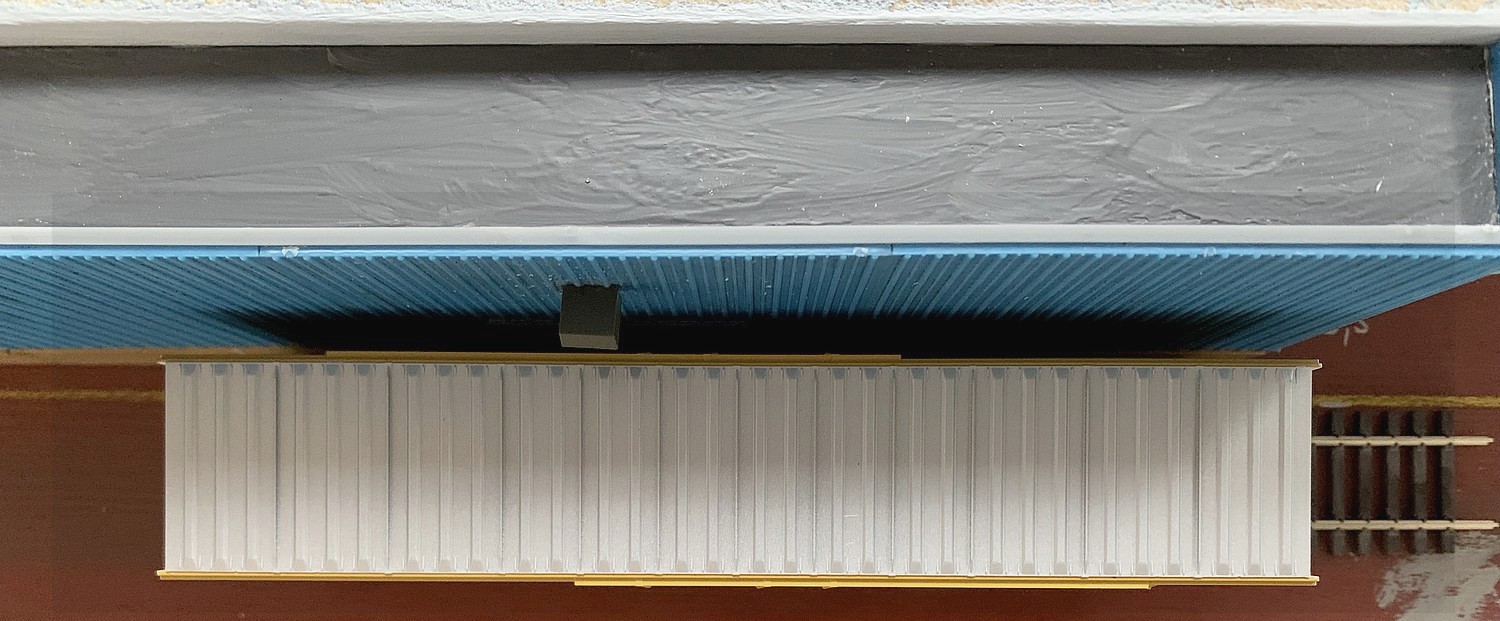
| |
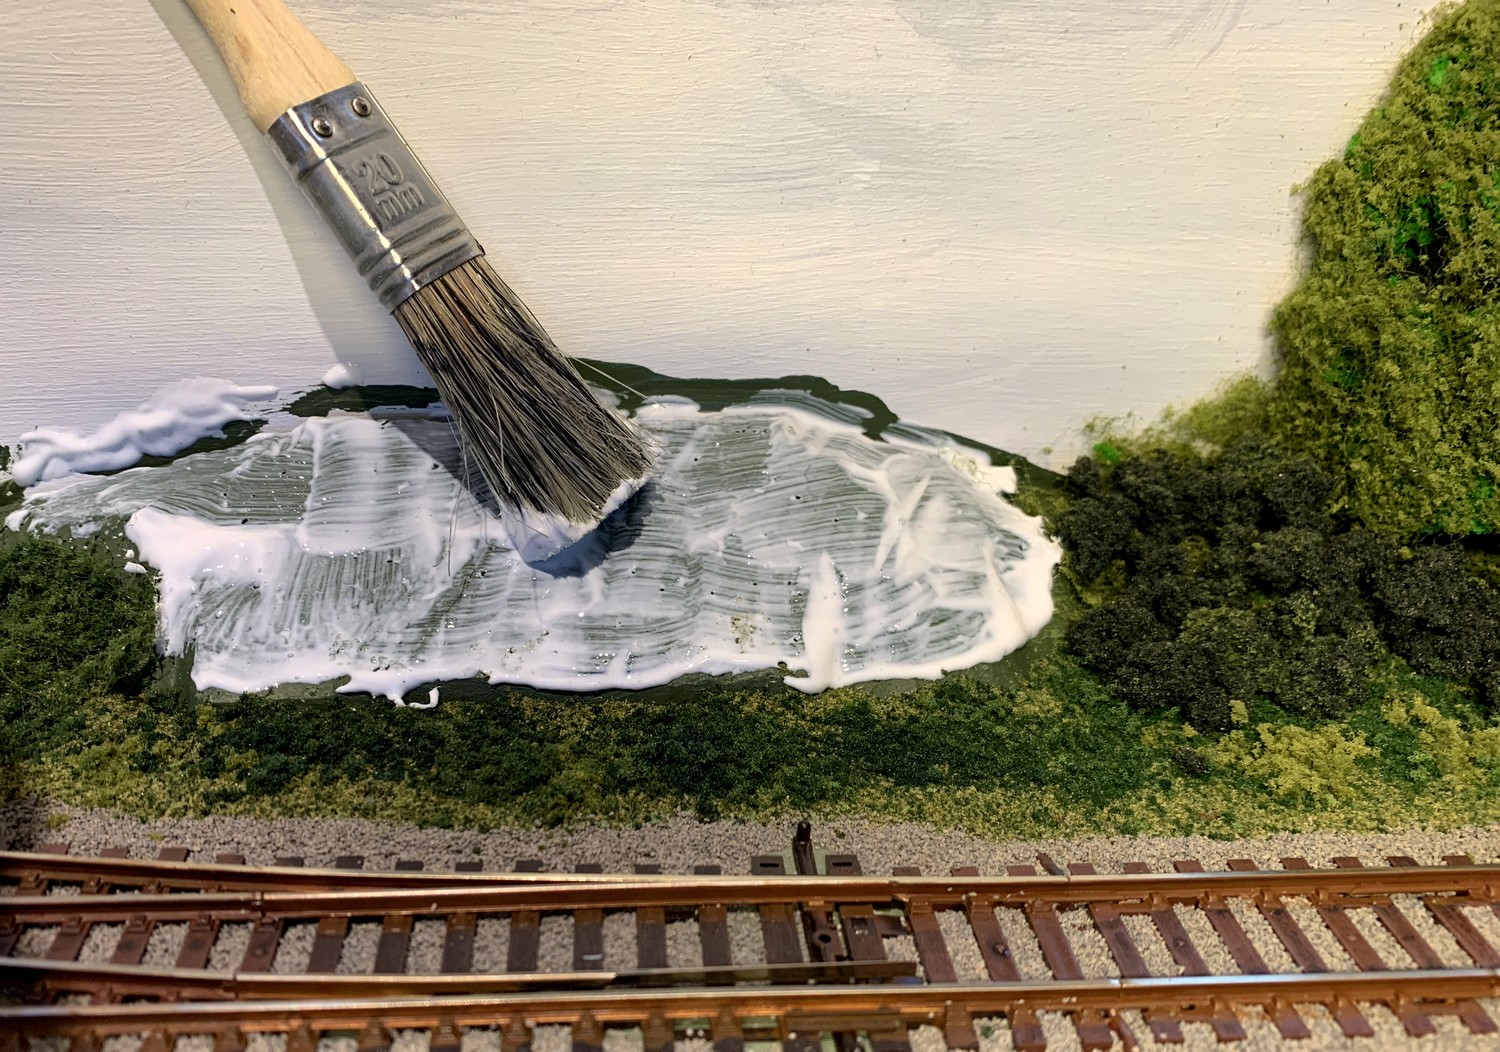
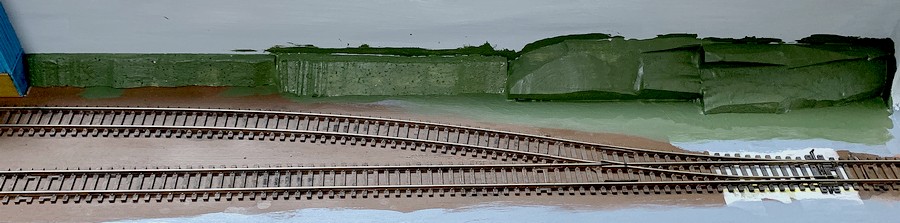
| Since the shrubbery will be "growing" up
from the baseboard top to the backdrop, providing a base
which provides an additional vertical structural support
will make it easier to bring the shrubbery up higher so
the required effect will actually work. This base is made up from four pieces
of narrow styrofoam. They are shaped to provide a slope
and then covered in a very thick layer of green acrylic
paint - normally I would cover the styrofoam with a layer
of plaster of Paris but this seemed like overkill in this
situation. When all will be done, nothing of that slope
should remain visible. The next steps on this will,
however, only be tackled once all the ballasting in that
area is done.
|
| |
| |
|
|
|
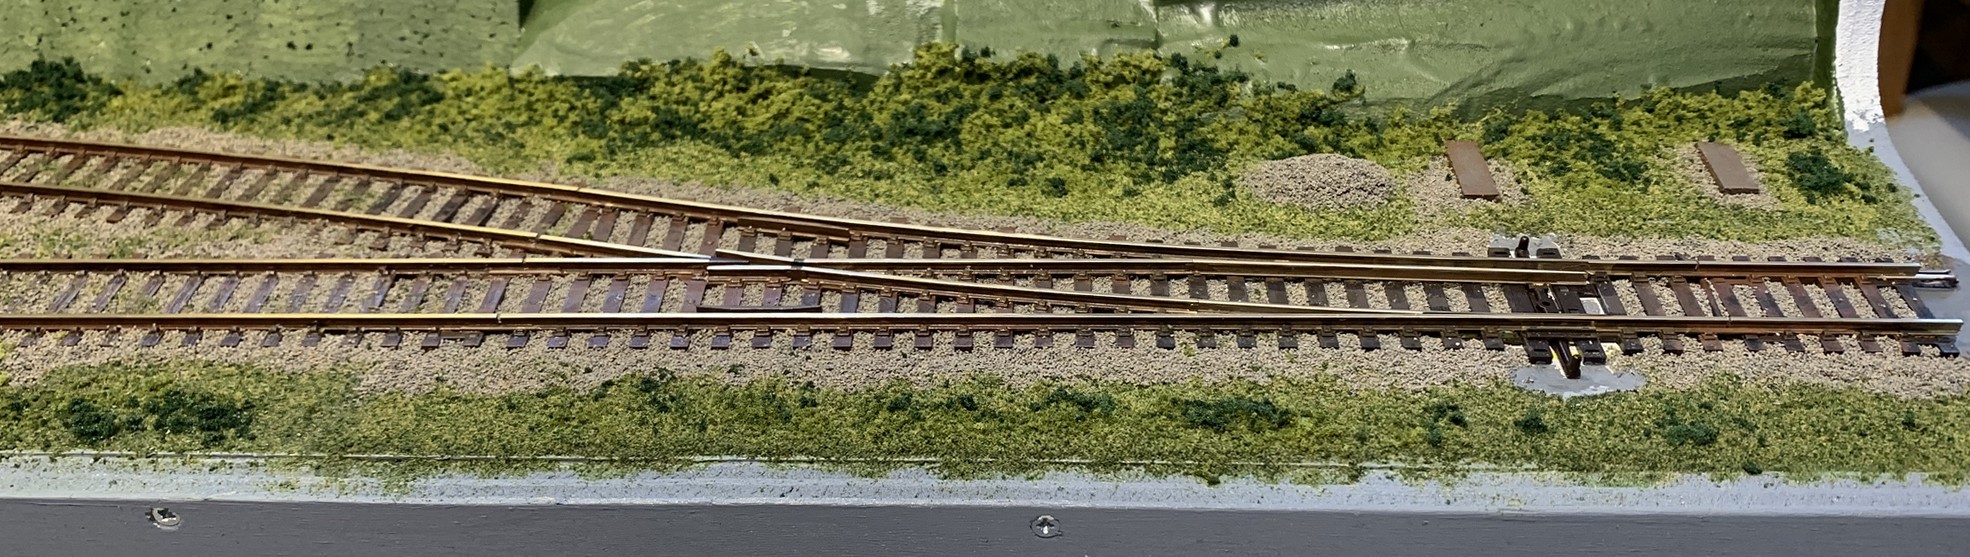
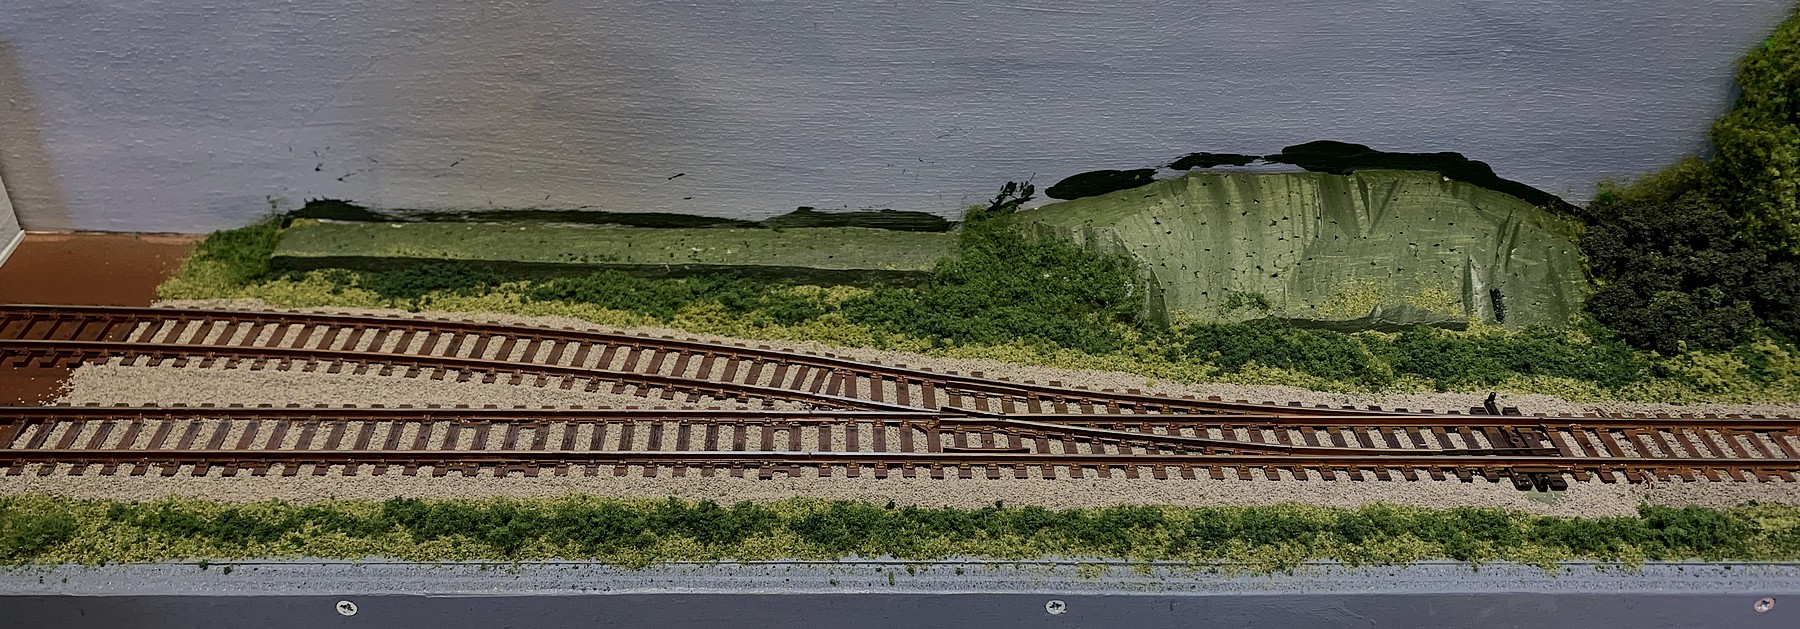
| |
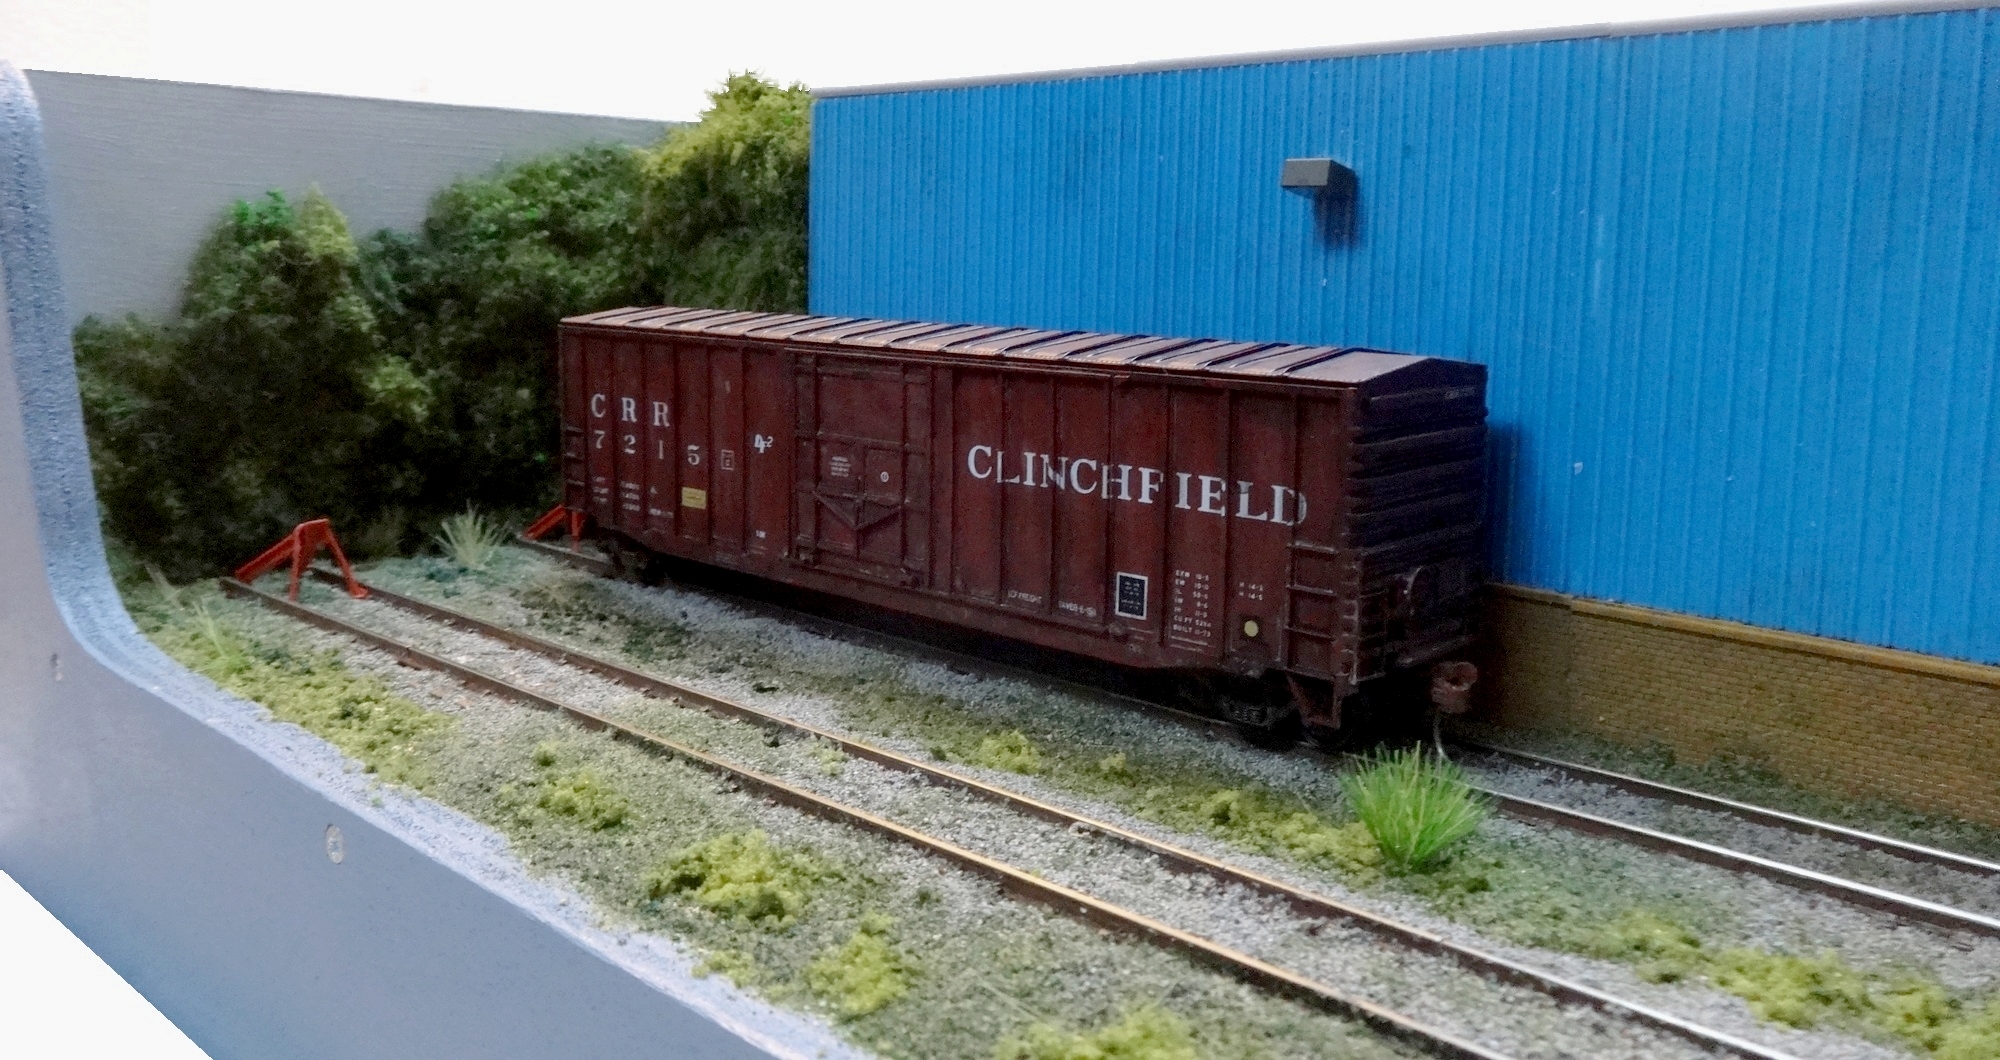
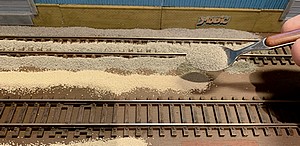
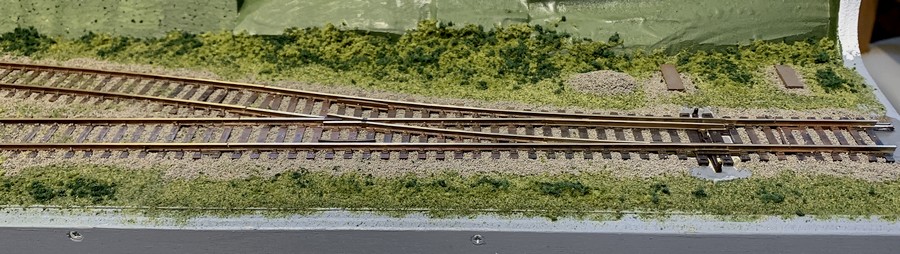
| Following the "heavy
ballasting" around the sidings, the area around the
switch was ballasted with a decisively lighter touch (and
therefore more in line with what I was used to from
previous layouts). The idea here is that the track is in
the process of being somewhat rehabilitated, as the
tamped ballast along with a small pile of fresh ballast
besides the switch is supposed to indicate. At a later
point, the two slabs in the background will support a few
lengths of switched-out worn and rusty rails. |
| |
 |
| |
| |
|
|
|
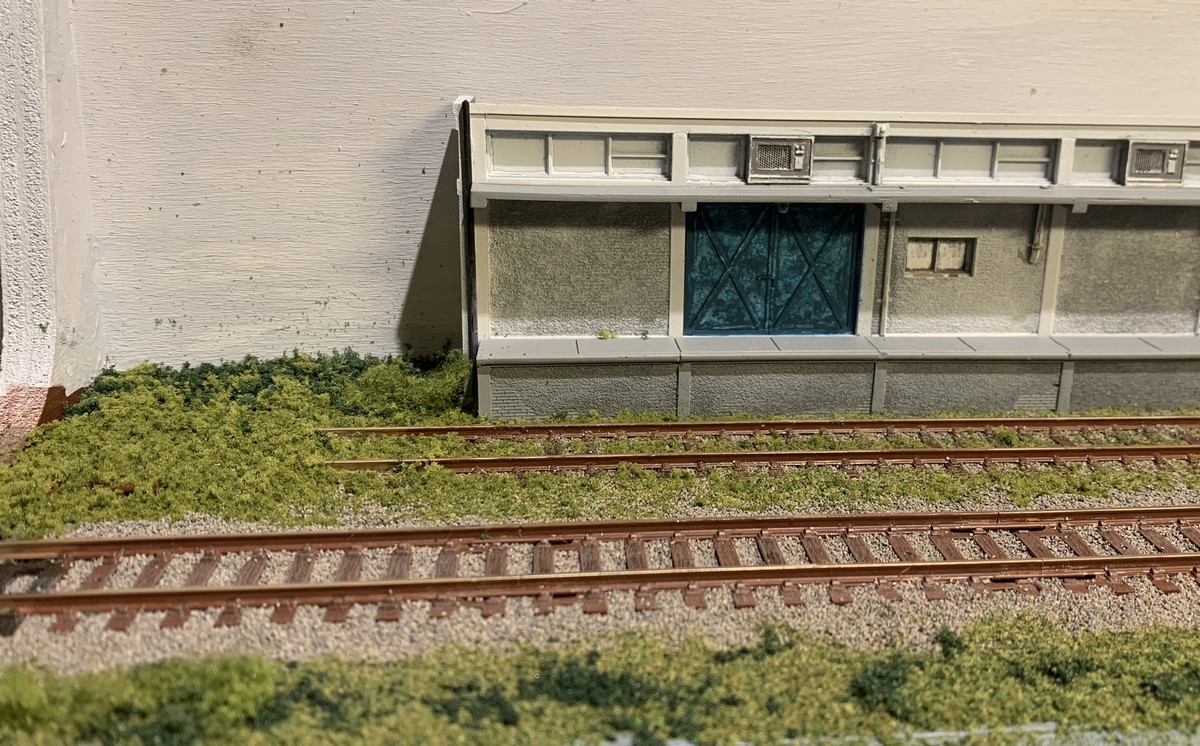
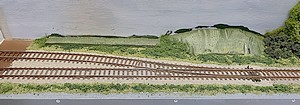
| |
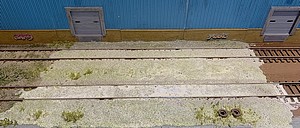
| The
narrow strip at the back of the left-hand section of
Pecan Street doesn't allow for much in terms of scenery.
The up side of this is that a lot less scenic material is
needed compared to what would usually be the case. The
possible down side: the scenery needs to be carefully
compressed in order to look convincing. |
| |
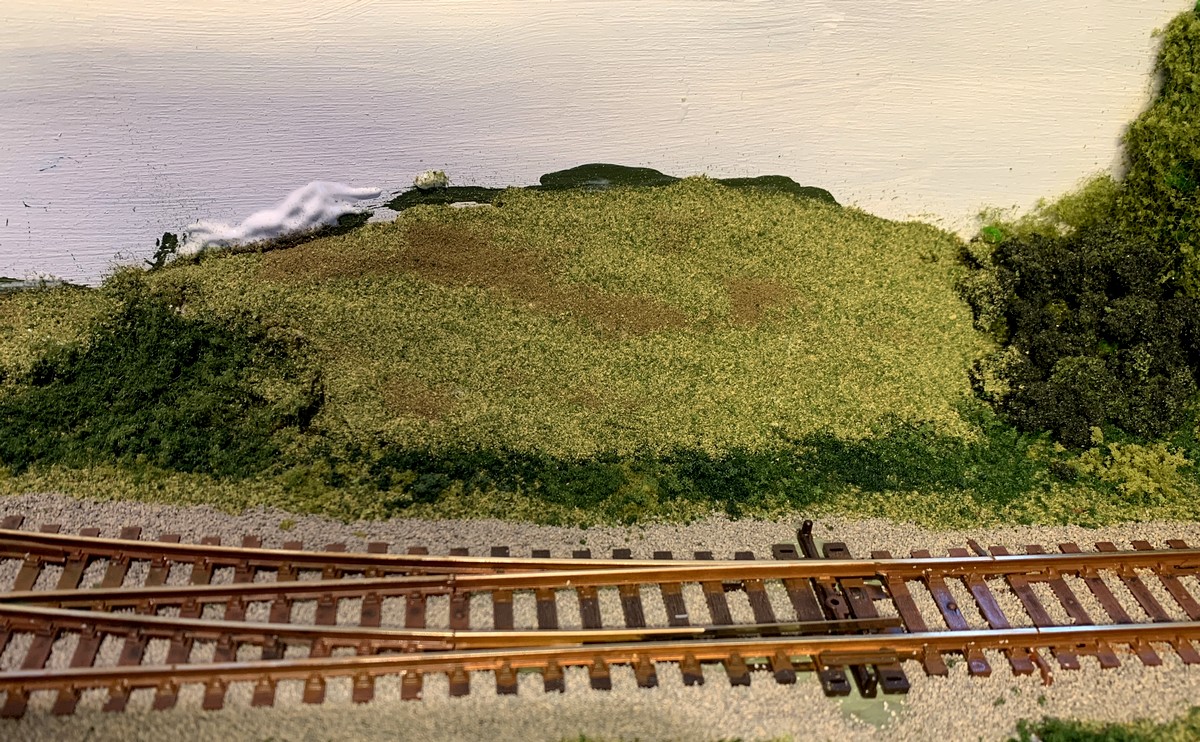
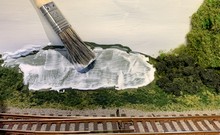
| I
have always built up my layout scenery in layers.
This allows for a gradual build-up and blending,
which avoids an overly uniform look and also
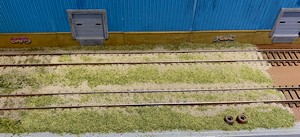
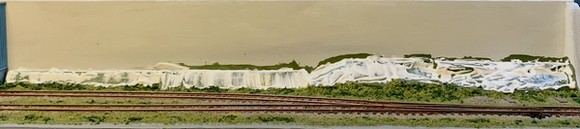
makes tweaking things a lot easier. The first stage in building up the
background scenery to the side of the warehouse
was to cover the styrofoam base with white glue;
this serves as a base for a generously applied
mix of Woodland Scenics "fine turf",
mixing "green grass" (T45, light to
medium green) and "weeds" (T46, medium
to dark green).
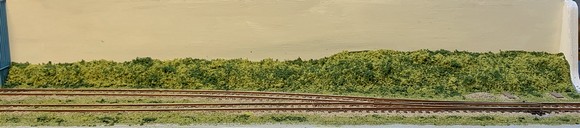
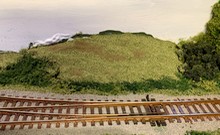
This produces a slope covered in low
grass of various shades of colour. It provides a
pleasing enough look, but more vegetation is
clearly needed. Adding different colour shades of
Woodland Scenics "bushes" (FC146 medium
green, FC147 dark green, and FC149 forest blend)
results in another layer, and a more
interestingly varied backdrop scenery.
|
|
|
|
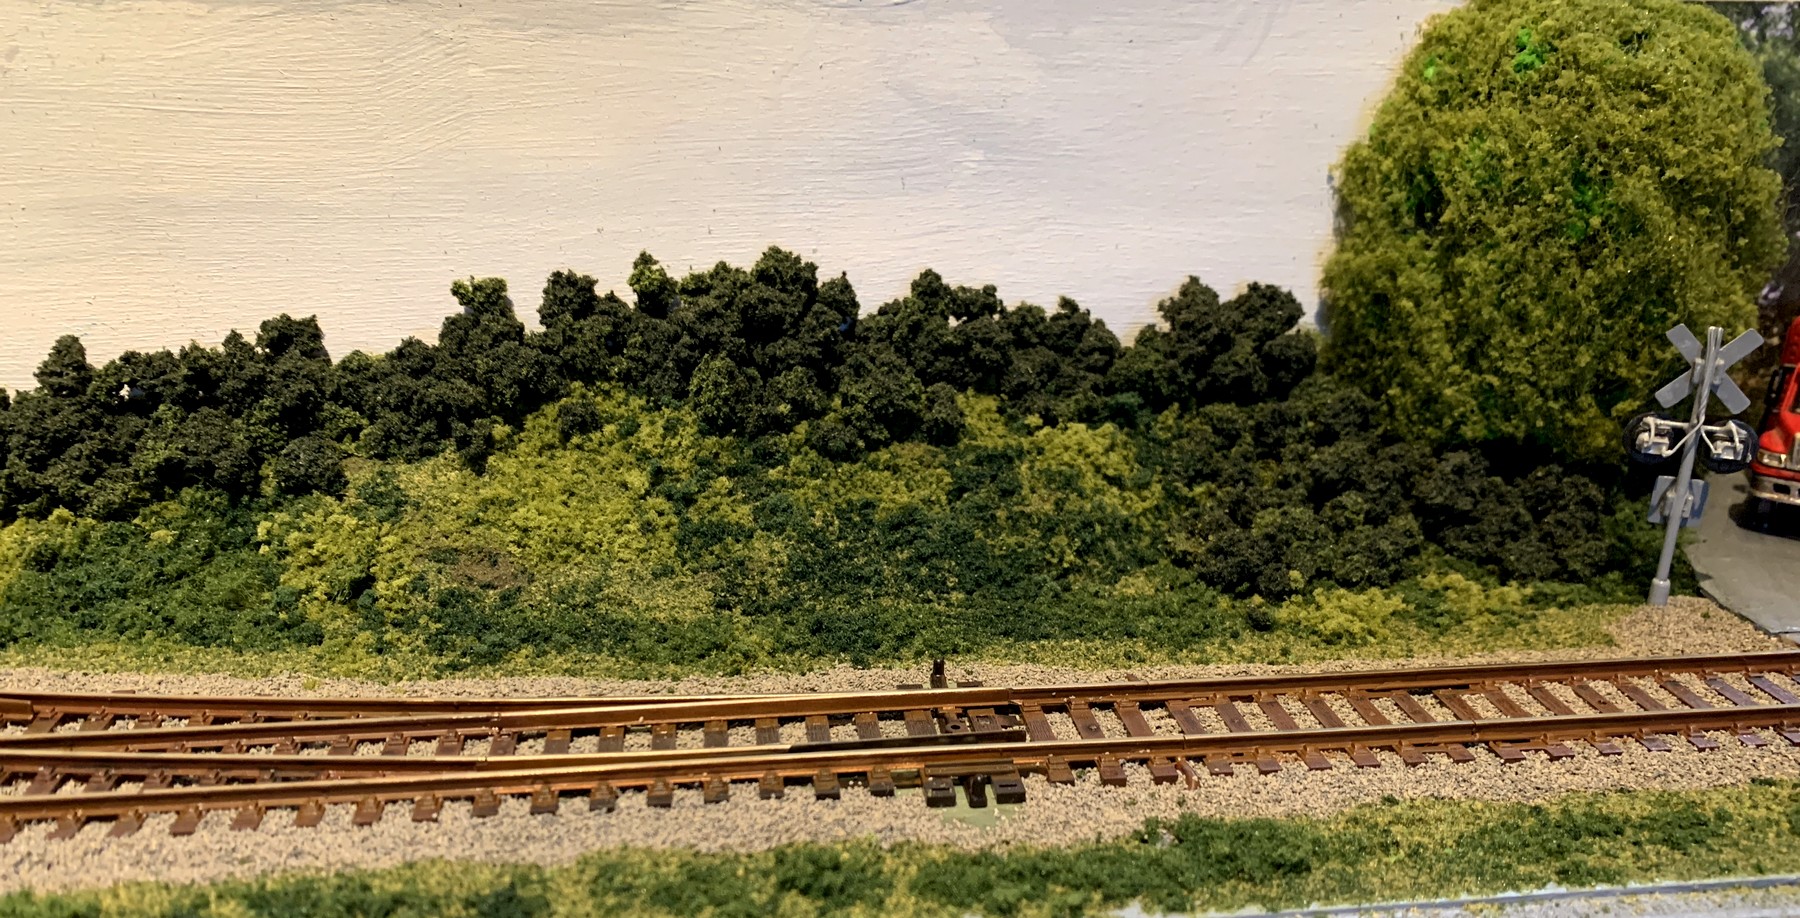
| |
| Having more dark colours towards
the very back helps to accentuate the perception of
visual depth. For the most part, this second layer is
sufficient, since the background scenery is supposed to
be just that: its role is not to attract attention but
rather quite the opposite - to just blend in with the
backdrop (which, being of a deliberately toned down
"not so sunny sky" tone, also doesn't detract
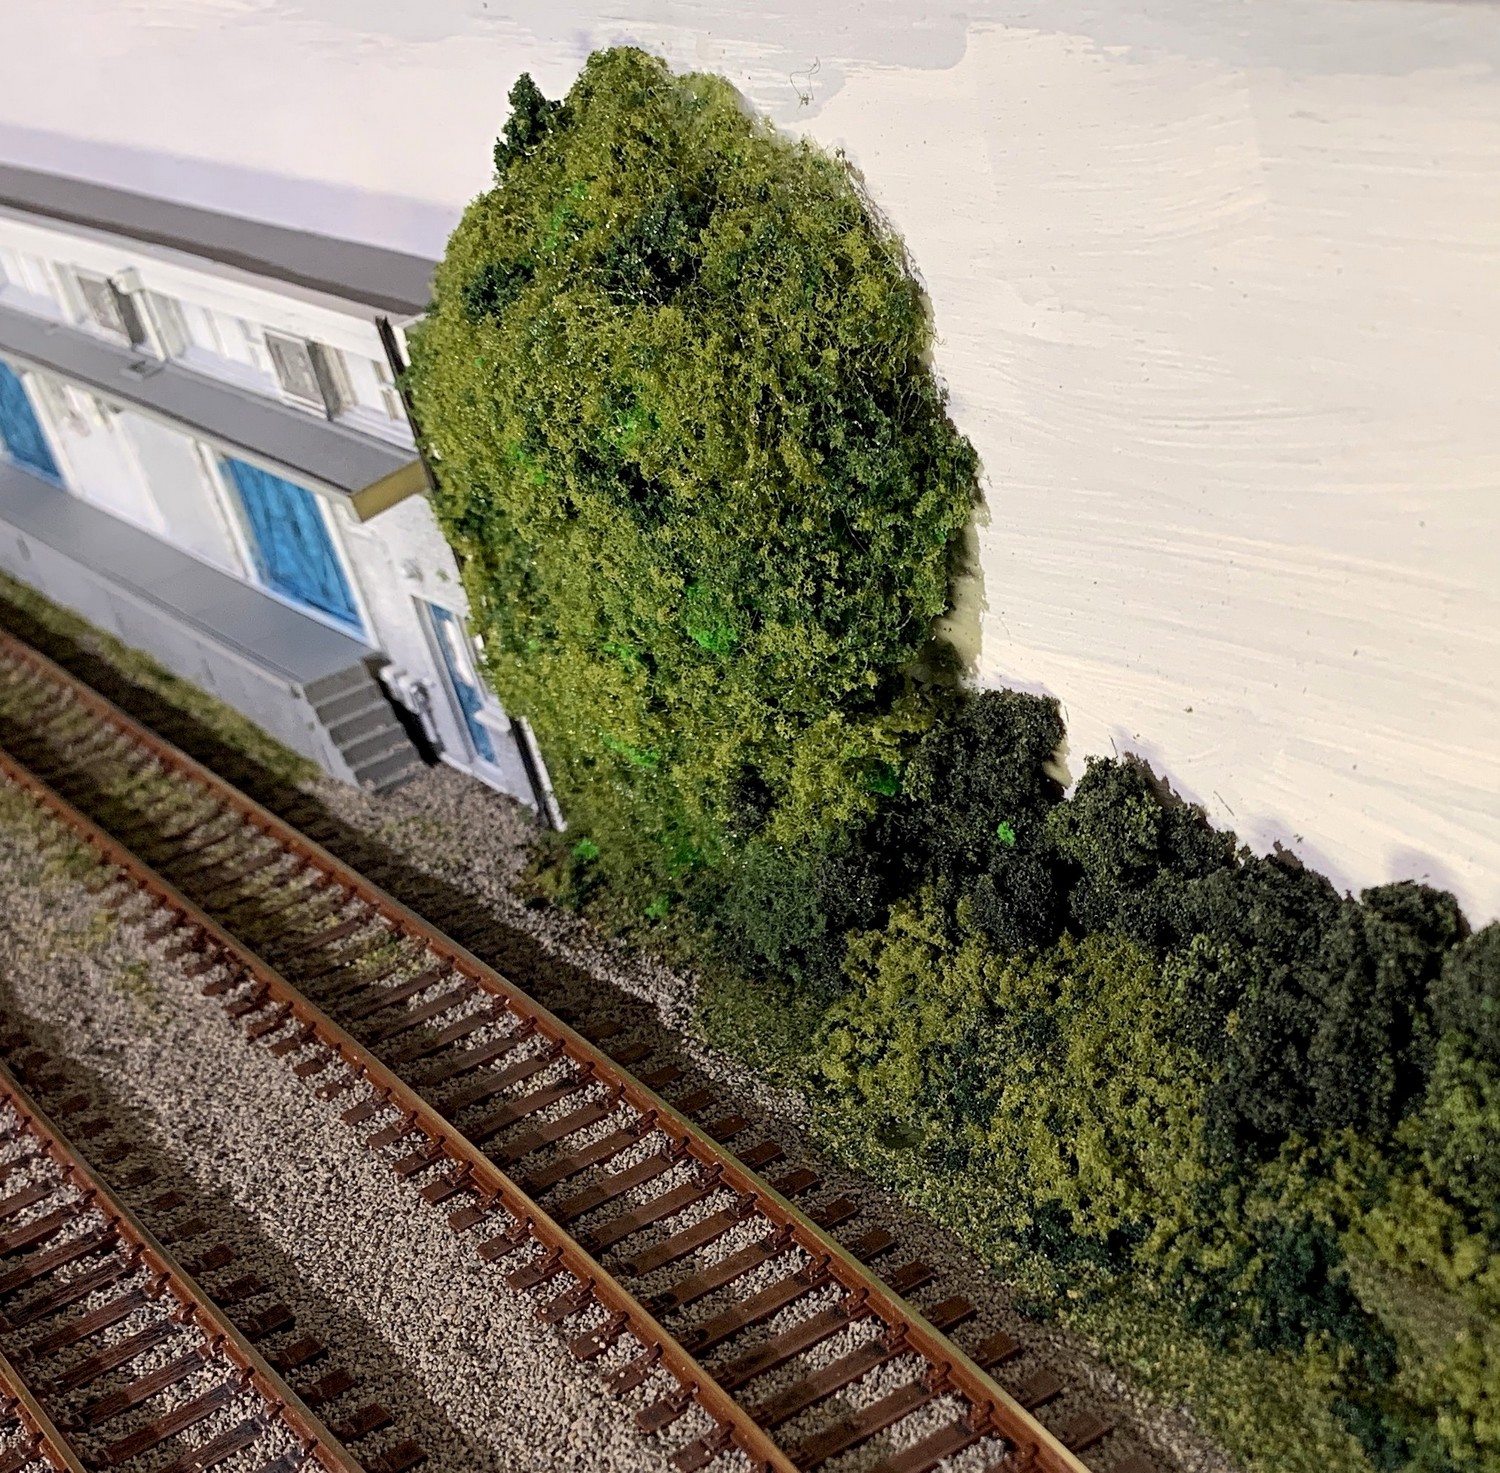
from what is going on in the foreground). |
| |
 |
|
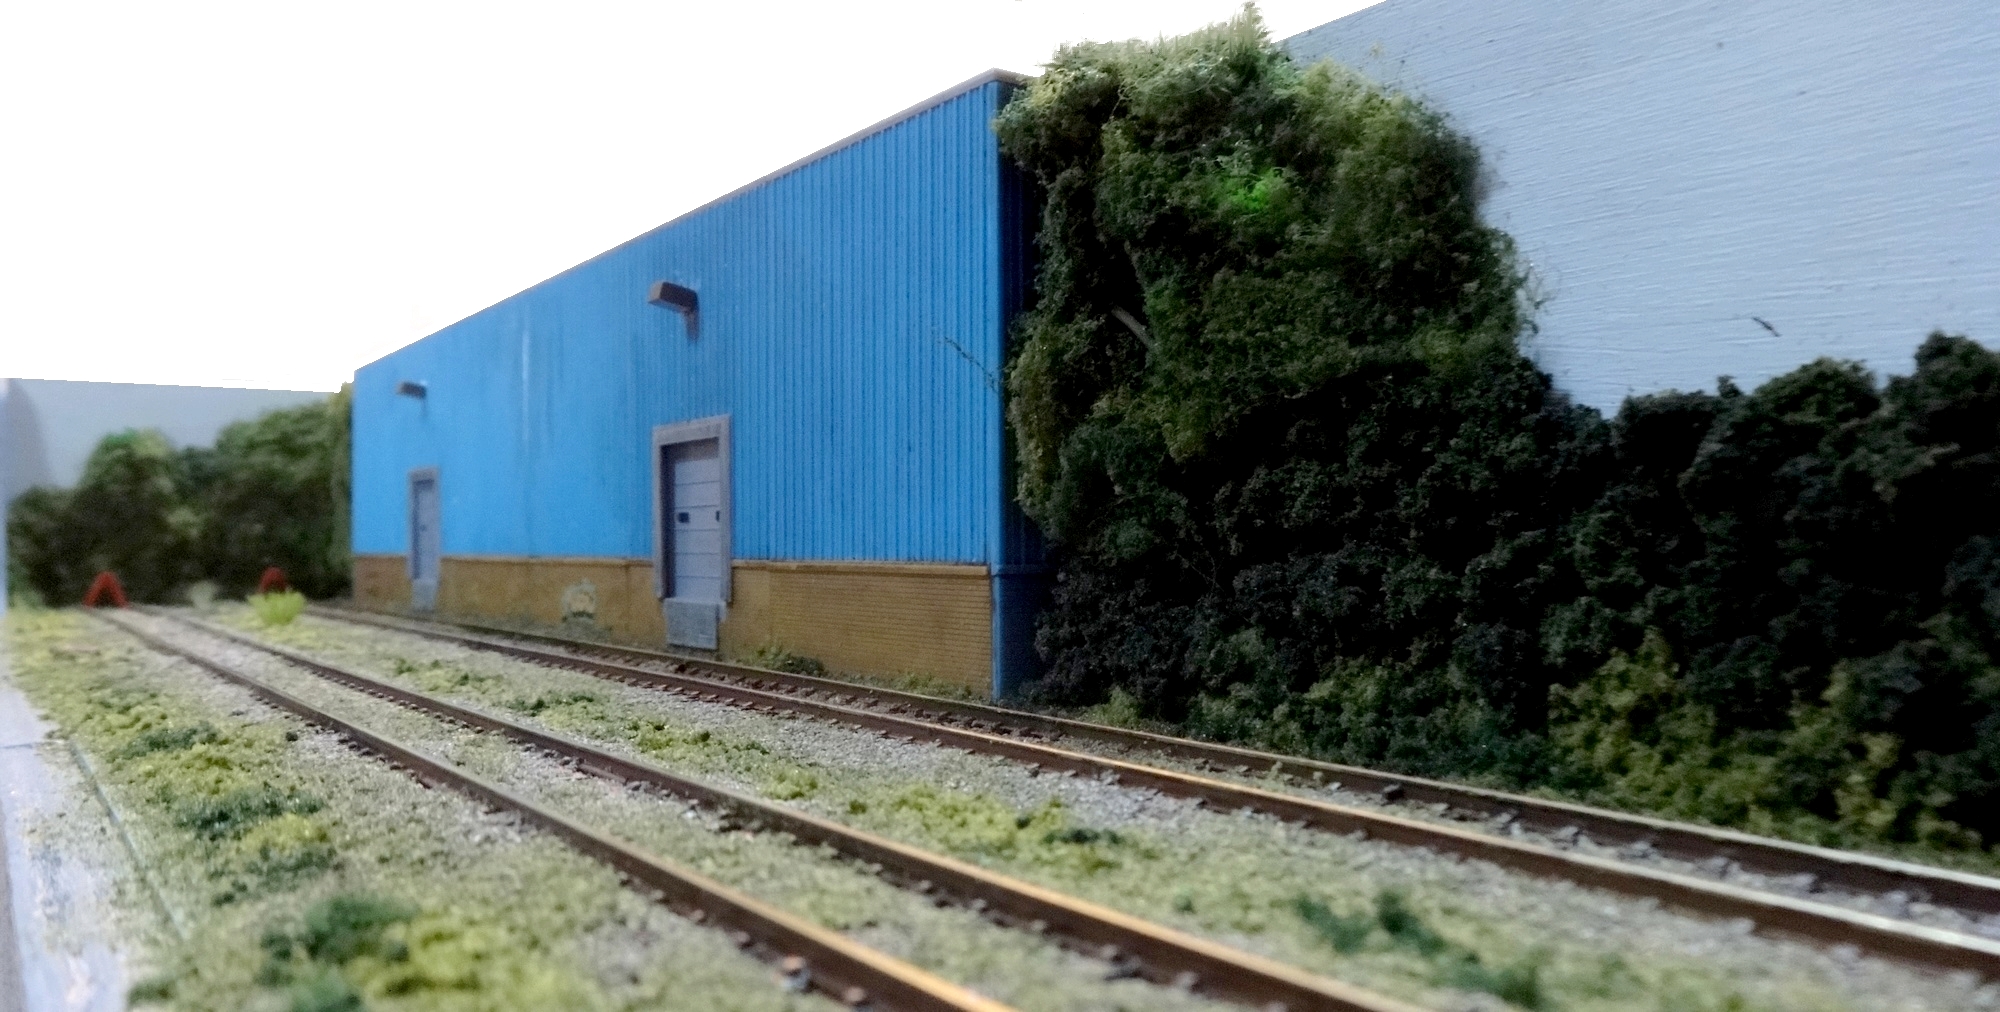
Using
low-relief buildings imitates a stage trick and
is a prime example of theatrical
layout design. But in
order for this visual deception to work, it is
important to disguise the true dimensions of such
"stage props" - the unhindered view of
the shallow sidewalls of the warehouse meeting up
with the backdrop is a dead giveaway at first
sight.
The deception works as
soon as that view is obstructed, preventing a
clear visual perception of where exactly the
warehouse ends and the backdrop begins.
This is what stage
designers do both in theatres and on film
production sets, and in this case the effect is
easily accomplished by adding some sprawling
vegetation in the form of trees and tall bushes.
|
|
| |
|
| |
| This sprawling vegetation is
essentially a first layer; refinements can be made
anytime at a later stage. It is formed of Woodland
Scenics "bushes" (again
mixing FC146 medium green, FC147 dark green, and FC149
forest blend) and "foliage" made up of
various colours (F51 light green, F52 medium green, and
F53 dark green). |
| |
| |
|
|
|
| |
| With the left hand segment of the
layout having come along quite a bit, work started
shifting to the right hand segment - and with it the
question of how the two segments would ultimately be
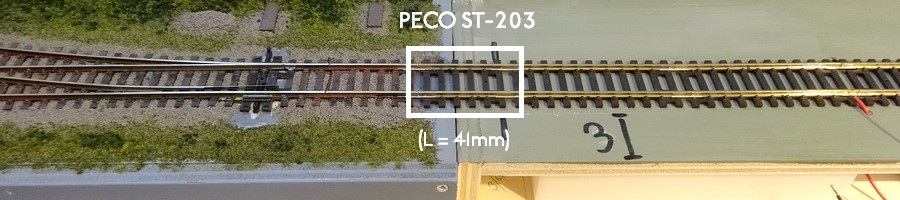
joined up for operating sessions. Although actually, that
question had been answered long before, since the
possibilities of joining up the two segments with a piece
of setrack was an important point in going for Peco code
100 track. |
| |
| Previous experience with modules
has lead me to trade visuals for truly secure physical
and electrical track connections across segments, and
nothing beats having a short piece of track as a
"bridging" element. |
| |
 |
| |
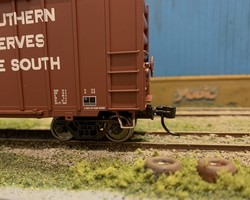
| The two segments of Pecan Street
are joined up by a very short (41mm) piece of track from
the Peco setrack range - a sturdy and reliable
connection. The tracks on both segments have been set
back accordingly in order to allow for a snug fit. Once
both segments are fully scenicked, the "connector
track" can be weathered in order to tone down the
visuals. |
| |
| |
|
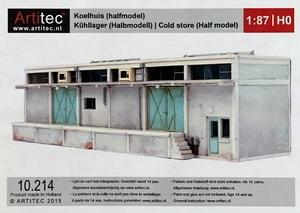
STRUCTURE #2: THE COLD STORAGE
|
|
|
| |
| A true "tuning fork" layout only has a
single lead track running up to the point, but early on
in my planning I decided to add some additional visual
interest and operational potential by adding another
point on the lead track with a very short spur that would
hold one single piece of rolling stock only. In order to give that single car spot
some sense of being another place that would have the odd
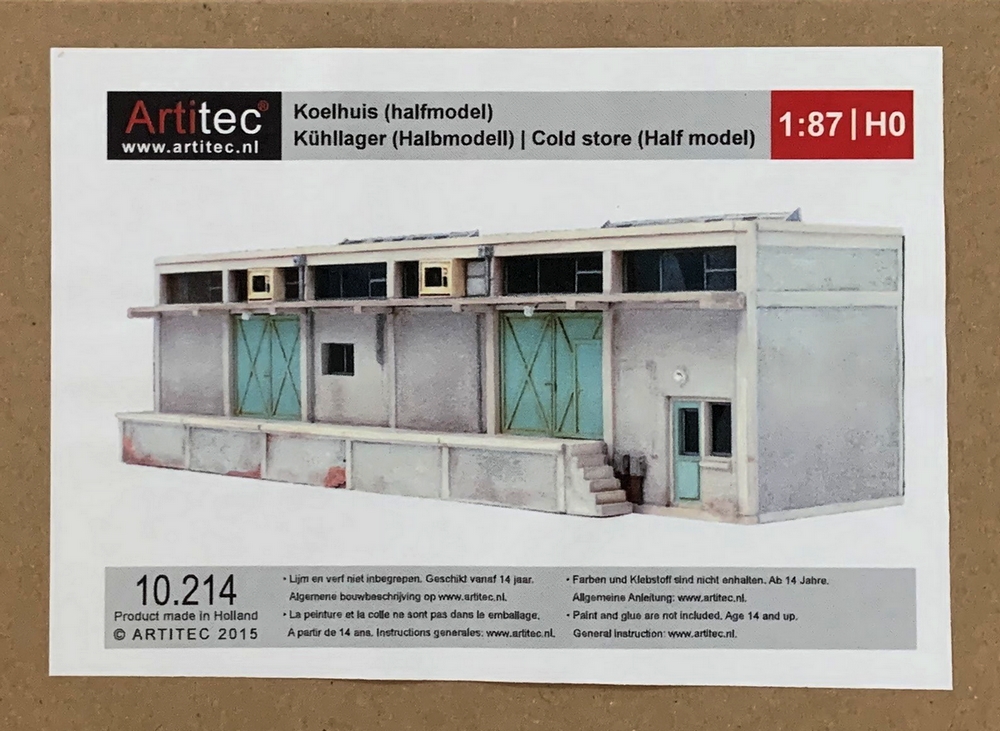
boxcar or mechanical reefer dropped off and picked up, I
decided to go for the Dutch company Artitec's low-relief
kit of a cold storage building that I had bought years
ago (and is no longer produced).
|
| |
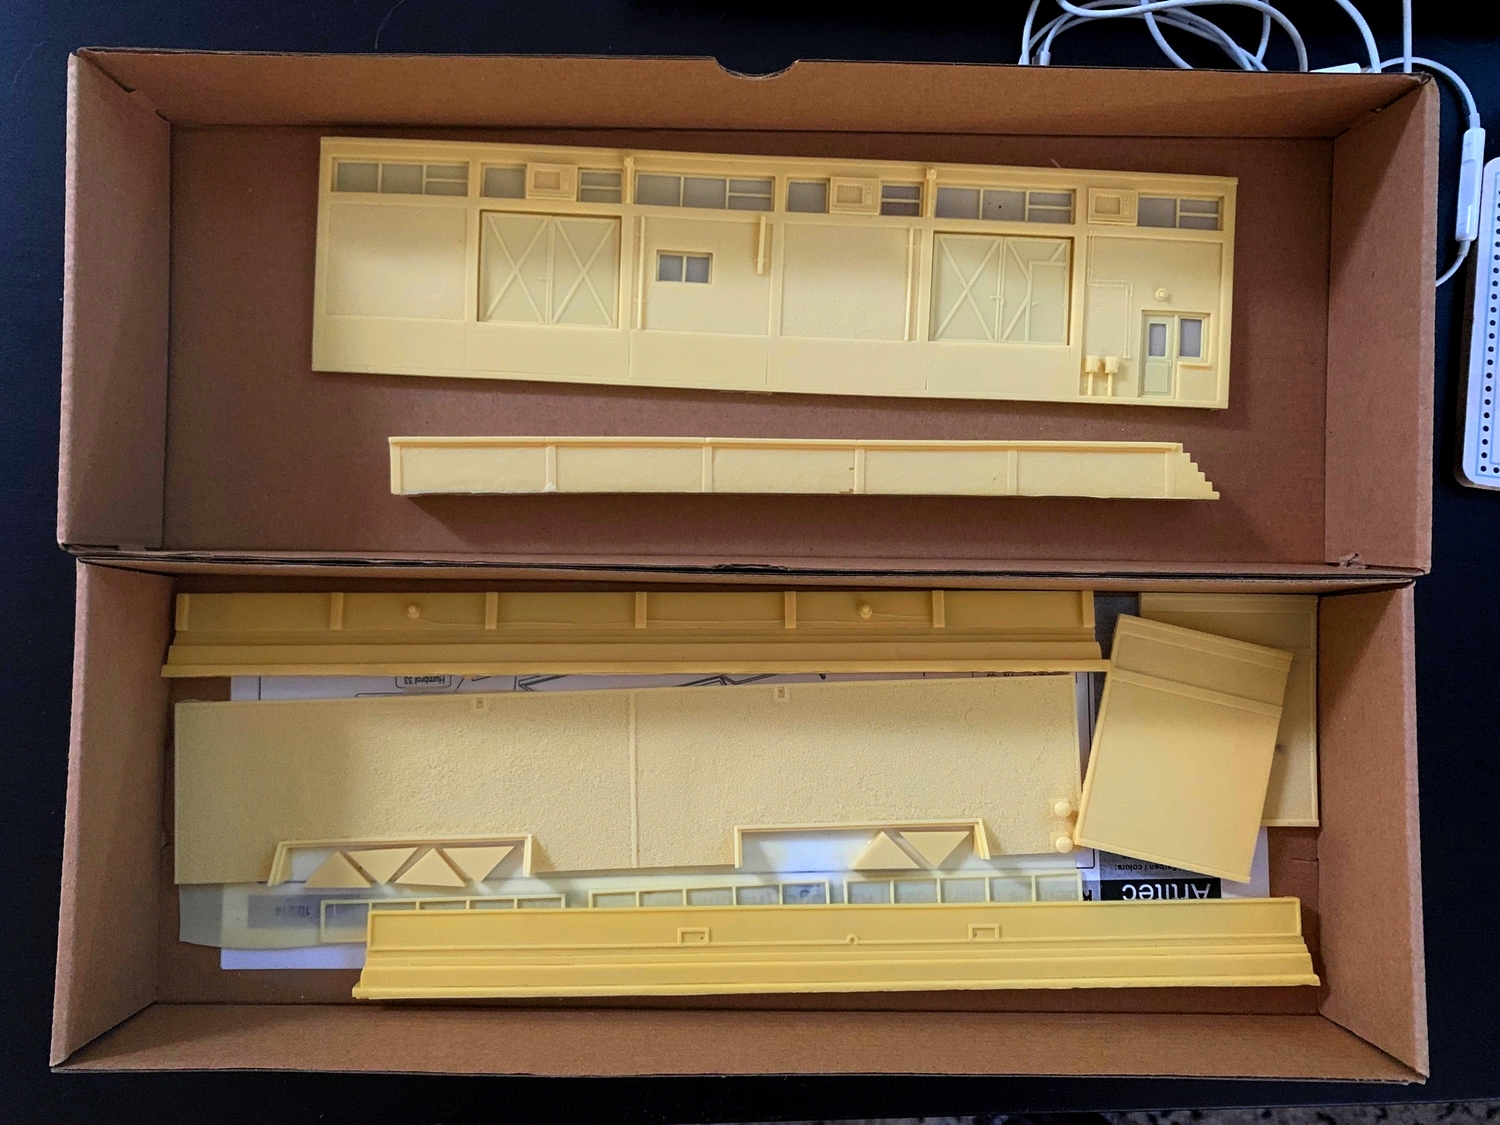
| The kit is interesting in that it
is made from resin rather than plastic; this
allows for larger pieces with details moulded on.
|
|
 |
|
| |
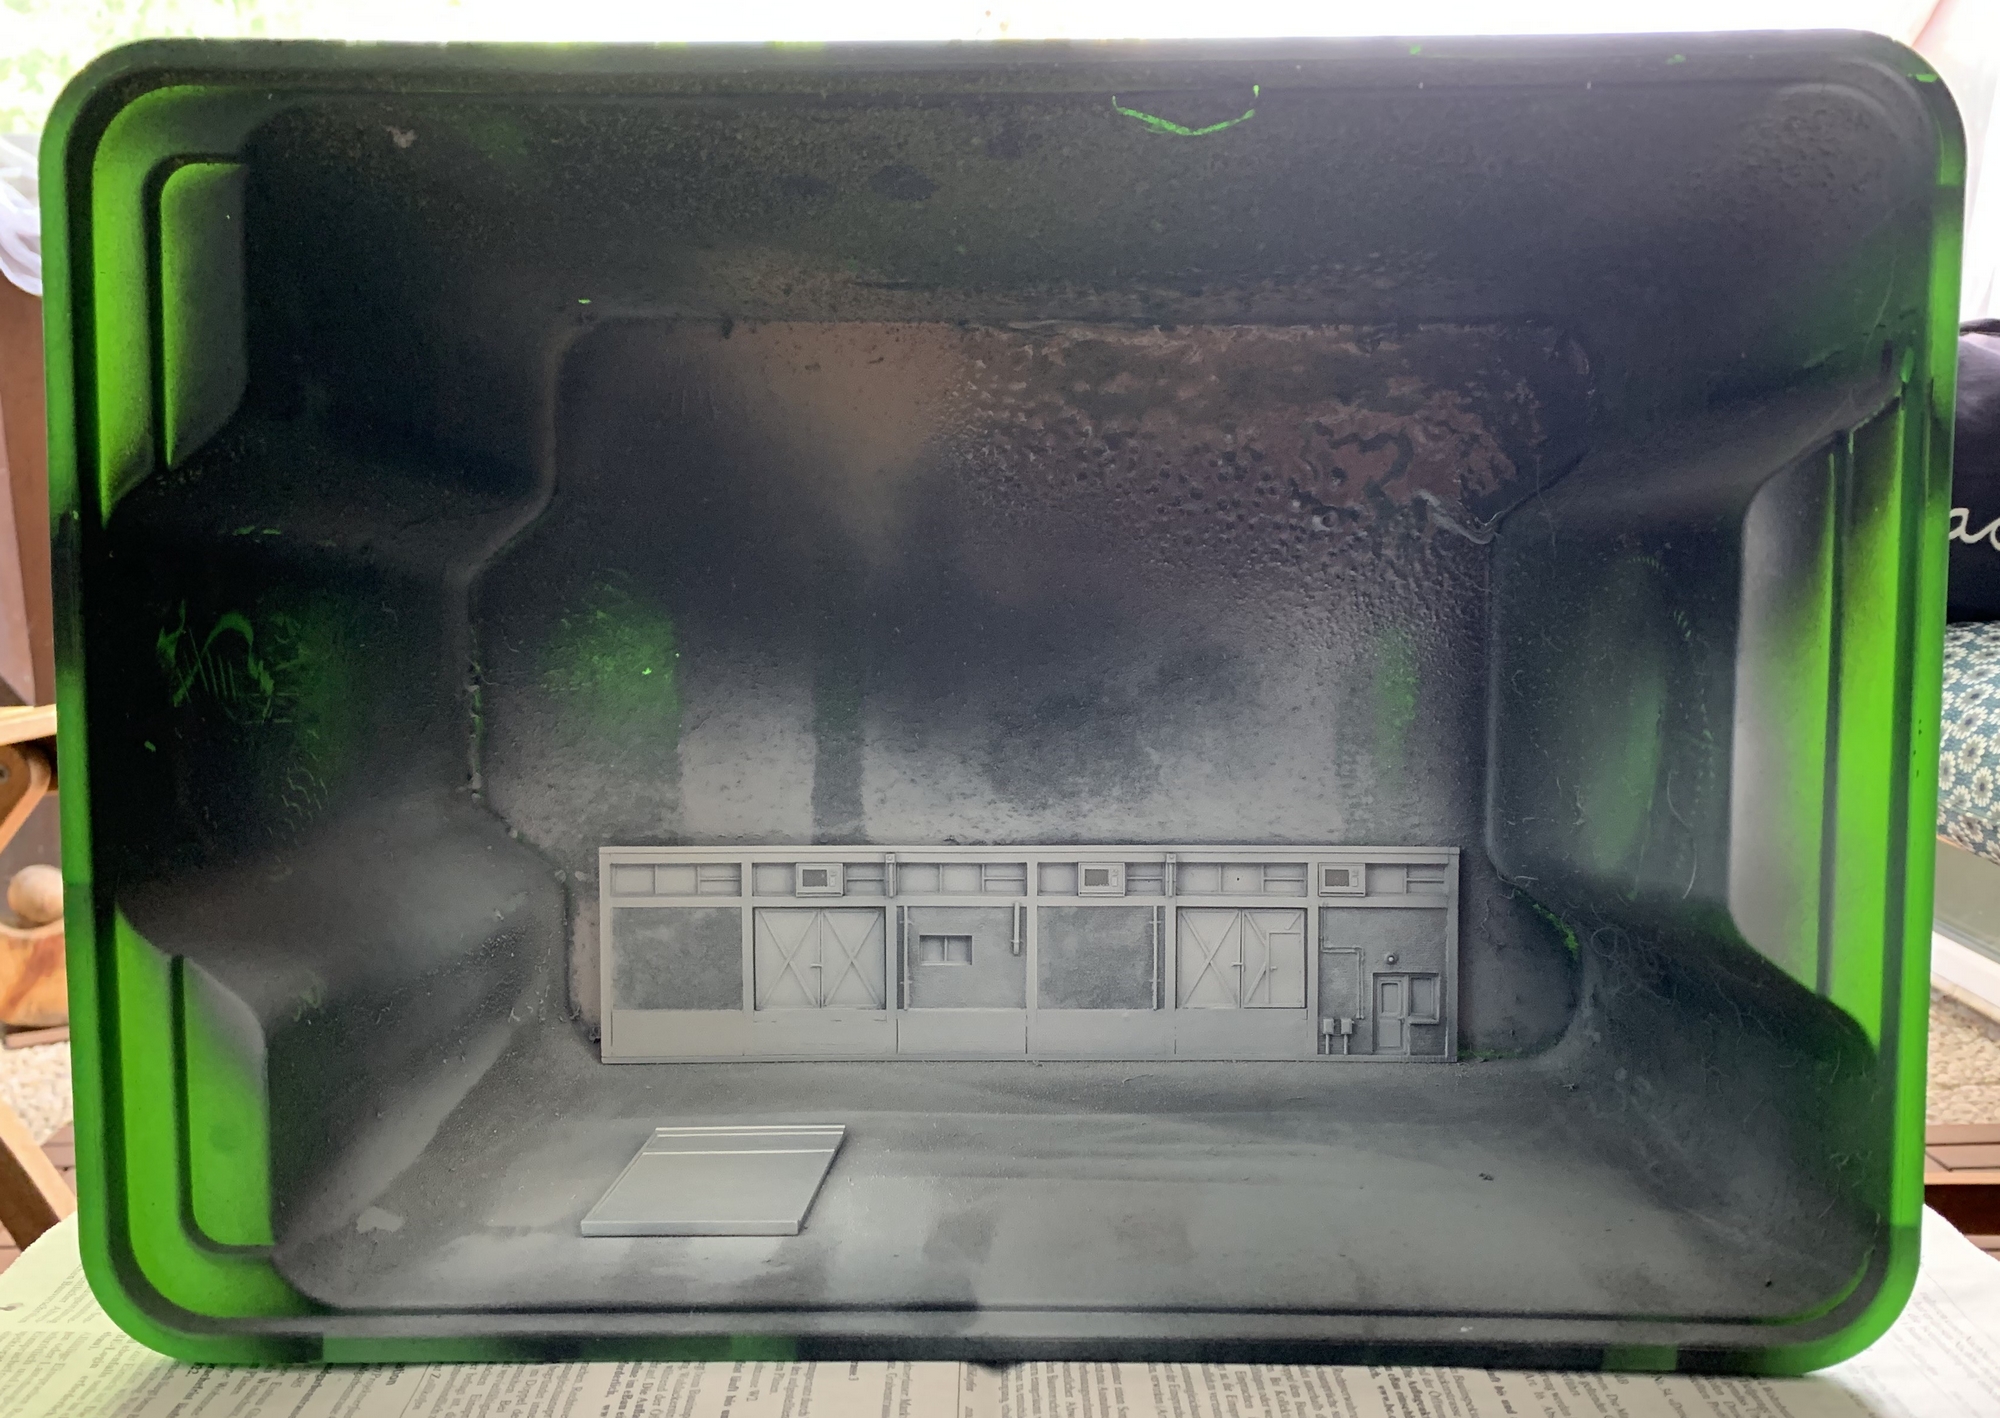
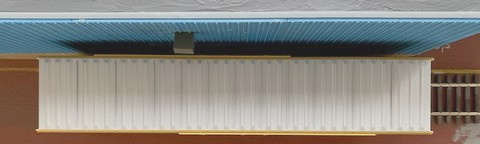
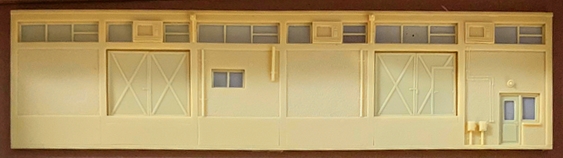
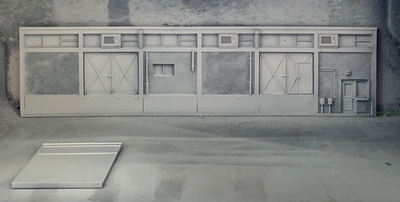
| As a result, the entire model is
made up of only a handful of parts. Somewhat inspired by
the rendition on the box, I gave the few parts of the kit
I would ultimately be needing two coats of paint from a
rattle can - the first black (for contrast and texture),
the second a light spray of white. |
| |
 |
|
The
transformation from the original light yellow
colour is quite striking, and the rather finely
moulded details are nicely highlighted by the
darker shades from the first coat of spray paint. As
straightforward as this model is, it would need
some adapting to fit the reduced footprint
available on the narrow layout.
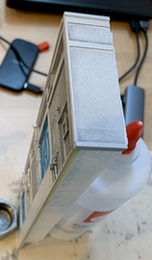
First
off, the already low-relief model was reduced
further in depth from the original 5cm to just a
tad over 2cm, resulting in a setup almost
identical to the warehouse scene on the left hand
segment.
To
give the model a bit more stability I cut a 2cm
thick piece of styrofoam to shape and glued it to
the back of the building's front
|
|
| |
| Since the
roof moulding didn't really work with the reduced depth
of the model, I replaced it with a simple piece of
styrene and then added the moulded loading platform and
canopy as per the instructions. |
| |
|
| |
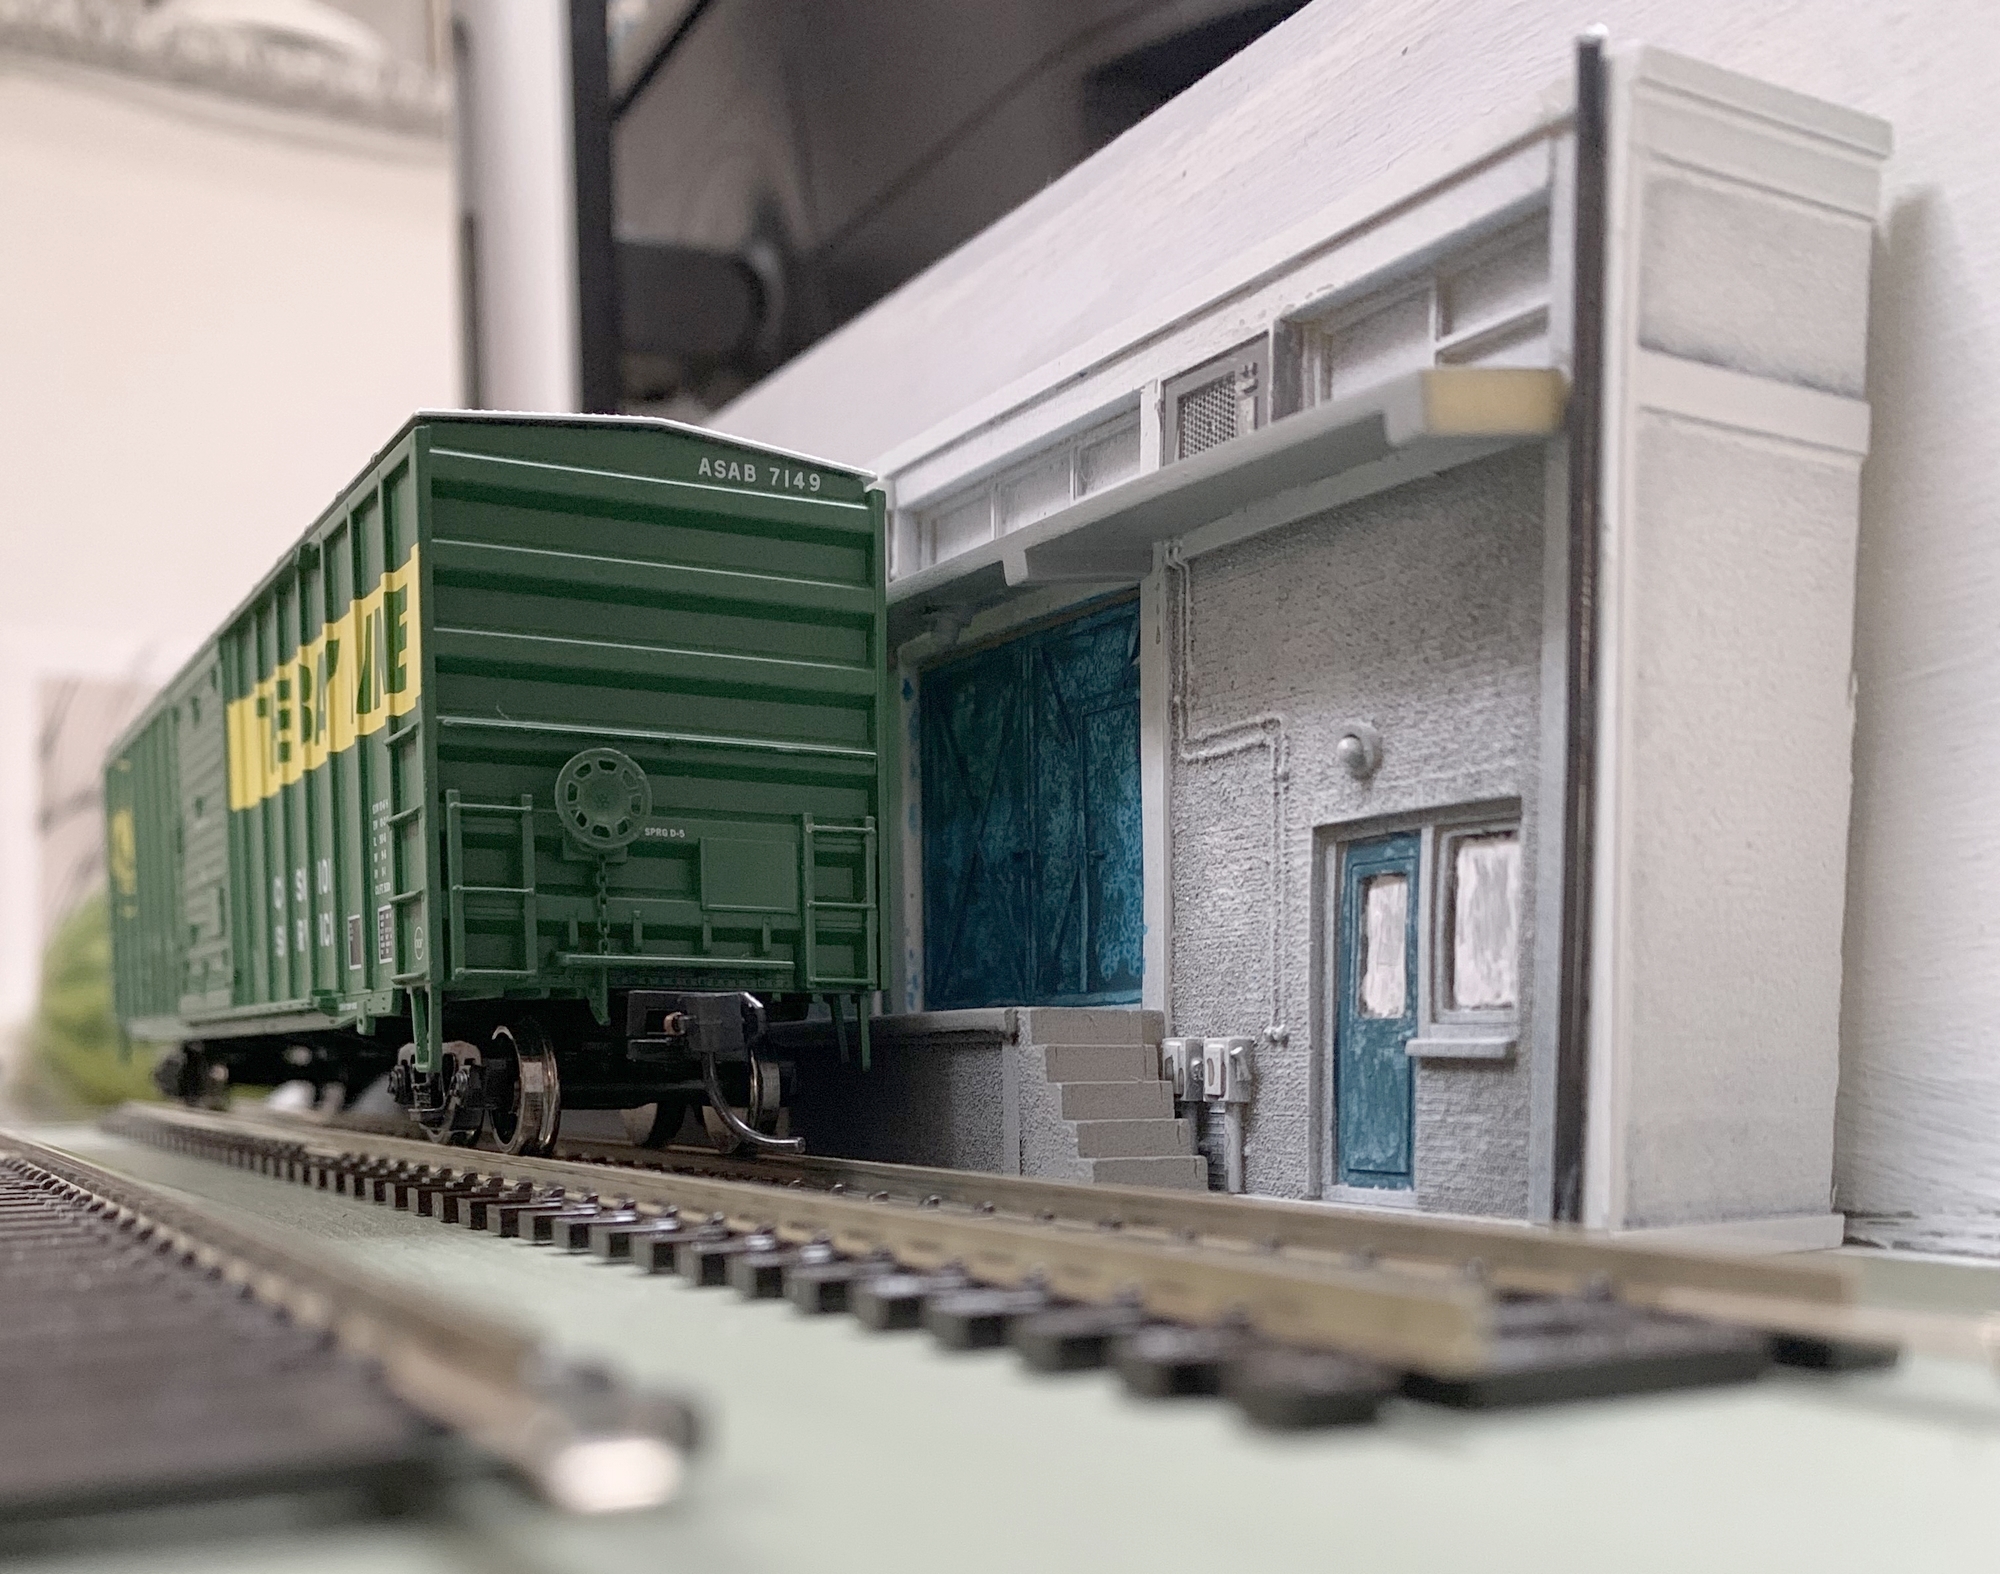
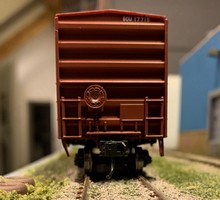
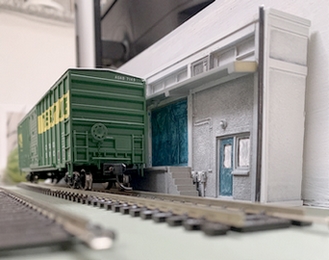
| As
with the warehouse on the left hand segment,
getting the clearances right with this building
is the first step as these determine where
exactly the rails will go. And again the object was to get cars
fairly close up to the loading dock edge, as this
will eventually make things look a lot more
realistic.
Once the measurements were all in,
checked, and then double and triple checked,
laying the track was next.
|
|
|
|
| |
|
MORE TRACKLAYING & WIRING
|
|
|
| |
| Following the same procedure for laying track and
wiring it all up as on the first, left hand side segment,
the simple track configuration (which is indeed identical
to the one on the left hand segment) was again made up of
Peco code 100 track Streamline
flextrack for the siding in front of the cold storage
building and pieces of Setrack "snap
track" for the siding running along the front of the
layout. |
| |
 |
| |
No changes to the switch arrangement
either, using a Peco Streamline
medium radius "Insulfrog" point and
adding insulator joiners to the inner rails past the frog
and extra wire feeds to all three segments of track, as
per Peco's instructions printed on the packaging of the
switch.
|
| |
 |
|
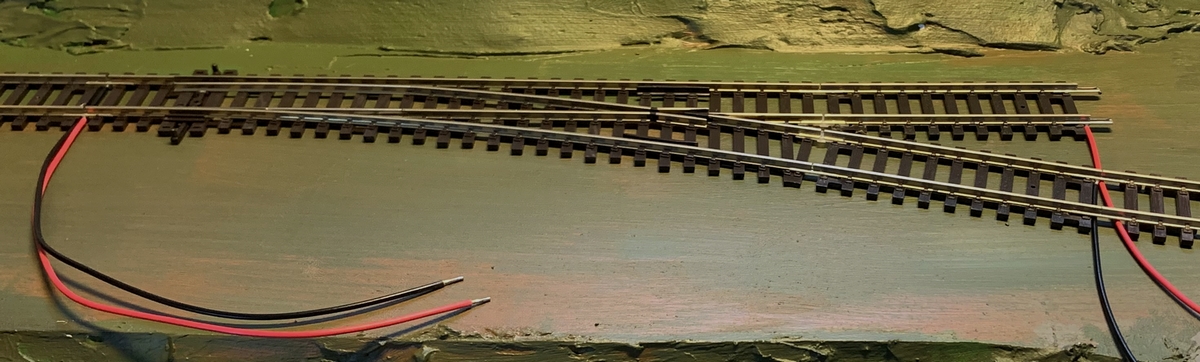
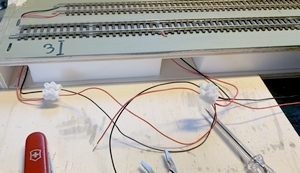
And again, Marklin Z Scale track
pins were used to attach the track firmly and
securely to the baseboard. Wiring such a simple track configuration
throws up no difference between an old-fashioned
DC wiring approach and a DCC friendly one -
although one could argue that the way I brought
together all three pairs of feeder wires has a
distinctly "old school" look to it.
After the all important
testing using a volt meter to make sure that all
connections work properly and provide eletric
current to all segments of the track, weathering
is next.
|
|
| |
BACK
TO WEATHERING THE TRACK
|
|
|
|
|
| |
| Avoiding the mistake of using the
contents of an old rattle can, I spraypainted the
rails, masking off (again, as always) the part of
the point which is made up of moveable parts and
also ensures connectivity for the elctrical
current. Painting the rails
outside on a hot August afternoon in the midst of
the 2022 heatwave made the paint dry really
quickly, so that it was impossible to wipe and
clean all the rail surfaces before the paint
started to set. But based on the experience with
the left hand segment, I knew not to worry and
just let the remaining paint dry properly. A day
later I used swabs
saturated with isopropyl alcohol to wipe the top
of the rails clean.
In order to brake up the unrealistic
uniformity of the colour, I also repeated the
process of darkening the ties, except this time I
only used a generous splash of Vallejo
black wash (which, when dry, is quite
transparent).
Once all is set for the moment, making
sure all electrical connections still work as
they are supposed to is certainly a good idea
before moving on to the next steps.
|
|
 |
|
| |
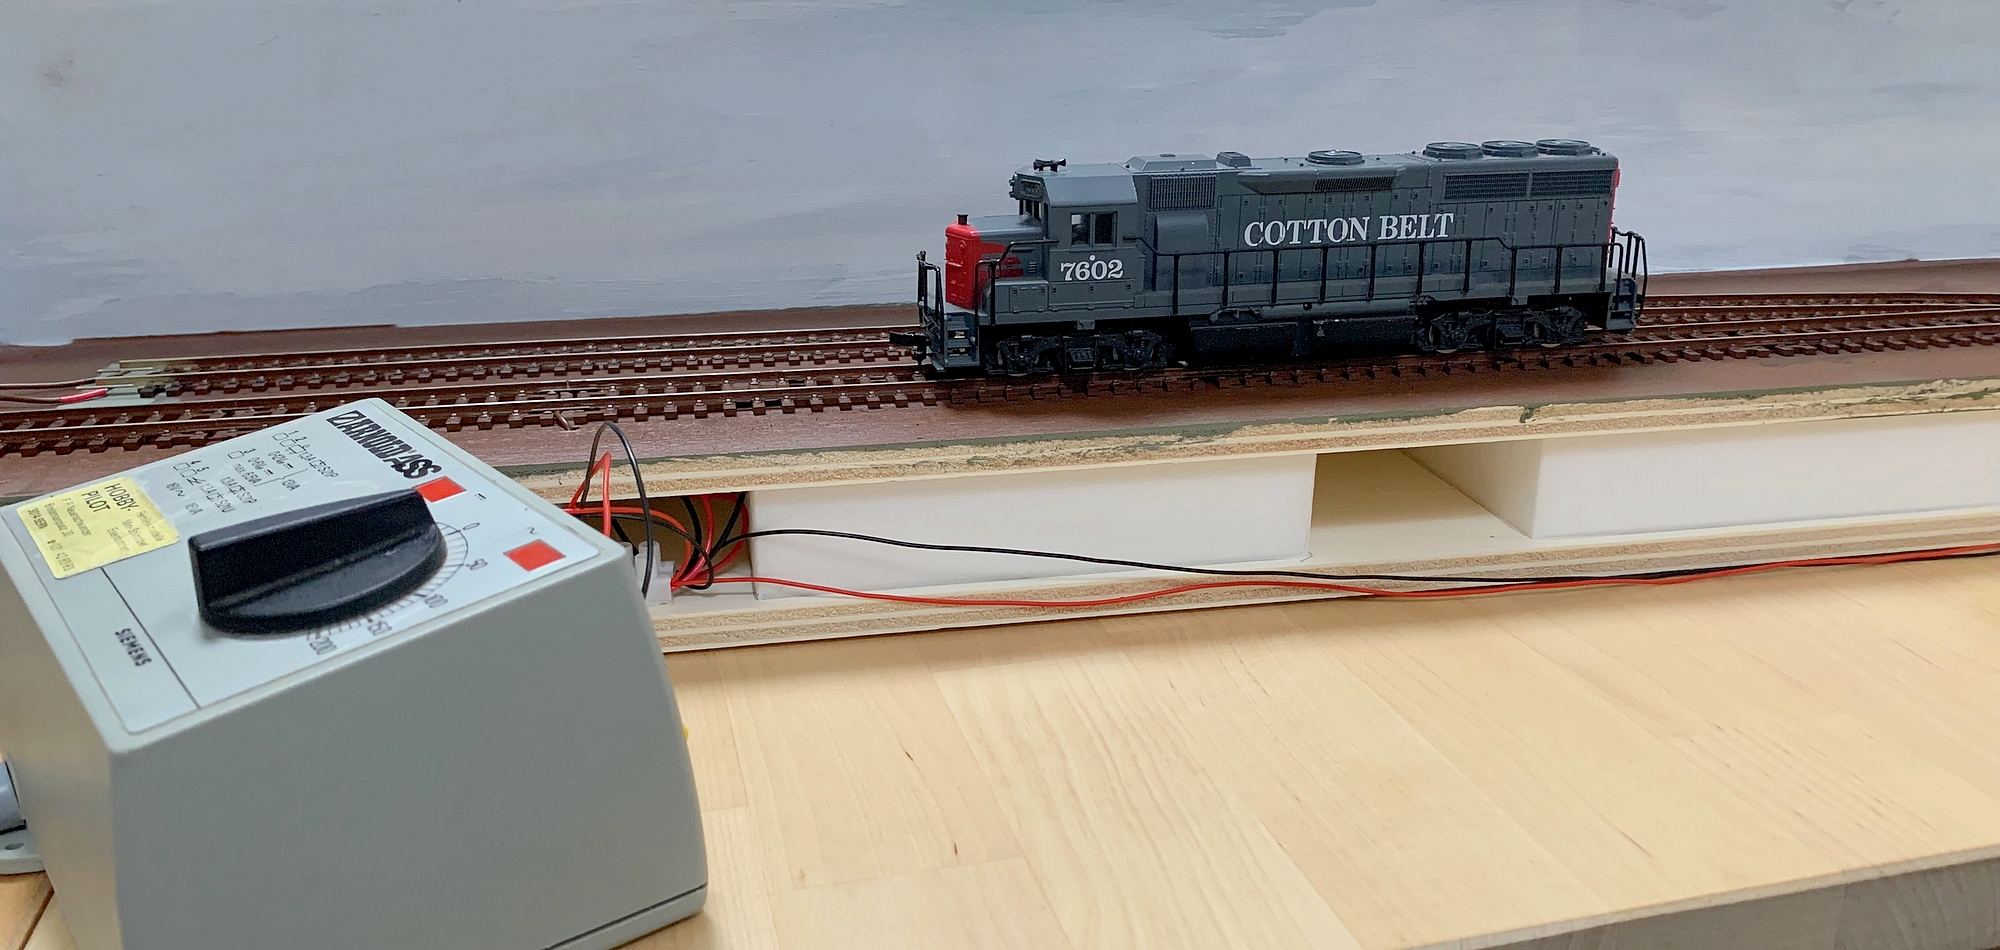
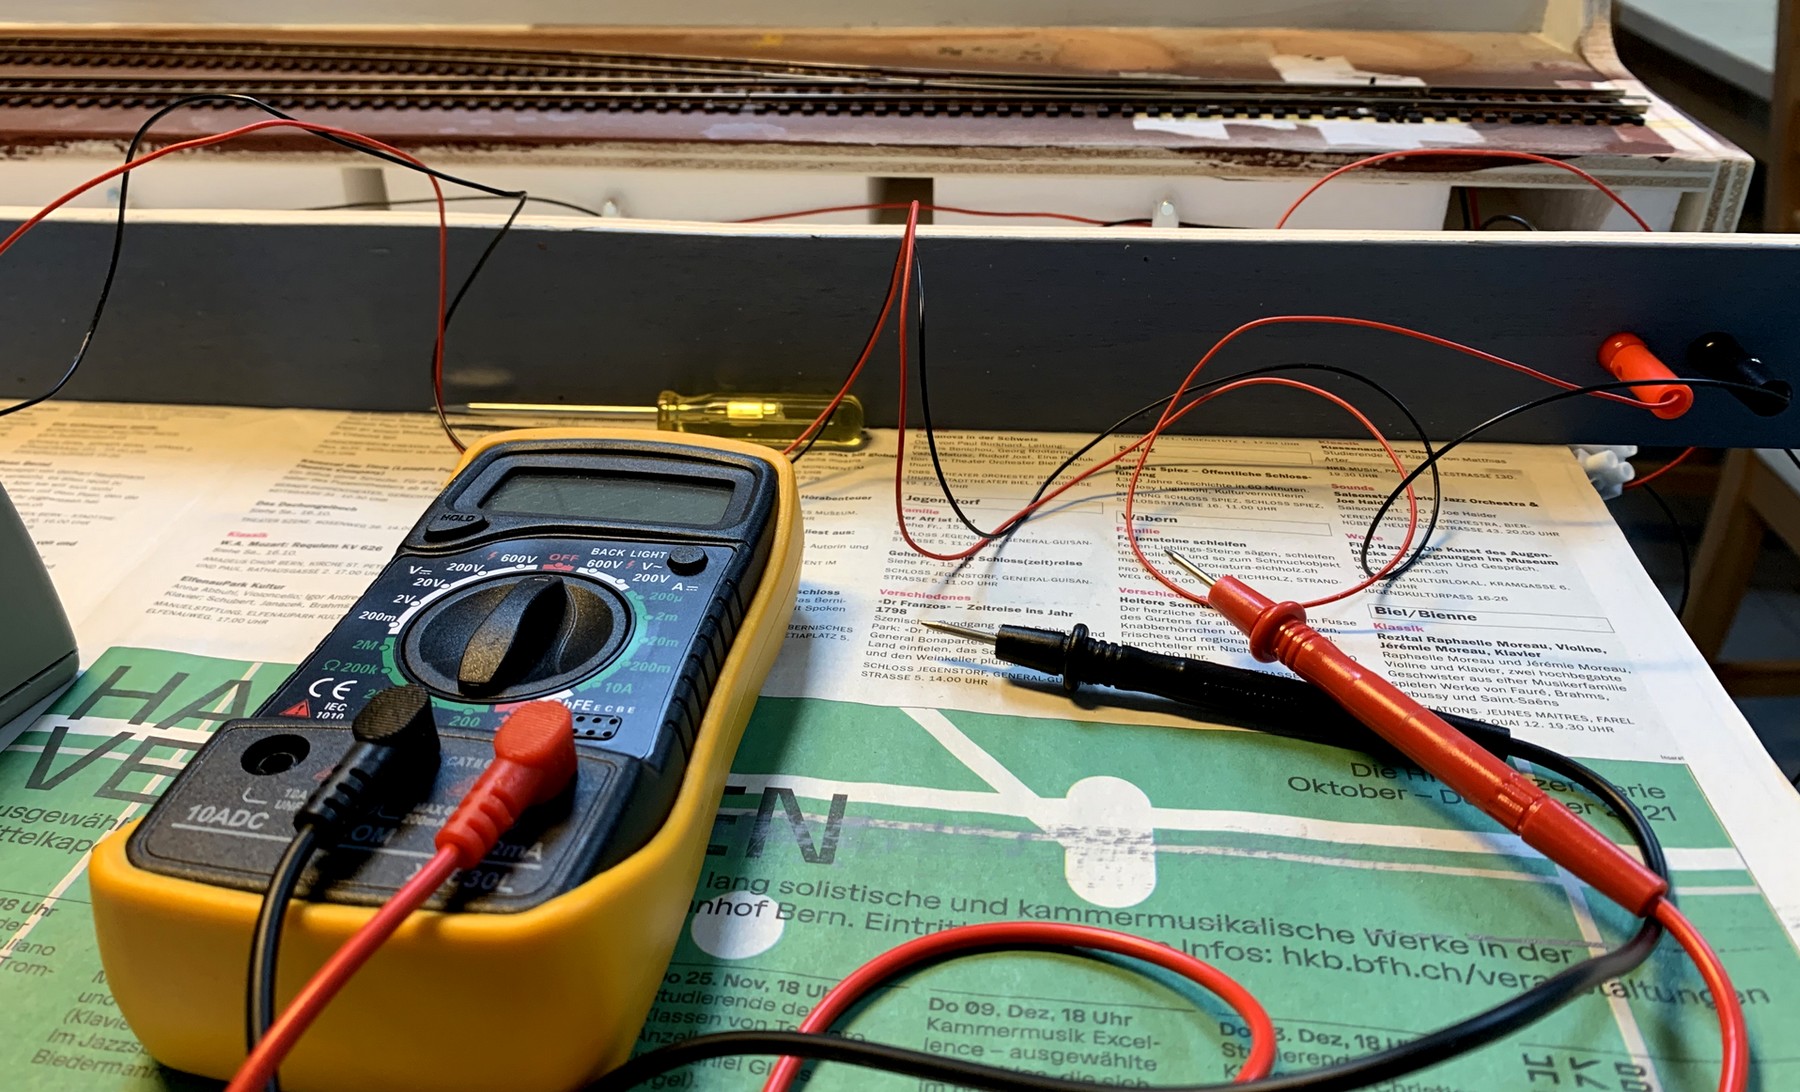
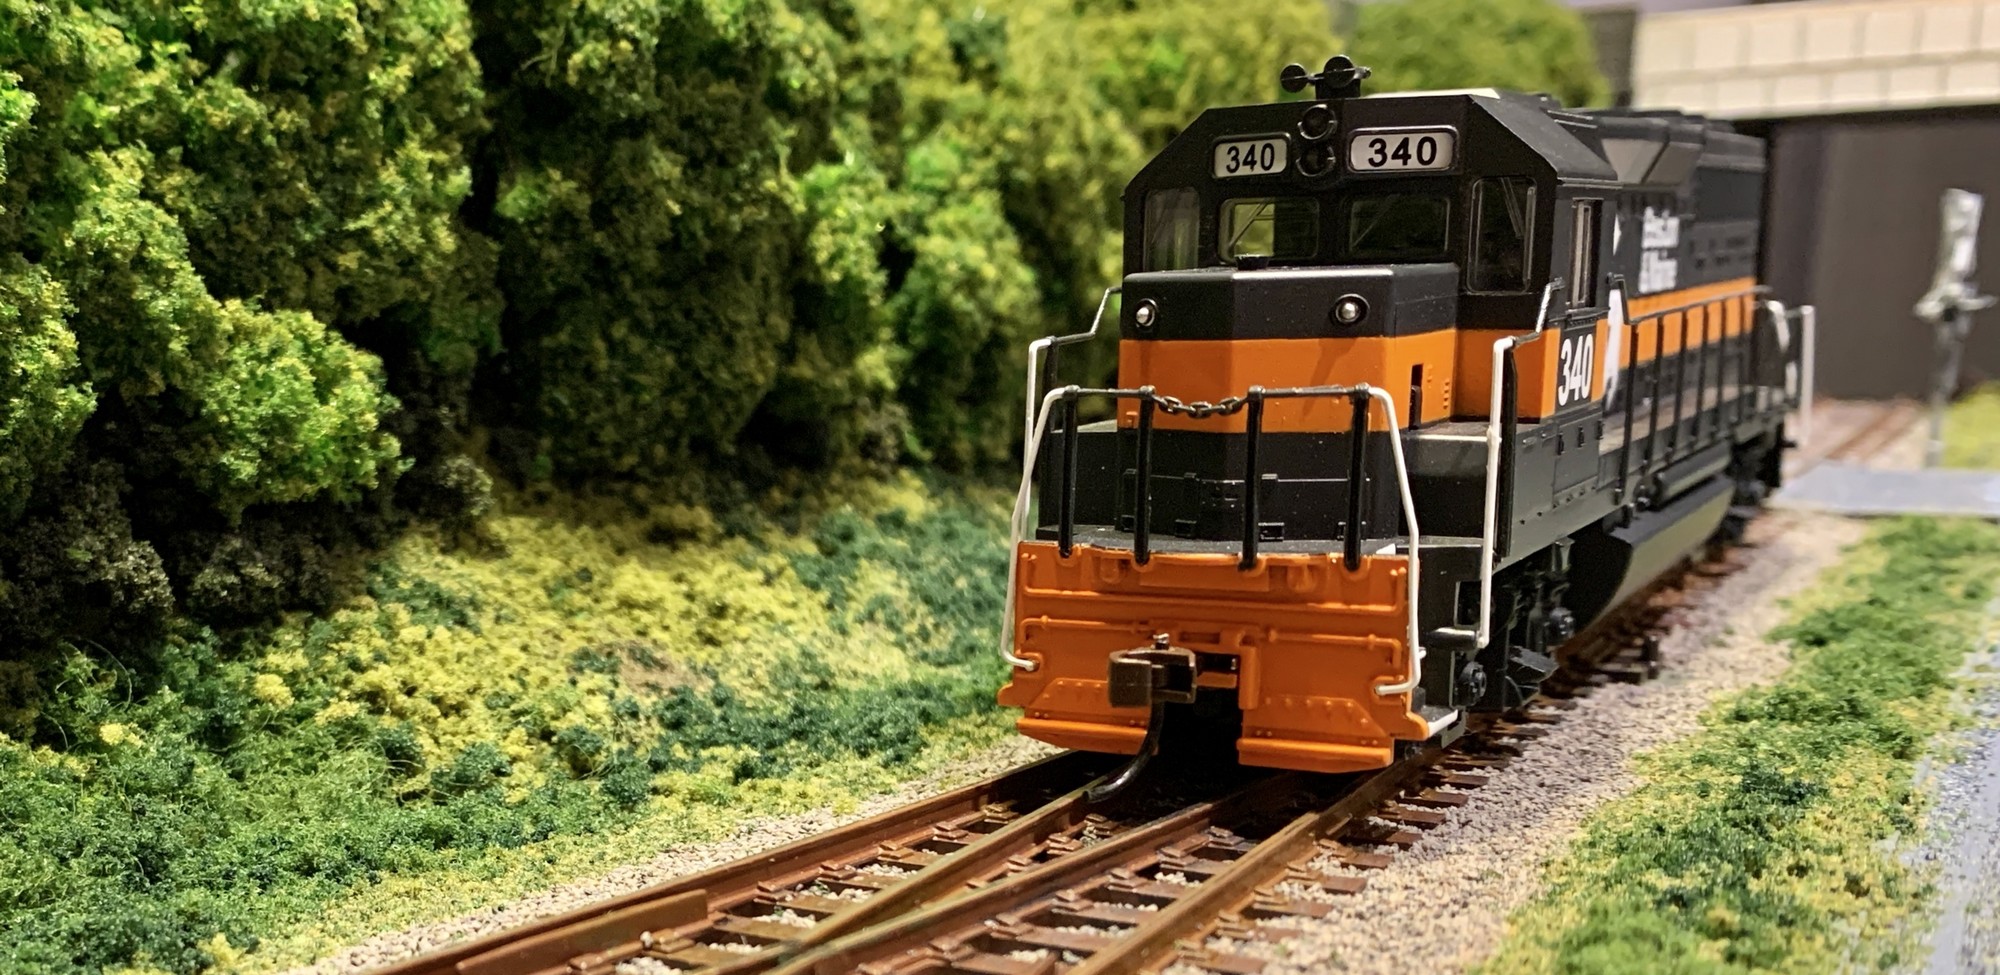
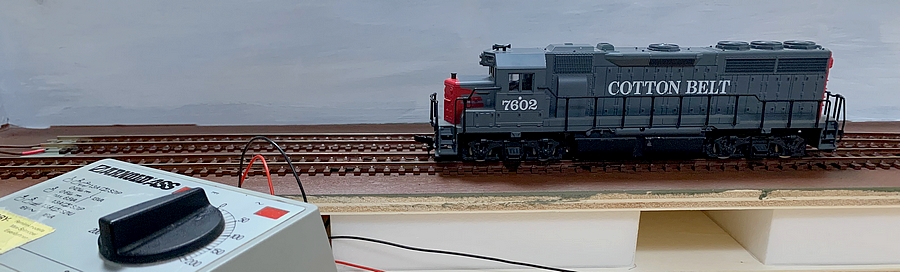
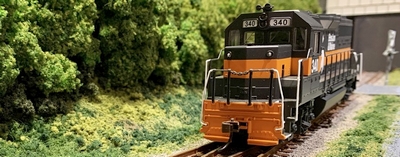
| I
did this following my usual best practice (applying
current from a standard 1980s DC controller and measuring
the current in all relevant places with a volt meter) but
then also got out my old Roco/Atlas GP40 from 1984 for
some actual test running - just a simple moment of inspirational nostalgia. |
| |
 |
| |
| |
|
|
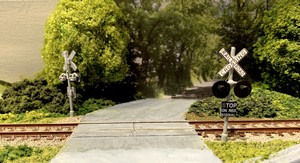
| |
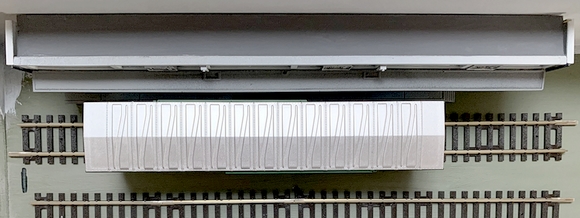
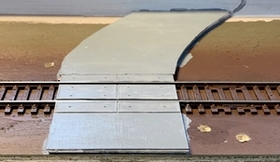
| Prior to ballasting a few scenic
items needed to be put in place, and one of them was a
grade crossing. Apart from
providing an opportunity to add some scenic interest, the
crossing was intended right from the start to mark a
boundary for switching moves when operating Pecan Street
in "tuning fork switching puzzle" mode. |
| |
In essence, it simply limits
the length of a train (and therefore the number
of cars that can be switched in one move) by
having a rule in place which states that the
grade crossing cannot be blocked during
switching.
|
|
 |
|
| |
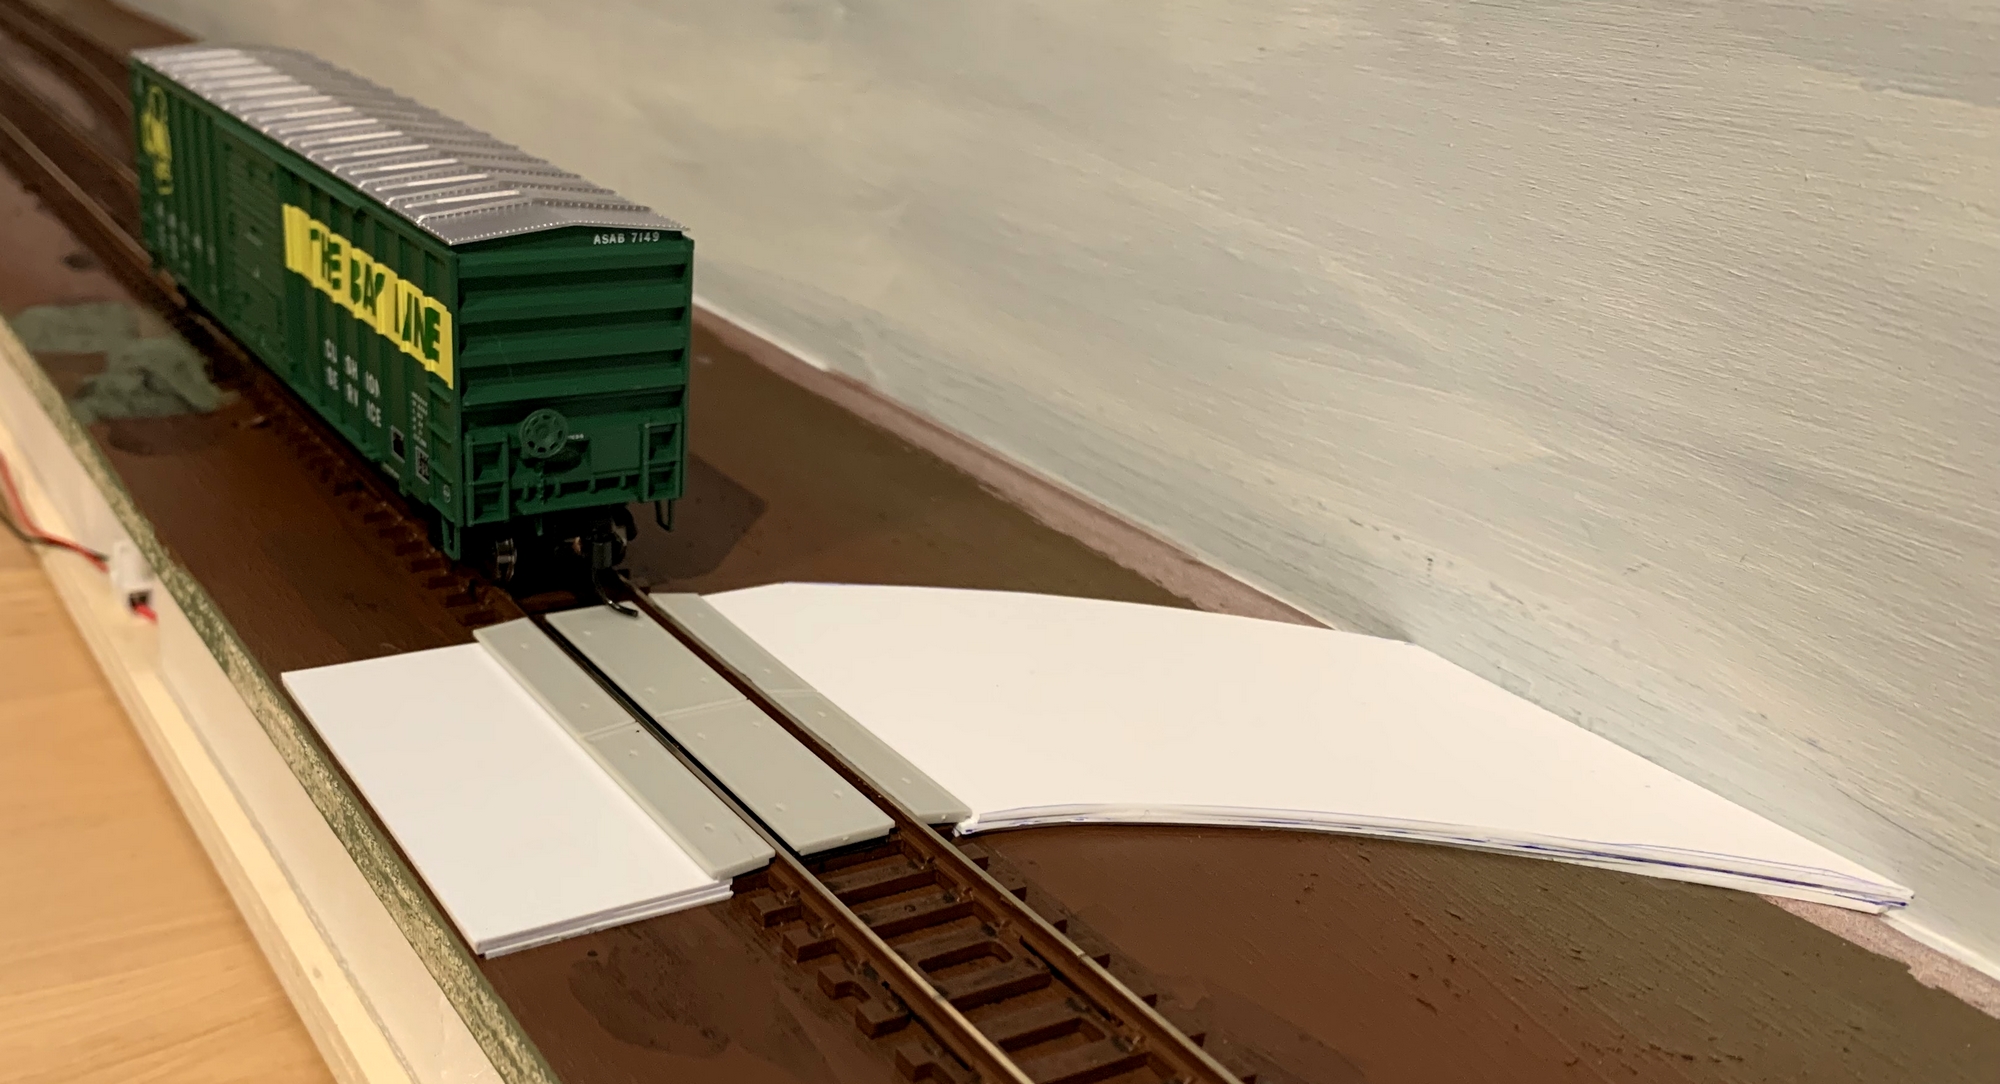
| For this layout, I made a point
of using as many items as possible that I already had
(i.e. purchased at one time "for later"), and
in my stash I found a number of concrete grade crossing
panels from BLMA (since taken over by Atlas). |
| |
|
|
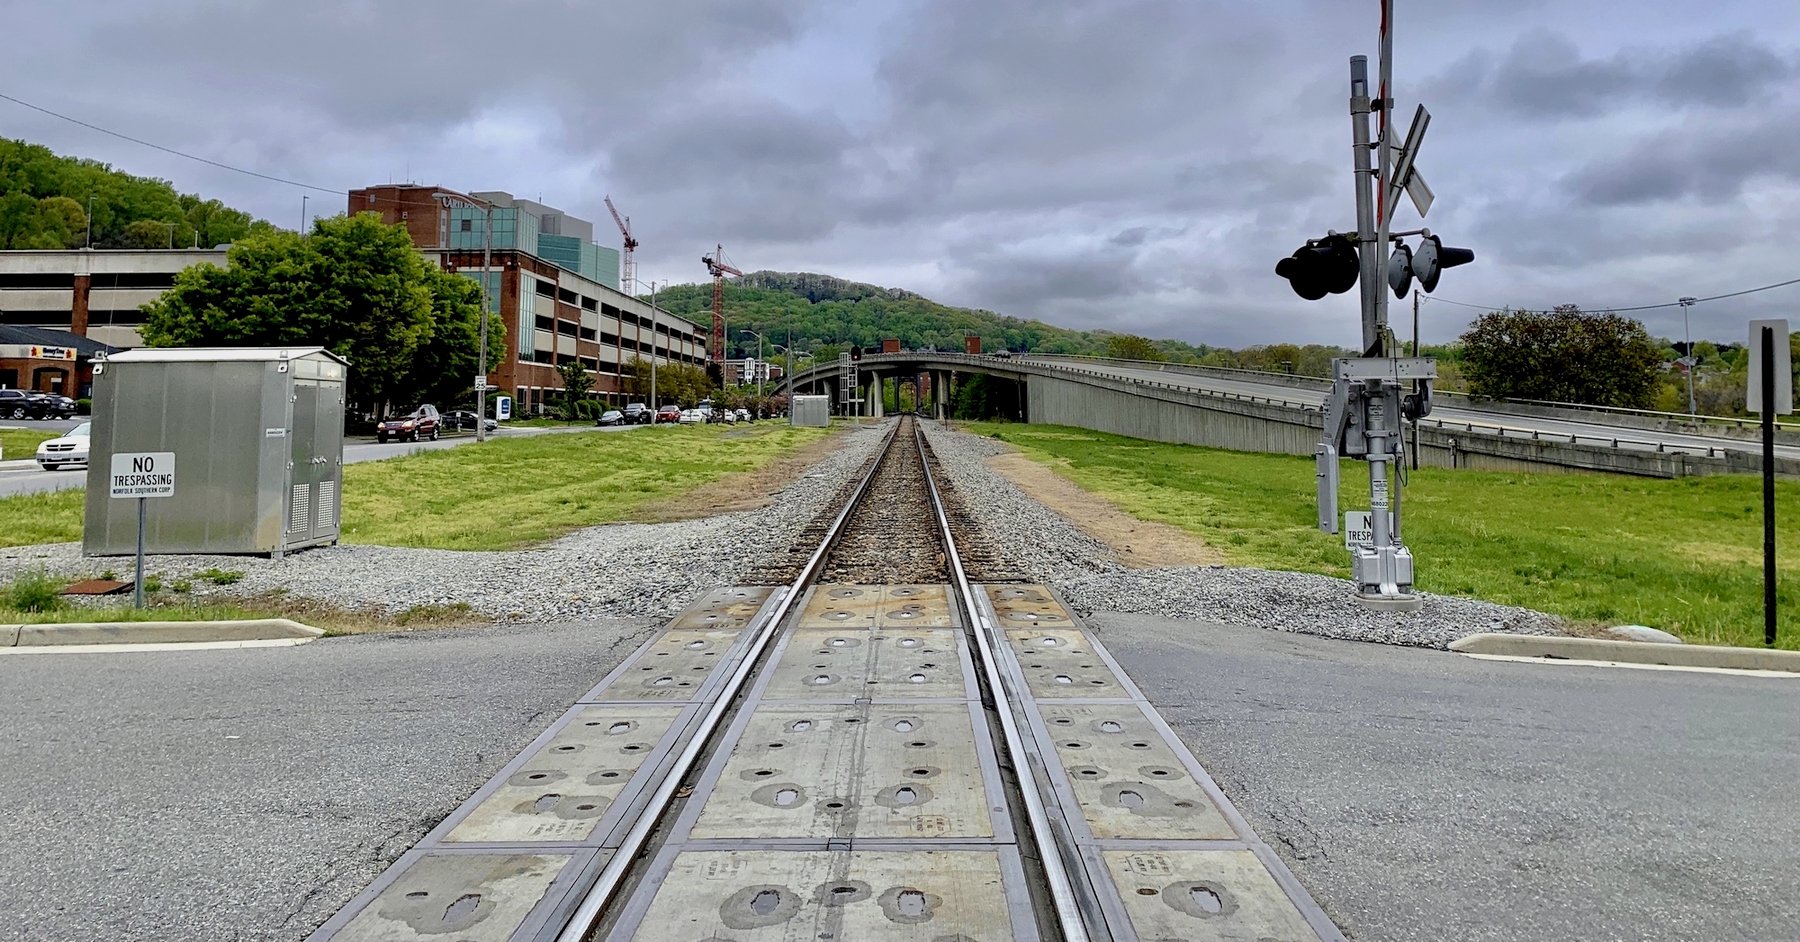
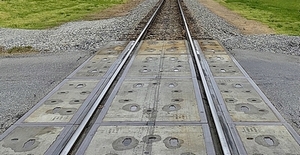
The nice thing about these was
that they not only fitted my very approximative
era very well (they have been used since the
1980s), but also happened to be the same type I
observed in April 2022, at a crossing over a
single Norfolk Southern track at Memorial
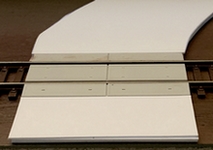
Hospital in Roanoke Va. The
BLMA model consists of two center panels and four
side panels, but given the restricted space I
opted to use only half of these components -
which I would clearly have to raise a bit since
the packaging stated that they would work from
code 60 upwards.
|
|
| |
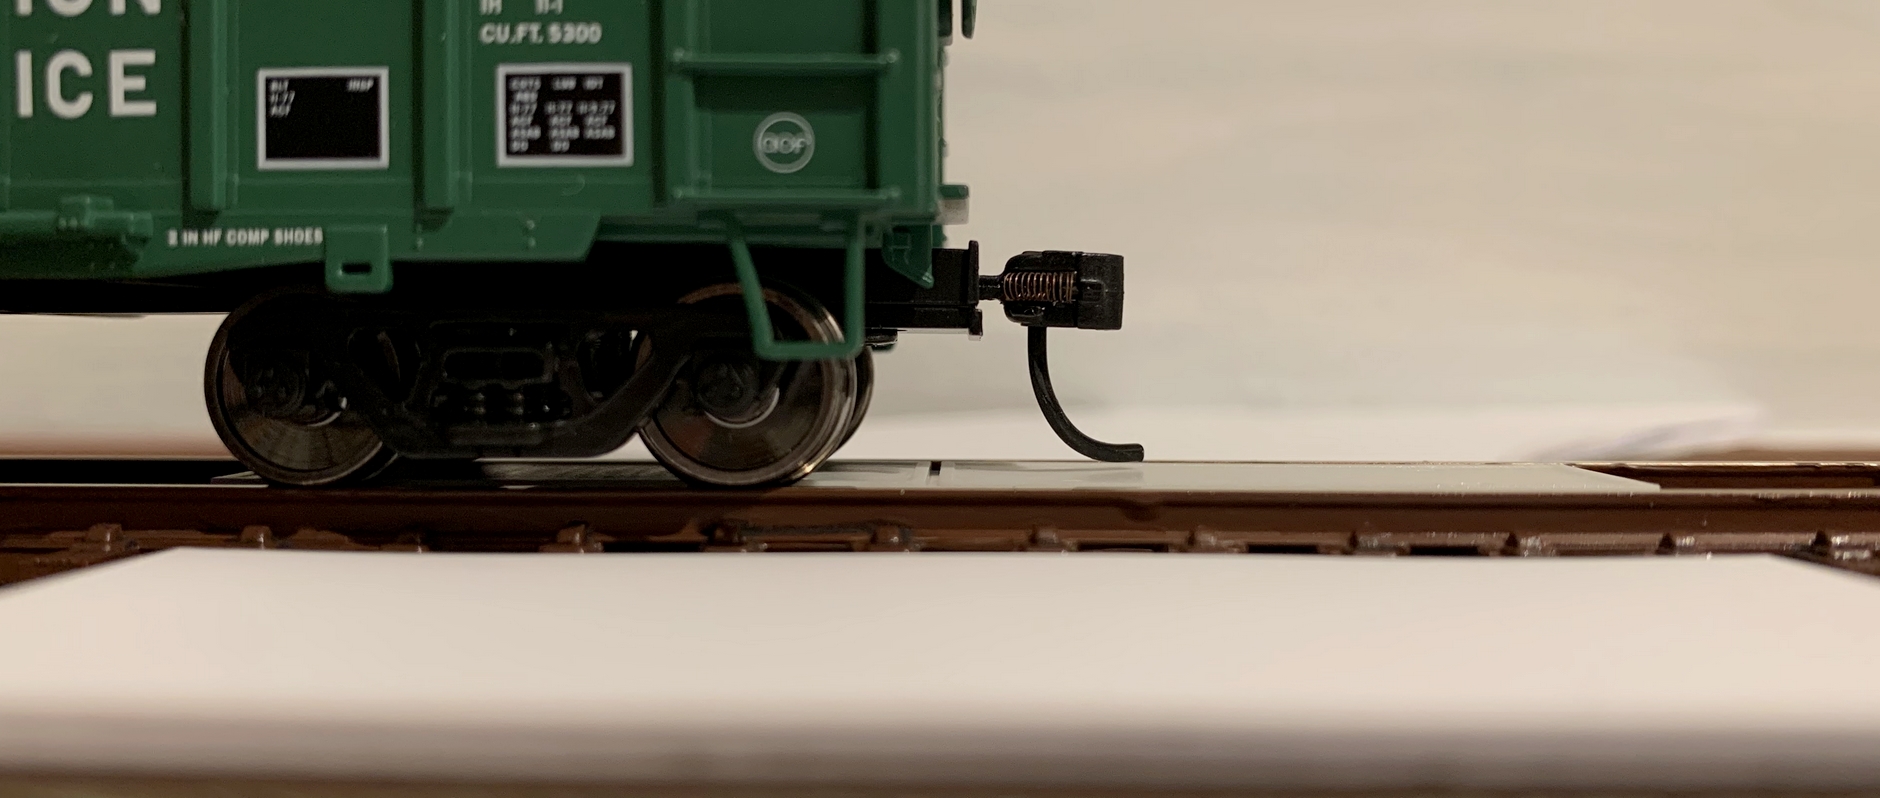
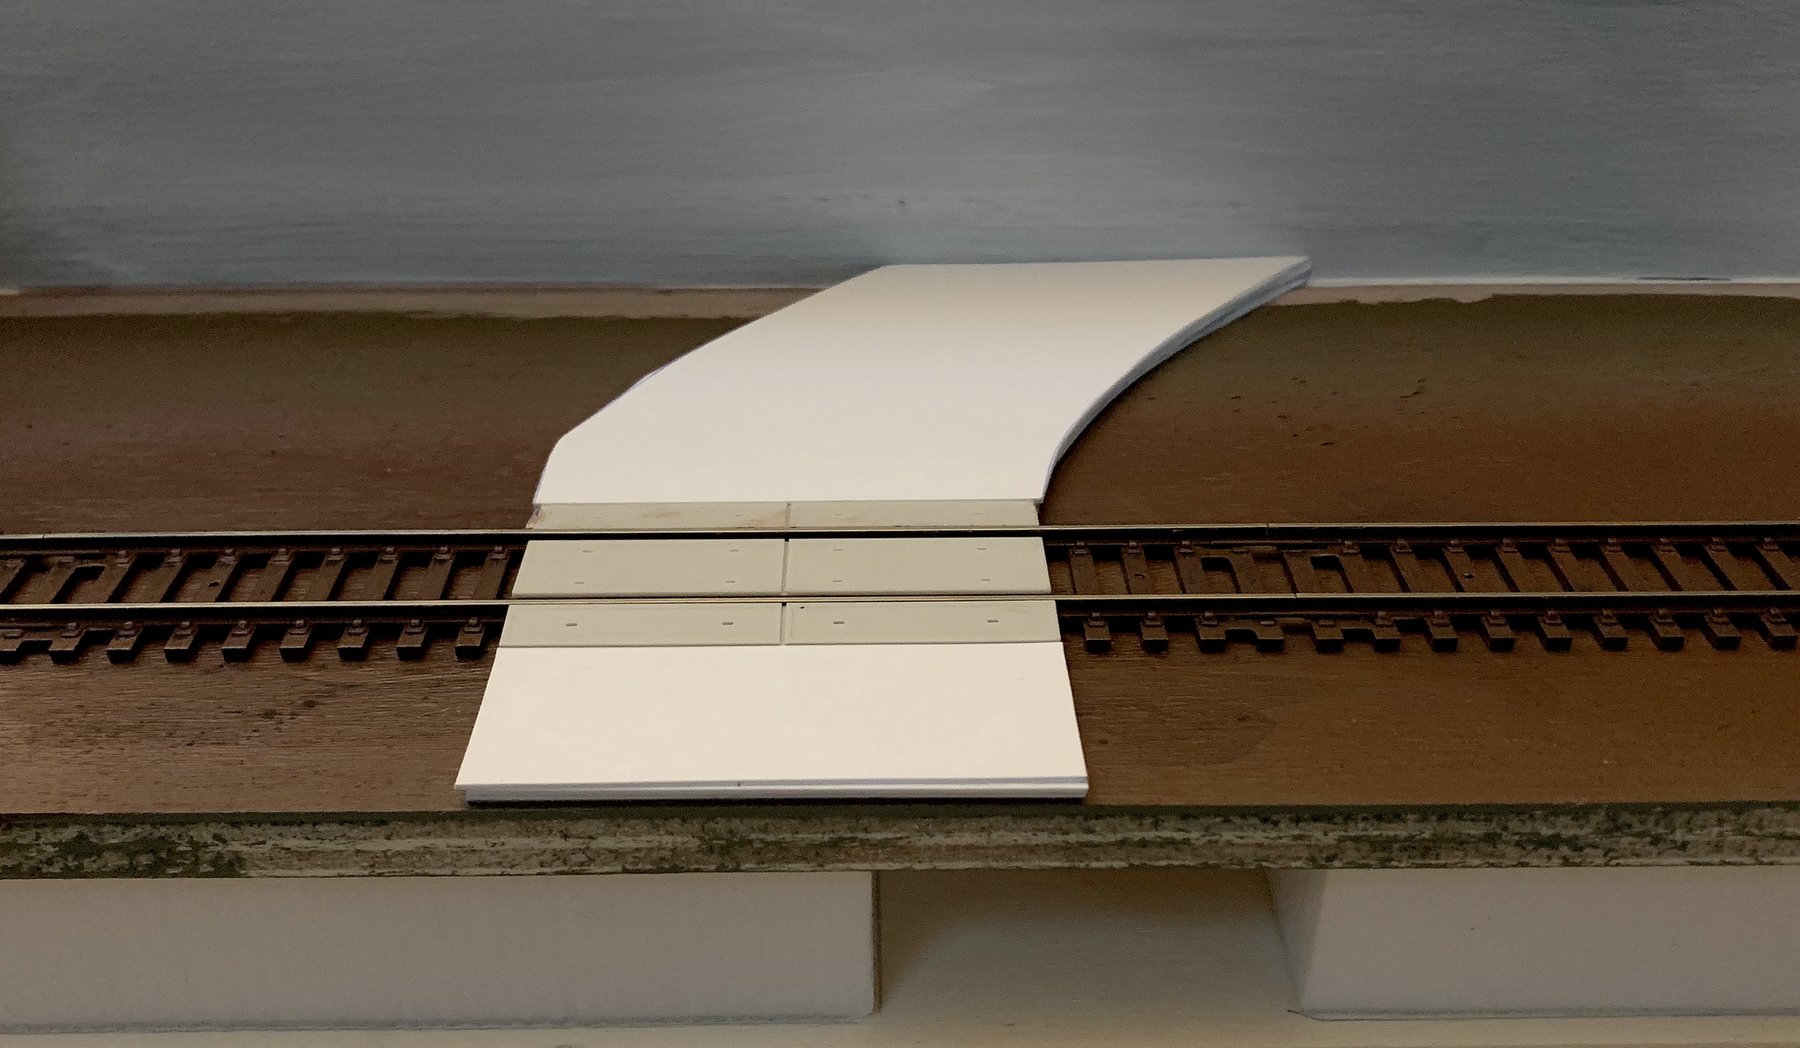
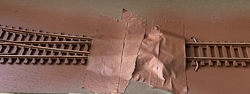
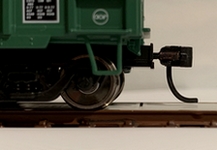
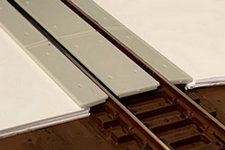
| The short stretch of road was
built up around the track using styrene sheets cut to
shape, and the BLMA panels brought closer to railhead
level using styrene shims. This is one of those occasions
where a delicate balance needs to be struck - setting the
panel in between the tracks too low will look terrible,
setting it too high will foul the couplers. As always
with clearances, it is best to use actual stock to make
sure things fit; in this case the central panel sits at a
visually realistic level - close, but not too close, for
couplers to clear it and run over it safely. |
| |
|
| |
 |
|
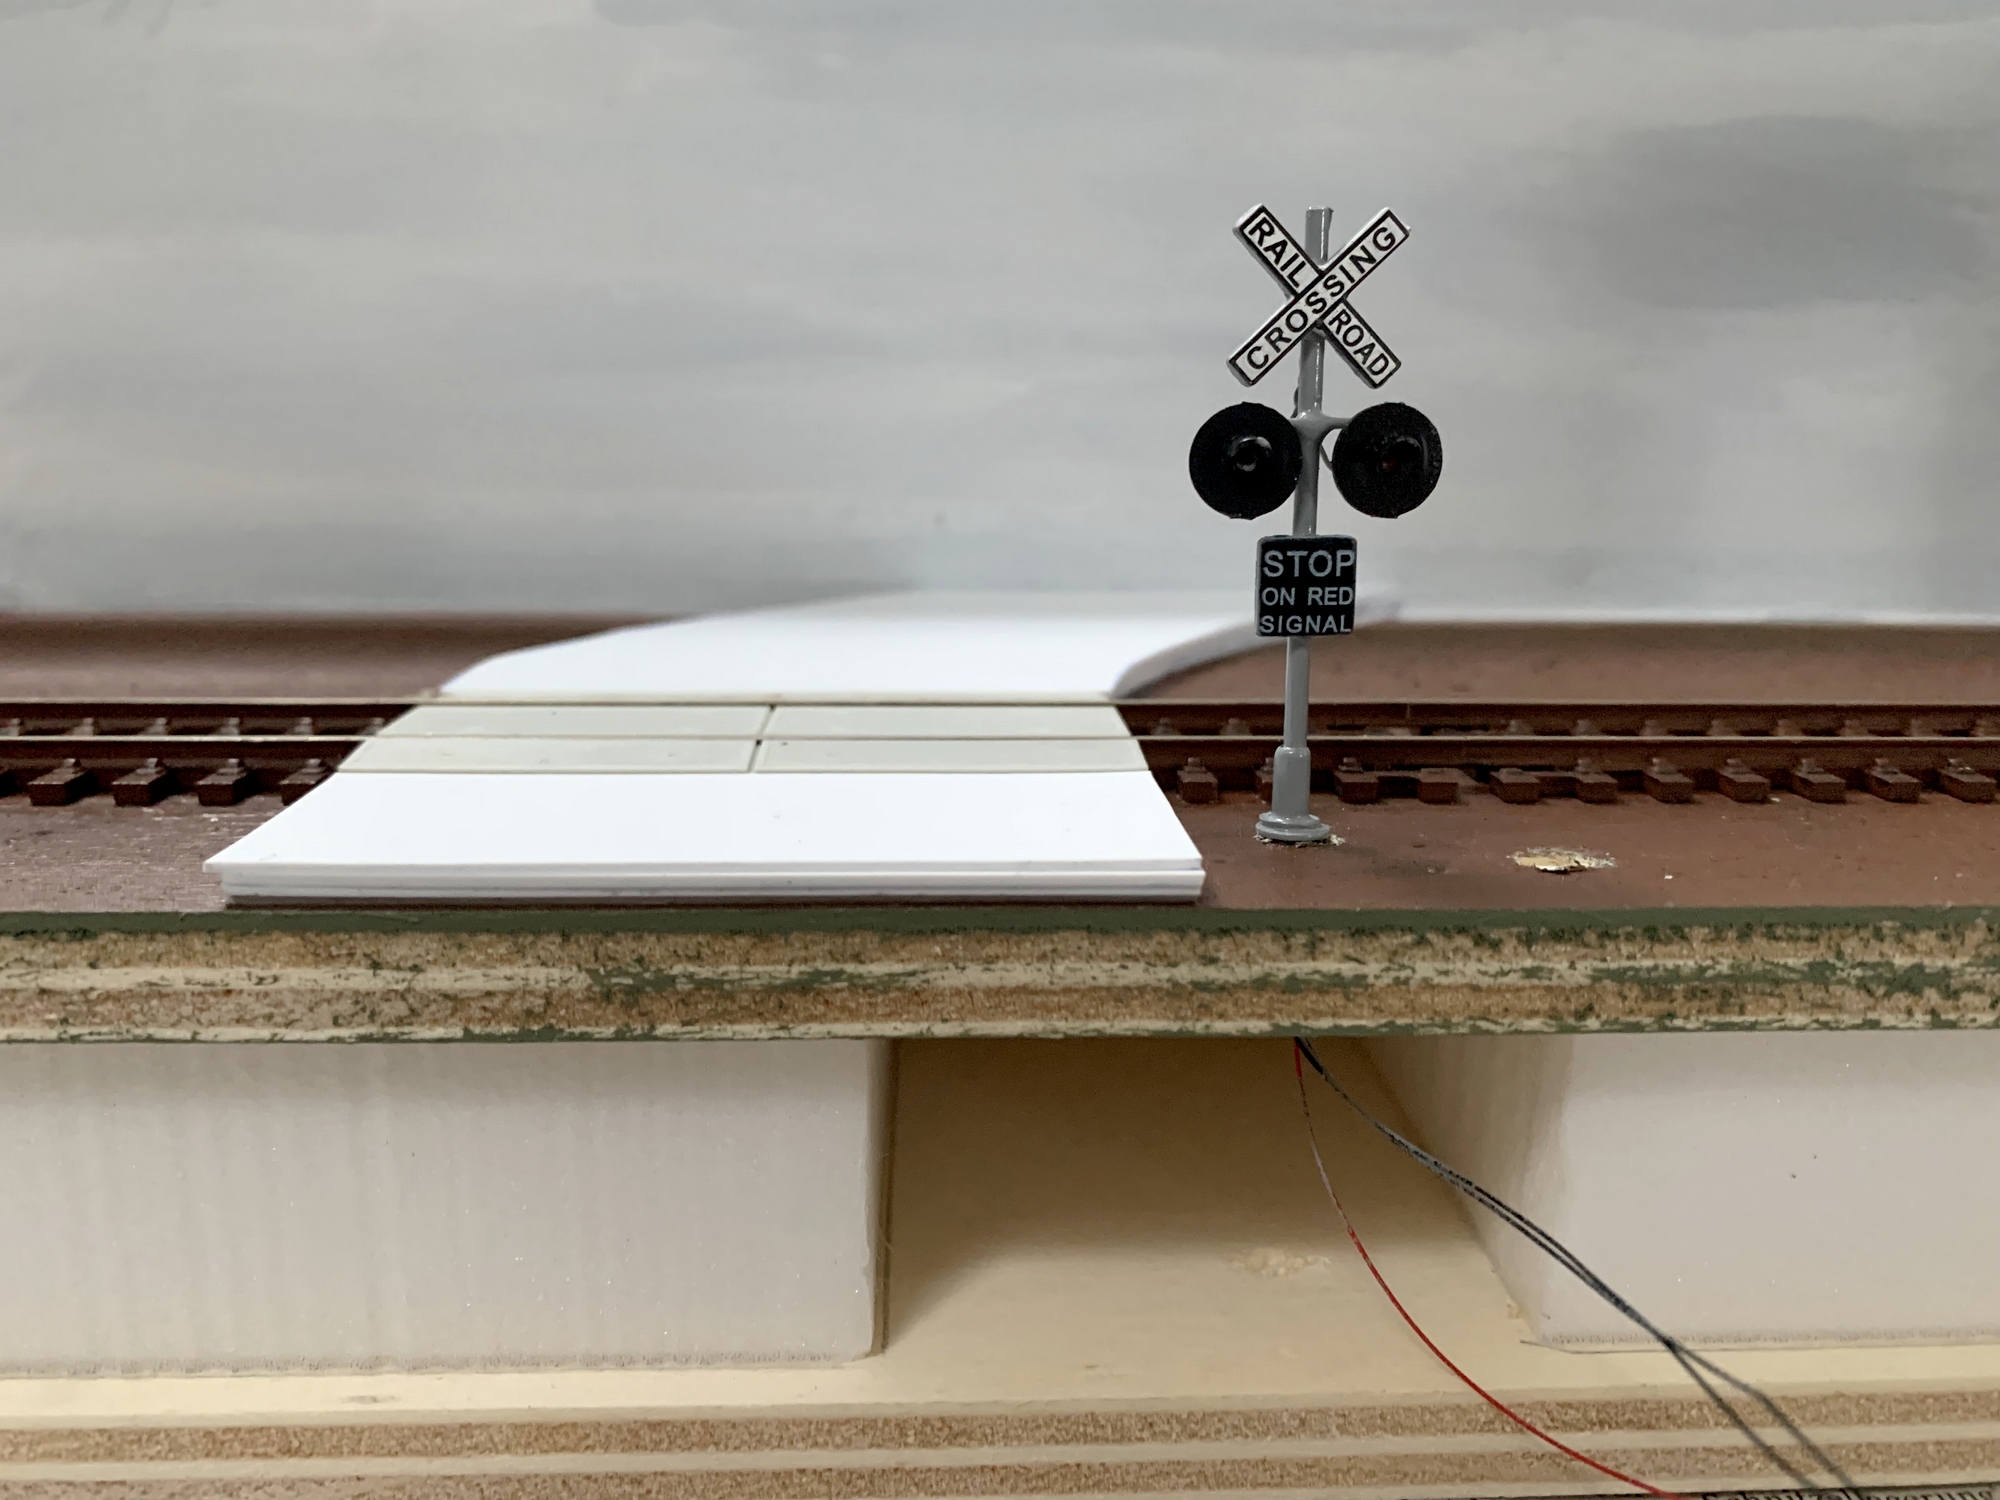
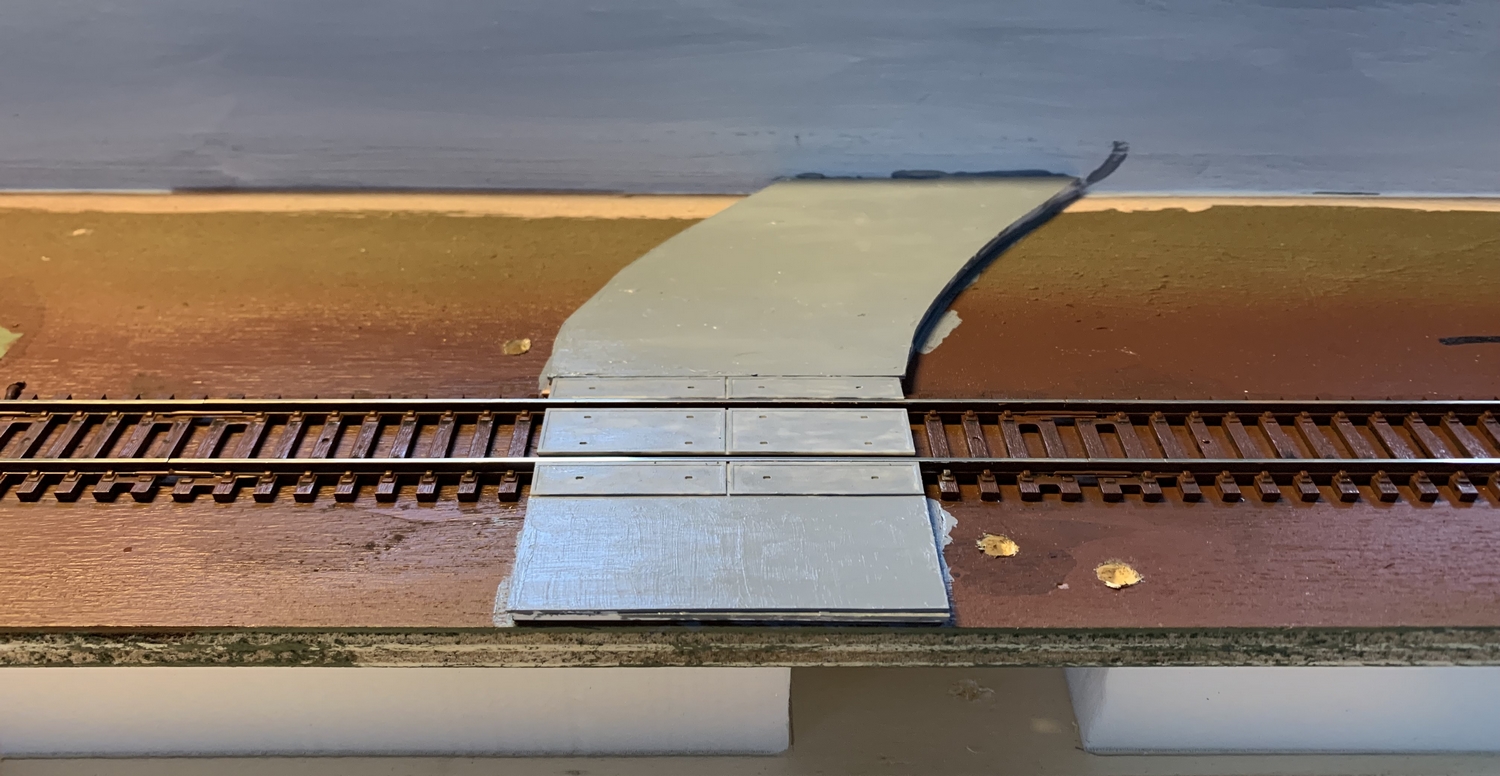
The crossing will be guarded by a
pair of signals with working lights, using a very
nice brass item bought on eBay. Holes to accomodate the
signals are drilled, and the road is given a coat
of medium-light grey; this will serve as the
basis for some overall as well as detail
weathering later on.
|
|
 |
|
| |
| |
THE
END (A.K.A. CONNECTION TO
THE REST OF THE WORLD)
|
|
|
|
|
|
| |
| In essence, Pecan Street is a
self-contained layout. And whilst there are no plans to
add any extension (such as connecting it to more modules)
for the foreseeable future, adding the possibility to do
so at this stage makes sense. |
| |
 |
|
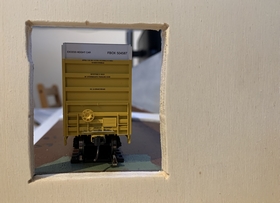
This also makes sense since there
is very little additional work involved in simply
cutting an opening into the sideframe (once again
making sure that the tallest and widest item of
rolling stock in use will pass through without
problems). On the layout
itself, a scenic break is needed to disguise the
actual end of the track regardless of whether it
can be extended beyond the baseboard frame or
not.
|
|
 |
|
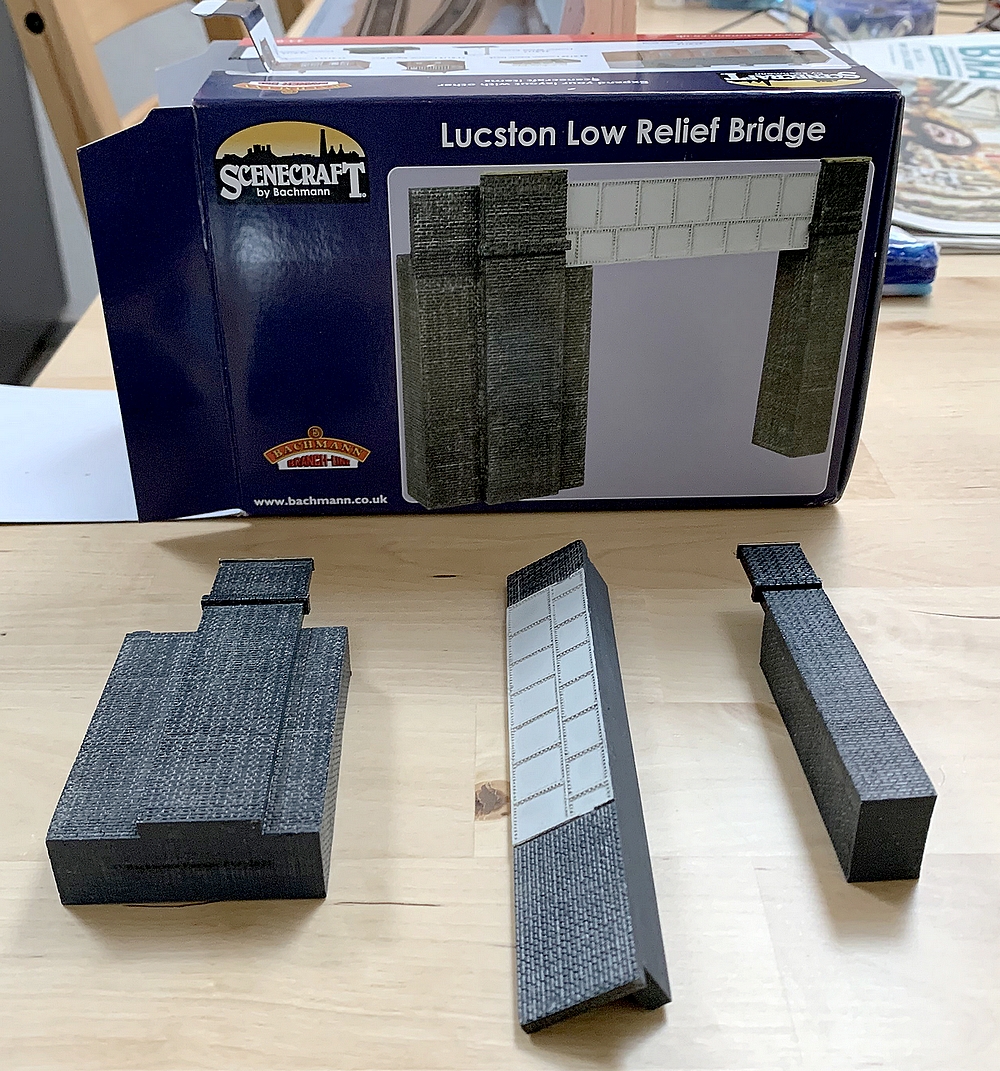
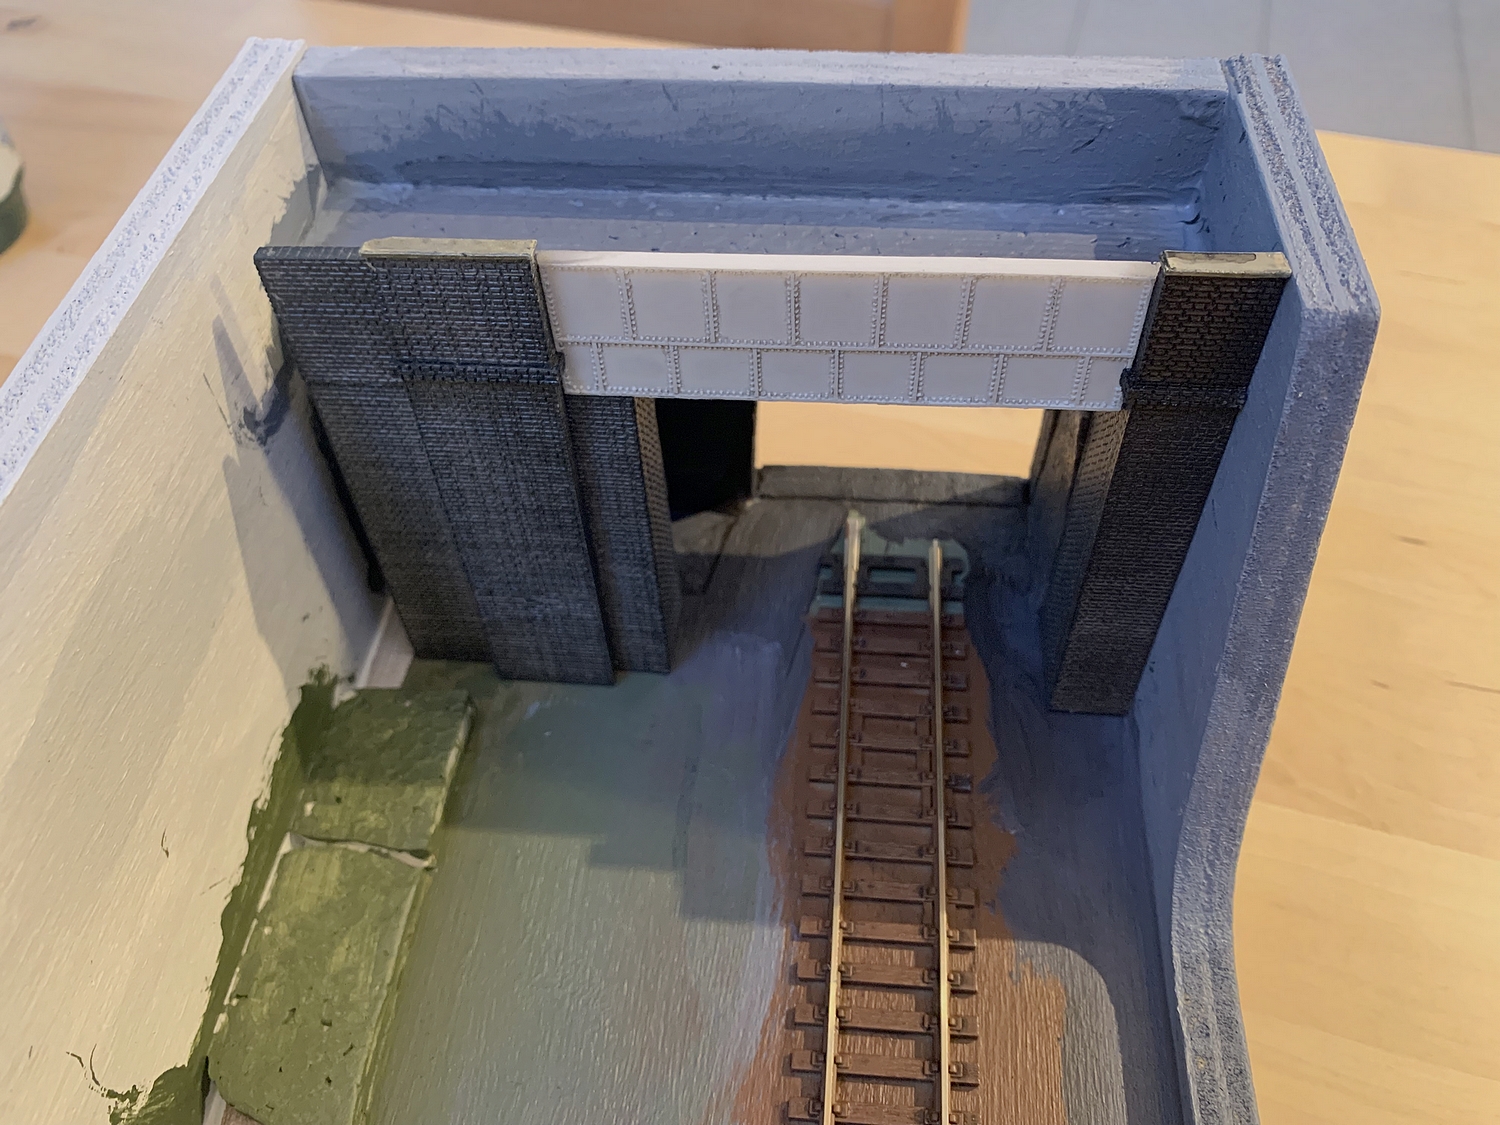
| |
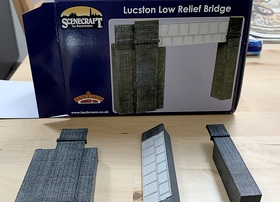
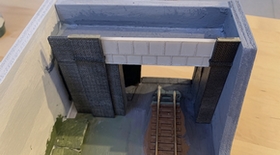
| A chance discovery of a 2022
model of a low relief bridge from the Bachmann (UK) range
of "Scenecraft" resin models provided just the
kind of "scenic disguise" I was looking for.
Although intended for British layouts, the design seemed
a good fit for a layout based on an East Coast location. |
| |
 |
|
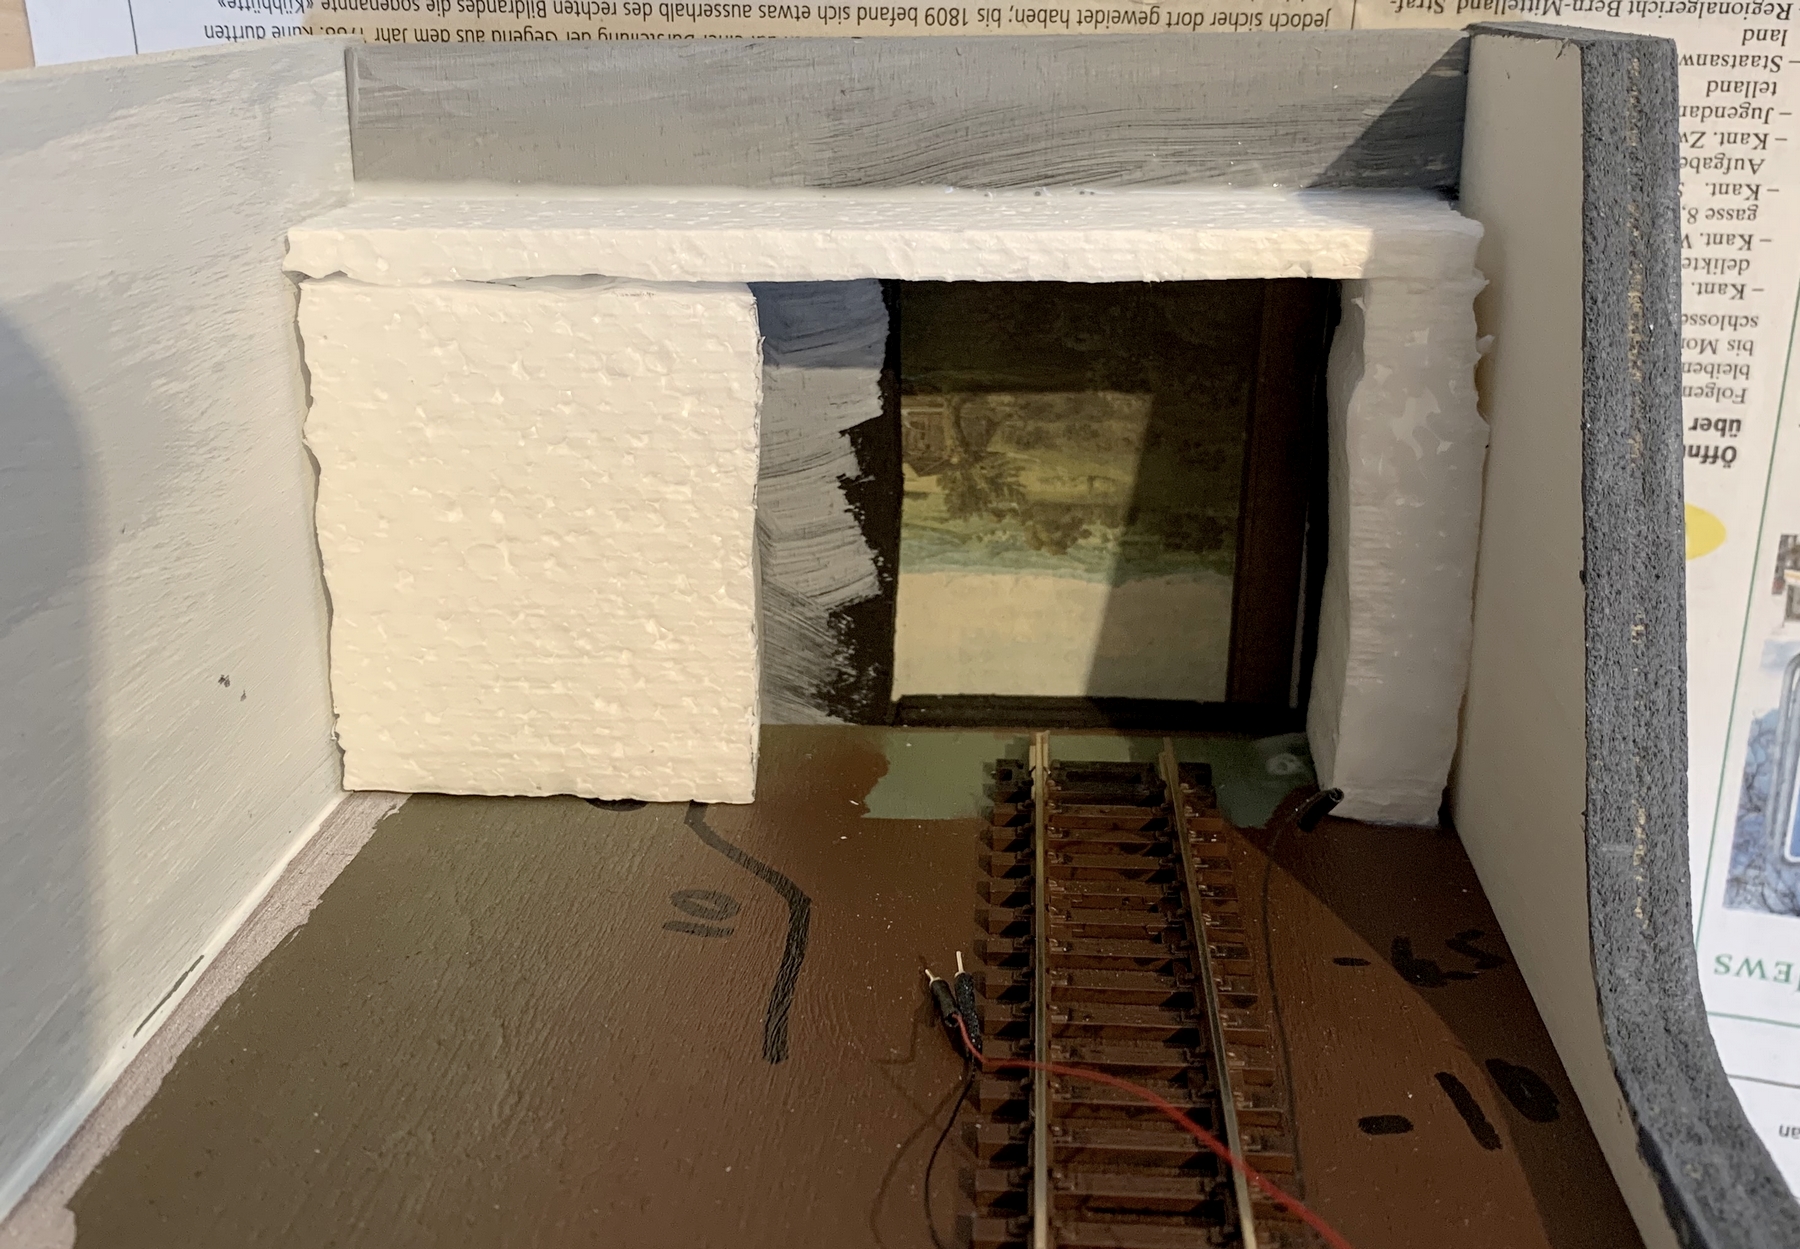
In order to work visually the
depth of this very low relief model had to be
increased quite a bit. This
was achieved by adding a structure made up of
three pieces of styrofoam cut to size. The result
in itself is a very crude contraption, but since
the model covers it up, this is all it takes.
|
|
 |
|
| |
| Black colour on the inside
disguises the styrofoam and creates enough of a
"dark passageway" feel to make it work as a
scenic break - one of many techniques I like to use that
originally stem from theatrical
stage design. For the moment, that was it; the
obvious rough bits and edges would be patched up and
hidden in scenery after the adjacent scene of the track
crossing had been worked on. |
| |
| |
STAGE
TRICK: THE CROSSING
|
|
|
|
|
|
| |
| The narrow nature of Pecan Street poses a number of
challenges, some of which have already been mentioned.
Most of those boil down to the fact that there simply
isn't a lot of room for scenery - and the grade crossing
is certainly one of the areas on the layout where this is
felt the most. I have also
mentioned how, in such cases, I like to fall back on
Frank Ellison's modelling approach involving theatrical
stage design - and this is perhaps also most apparent
in how the grade crossing is set up on Pecan Street.
|
| |
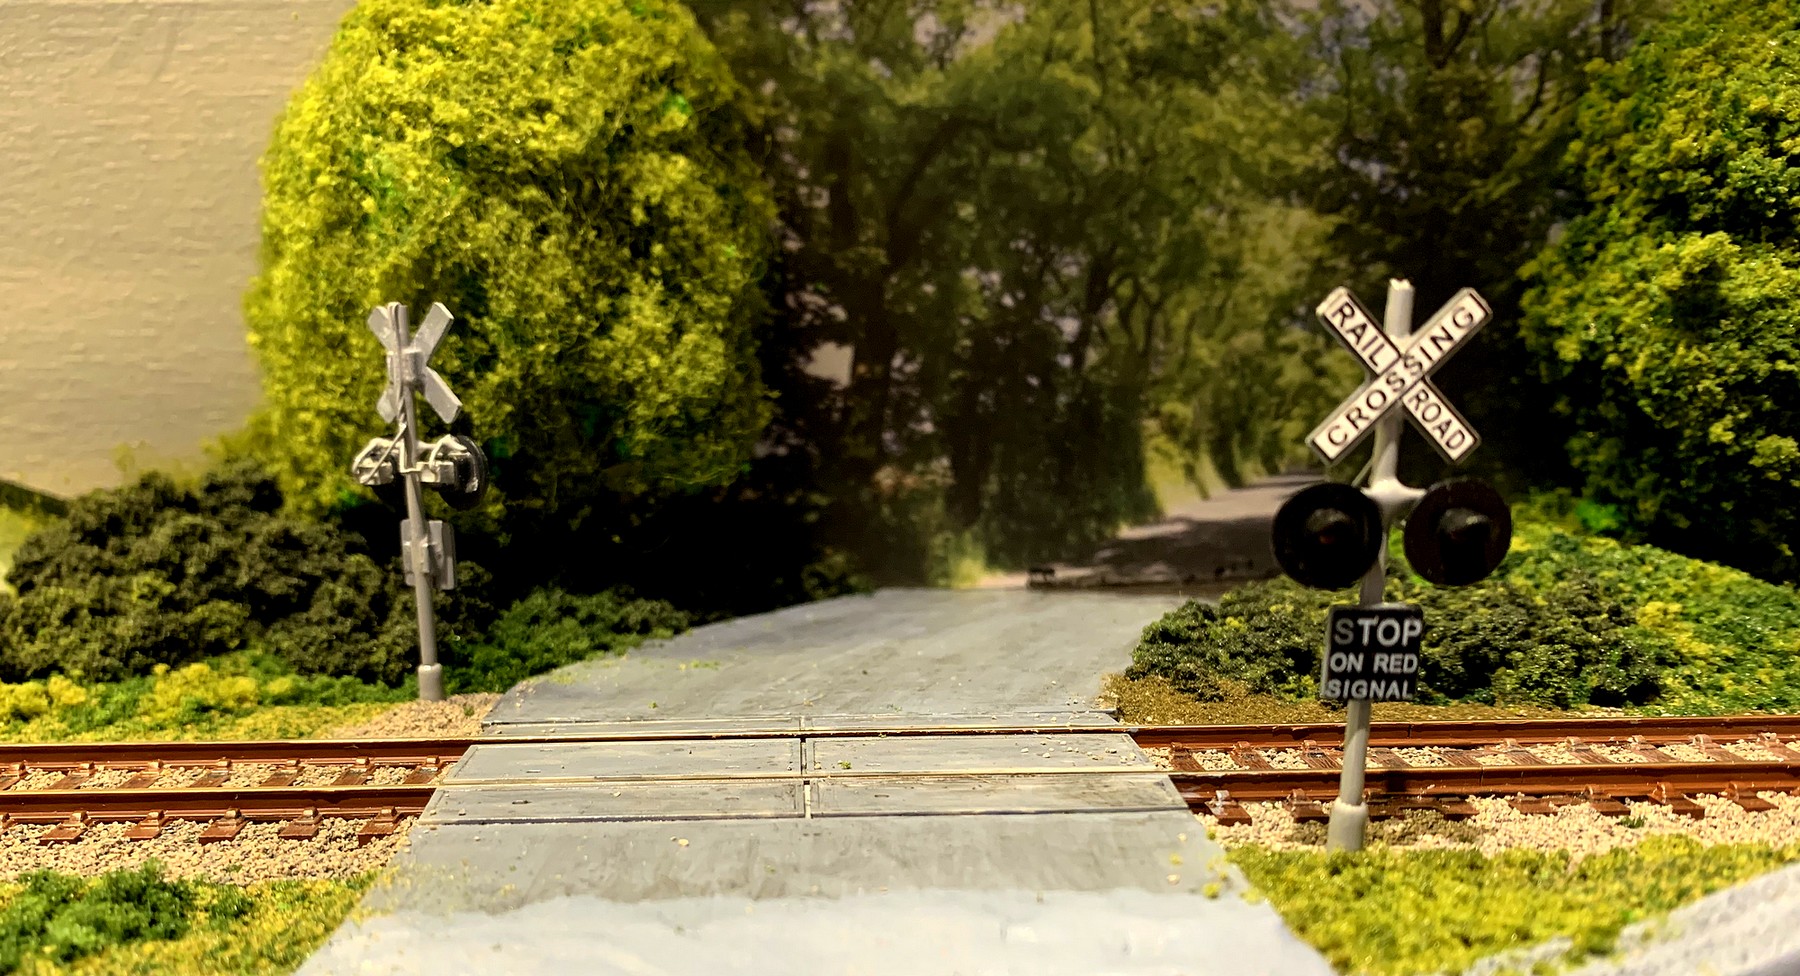
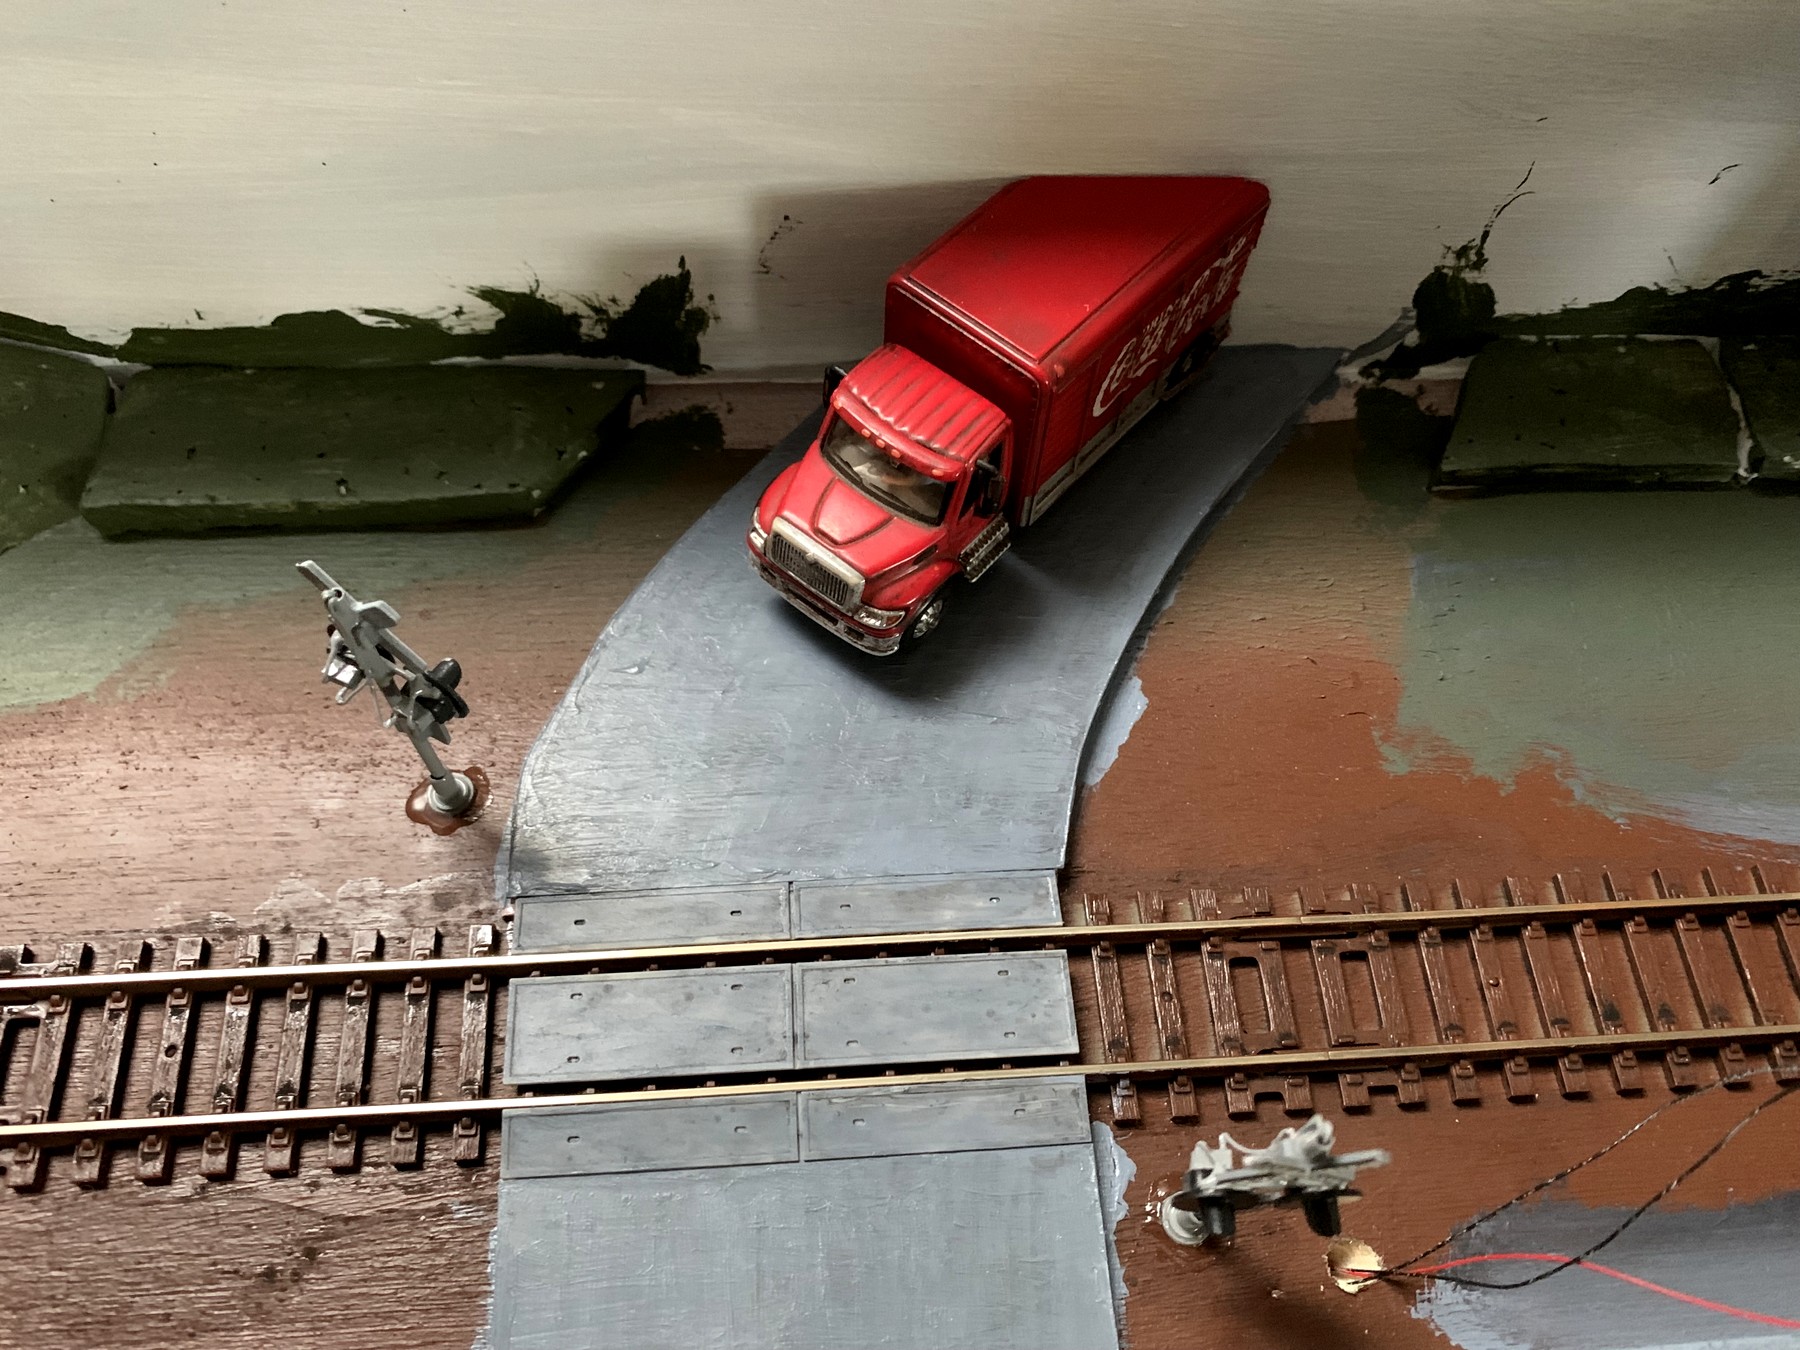
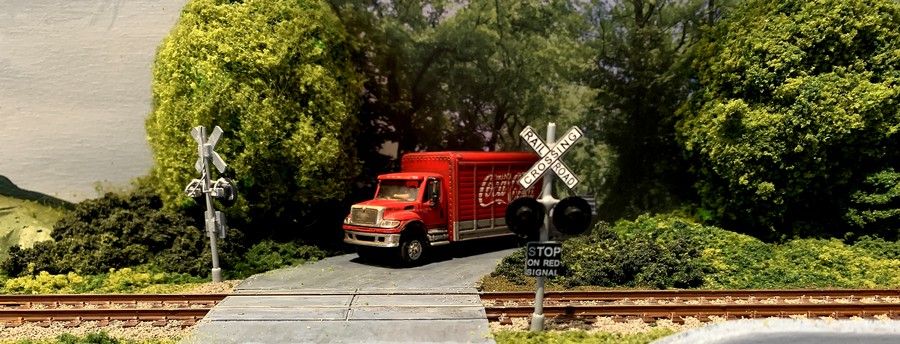
| In its raw modelling state, the
road crossing the tracks curves away slightly in
order to provide at least some illusion that it
doesn't just hit the backdrop in a head-on
collision, but it still clearly ends right there,
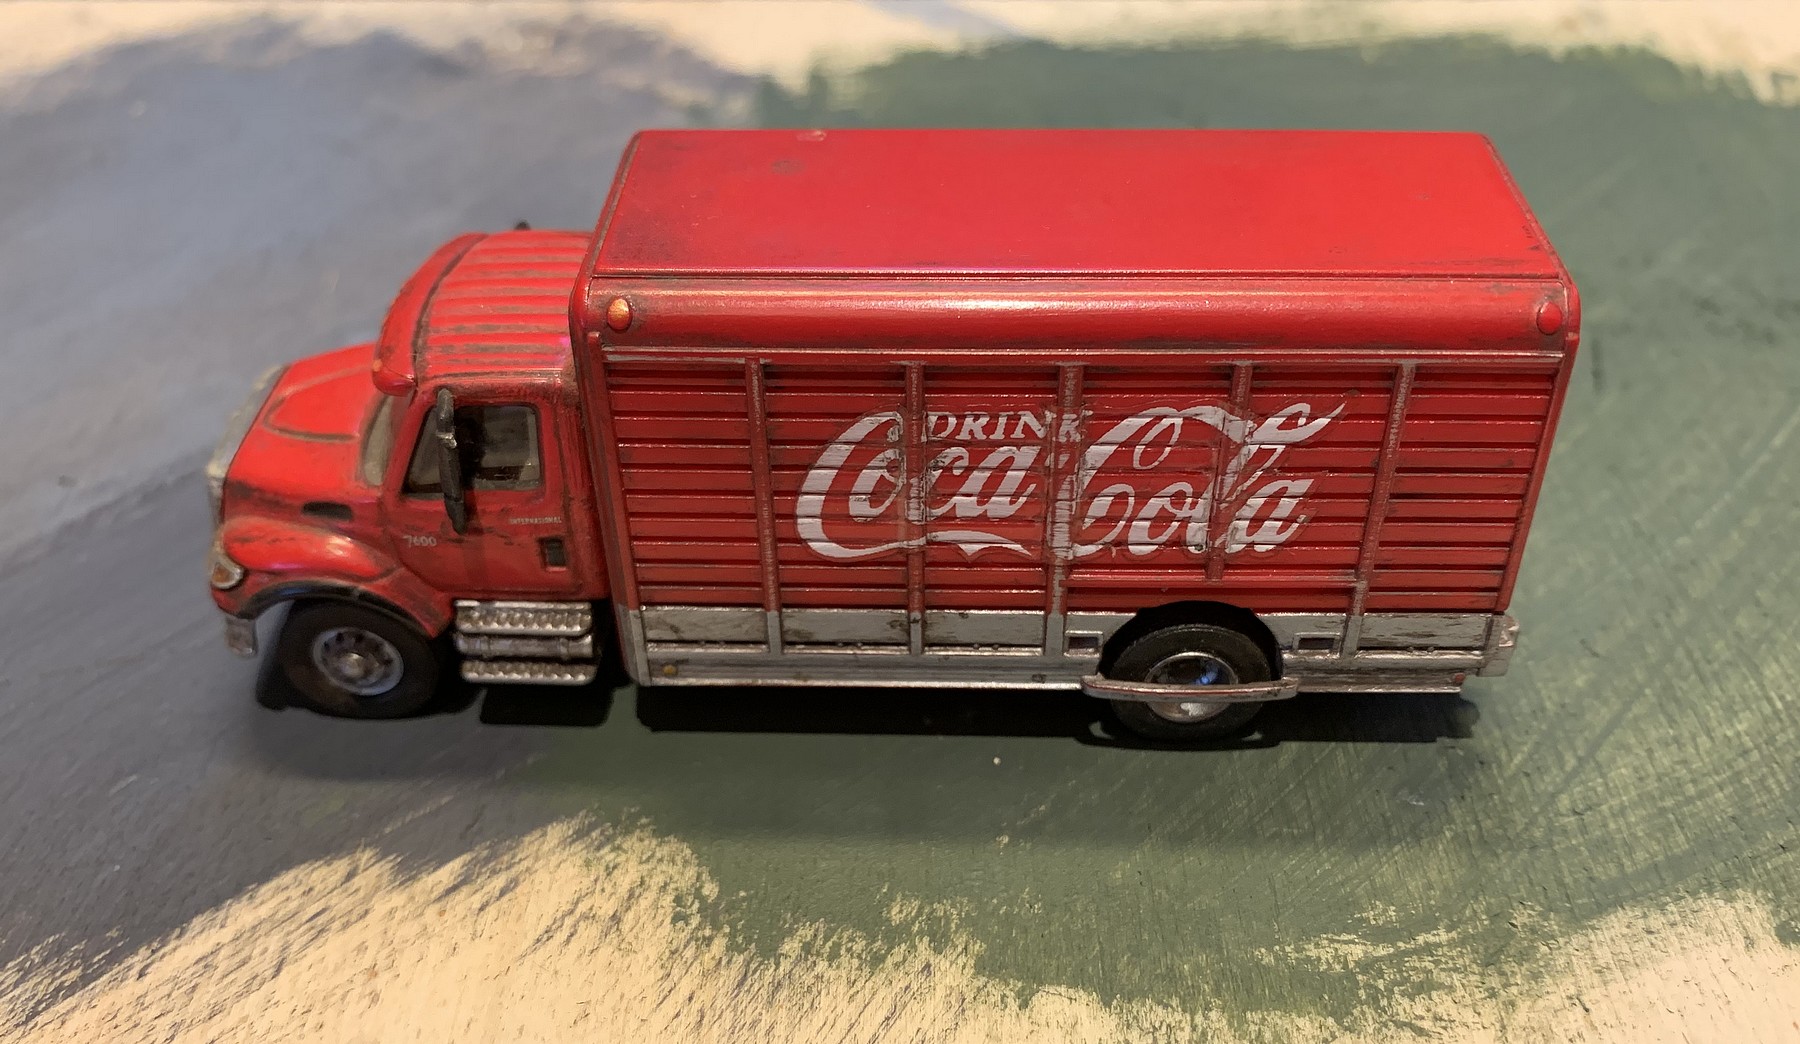
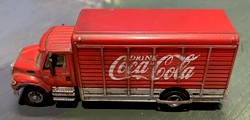
a mere 3.5 inches (9 cm) away from the track. In order to conceal this, a
number of steps would be necessary to create an
illusion of depth, and one central prop was a
rather nice model of a truck, manufactured by a
company named Boley, that I had bought cheaply
and put aside years ago for "some future
project". Now, it would literally take
center stage.
|
|
 |
|
| |
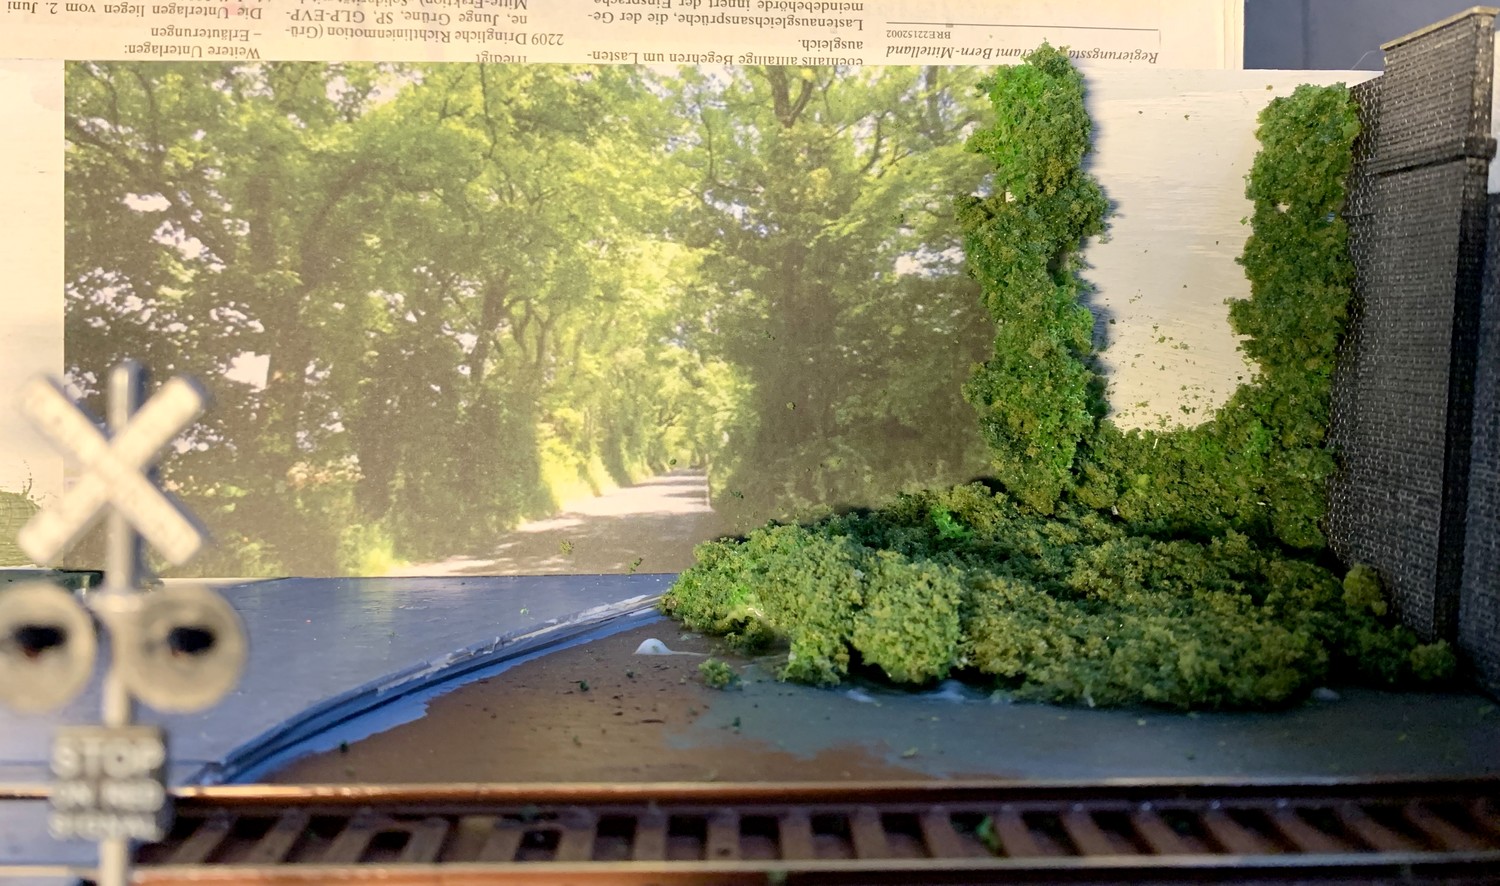
| But before that could happen, the stage itself had to
be set. The idea was to add a flat photographic backscene
to the backdrop, and then add some semi-relief props to
make the scene look threedimensional and create the
impression that the road crossing the tracks actually
went somewhere in the background. After
finding a suitable royalty-free image on the web, this
was reduced to the required size, cut out and glued onto
sturdy 2mm cardboard, and given a protective layer of
matt varnish. This was then in turn glued to the
backdrop, and a first batch of scenic material applied to
cover both the edge of the card and fill in a gap between
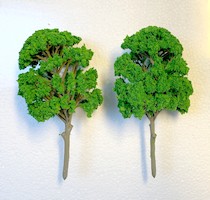
the overbridge and the backdrop. For the more
three-dimensional props, two large scenic trees were cut
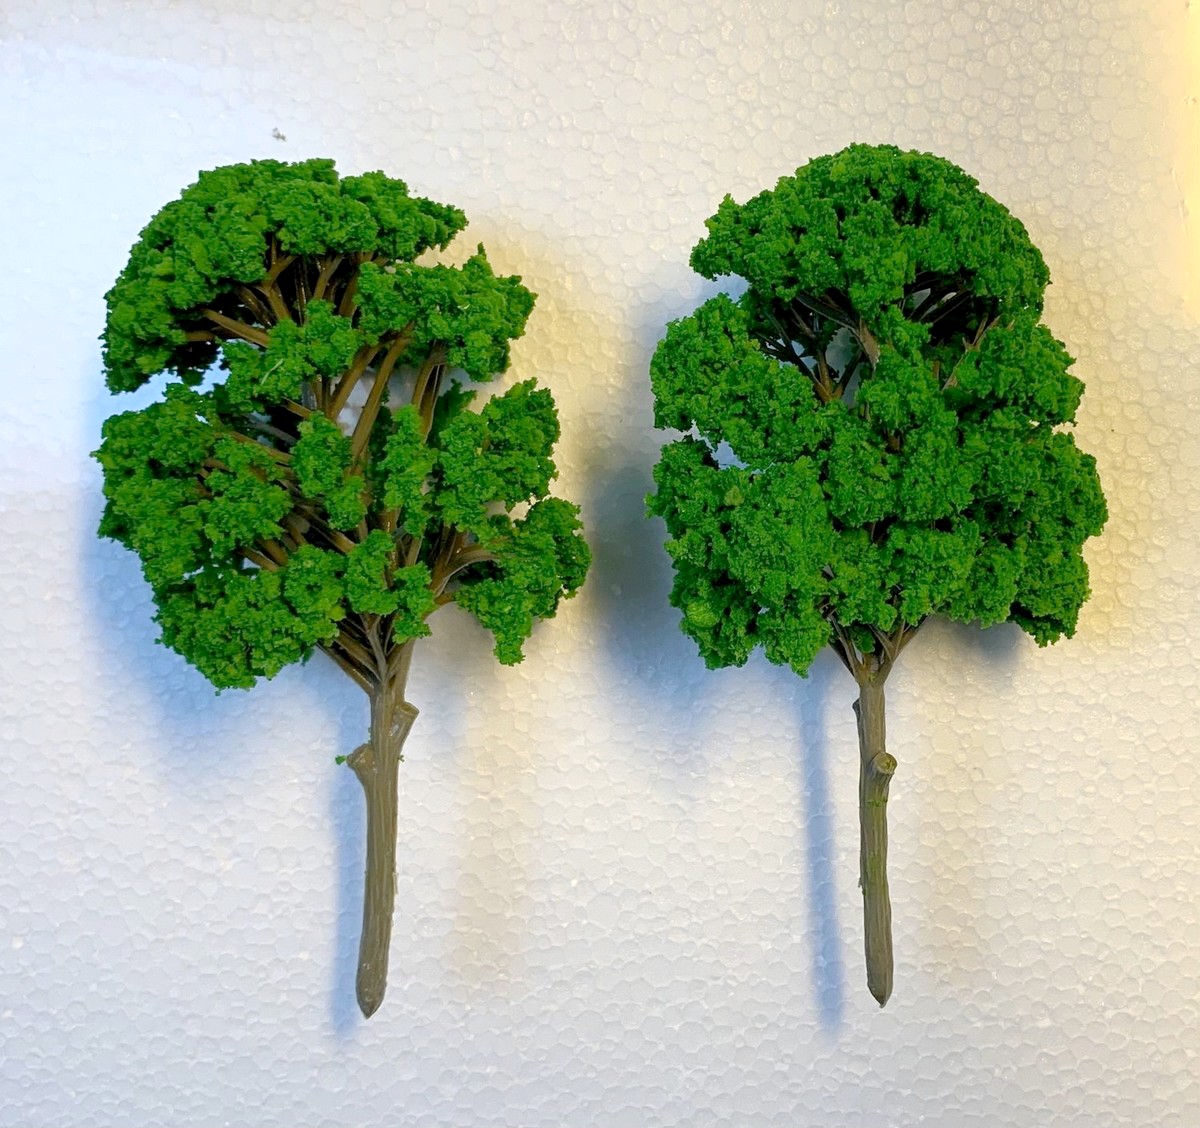
in half and then glued into place.
|
| |
|
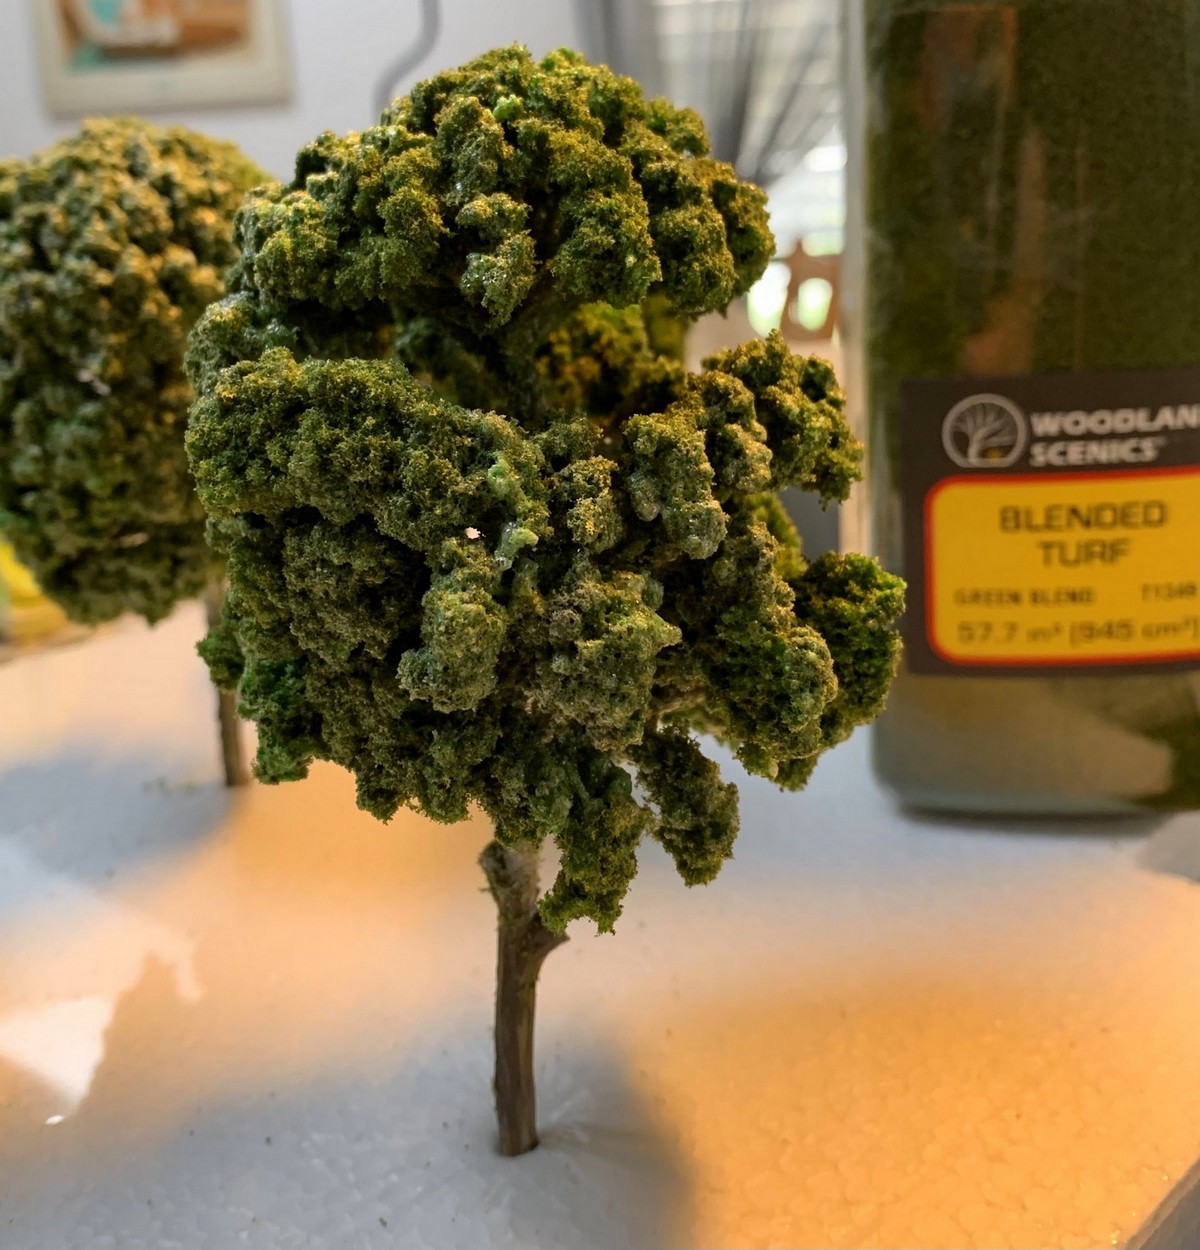
| The trees
came from a range that can generally be
termed "cheap model trees from China
sold on eBay". They are somewhat
infamous for their overall identical
appearance (which of course explains the
cheap price) but also rather popular,
since it is fairly easy to improve their
looks. Usually the
excuse for giving these a go is the sheer
number of trees needed and the cost
involved, but I still happened to have
these lying around after a curiosity
purchase and successfully (I felt)
"pimping" them with Woodland
Scenics foliage for use on Little
Bazeley.
|
|
  |
|
|
| |
|
|
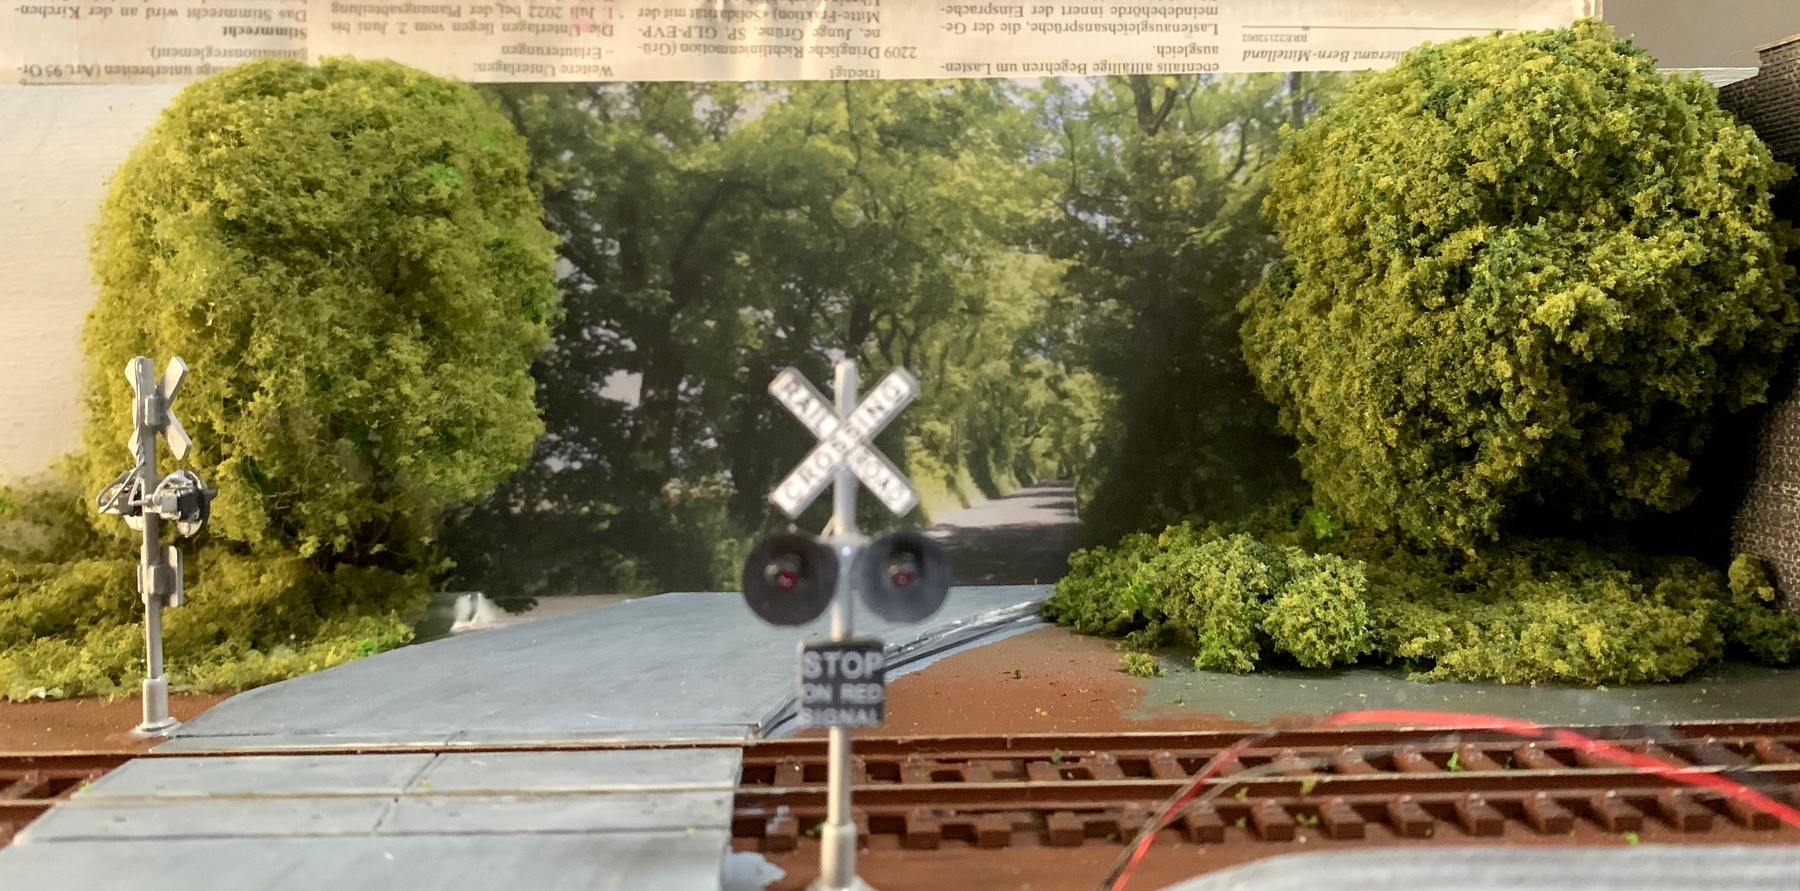
Building up more layers of
scenery (mixing Woodland Scenics fine and coarse
turf, foliage and bushes of various colour
shades) allows the foreground to blend with the
flat backscene, further enhanced by some
strategic "shadows". As on a theatrical
stage, it is all aimed at deceiving the onlooker
into believing that the scene has more depth and
reaches further back than it actually does. The scene could be left this
way, but in order to fool even a lingering
observer a bit longer, the aforementioned truck
is placed as a view block which also deflects
attention from the flat backdrop to an actual
three-dimensional prop in the foreground.
|
|
| |
 |
| |
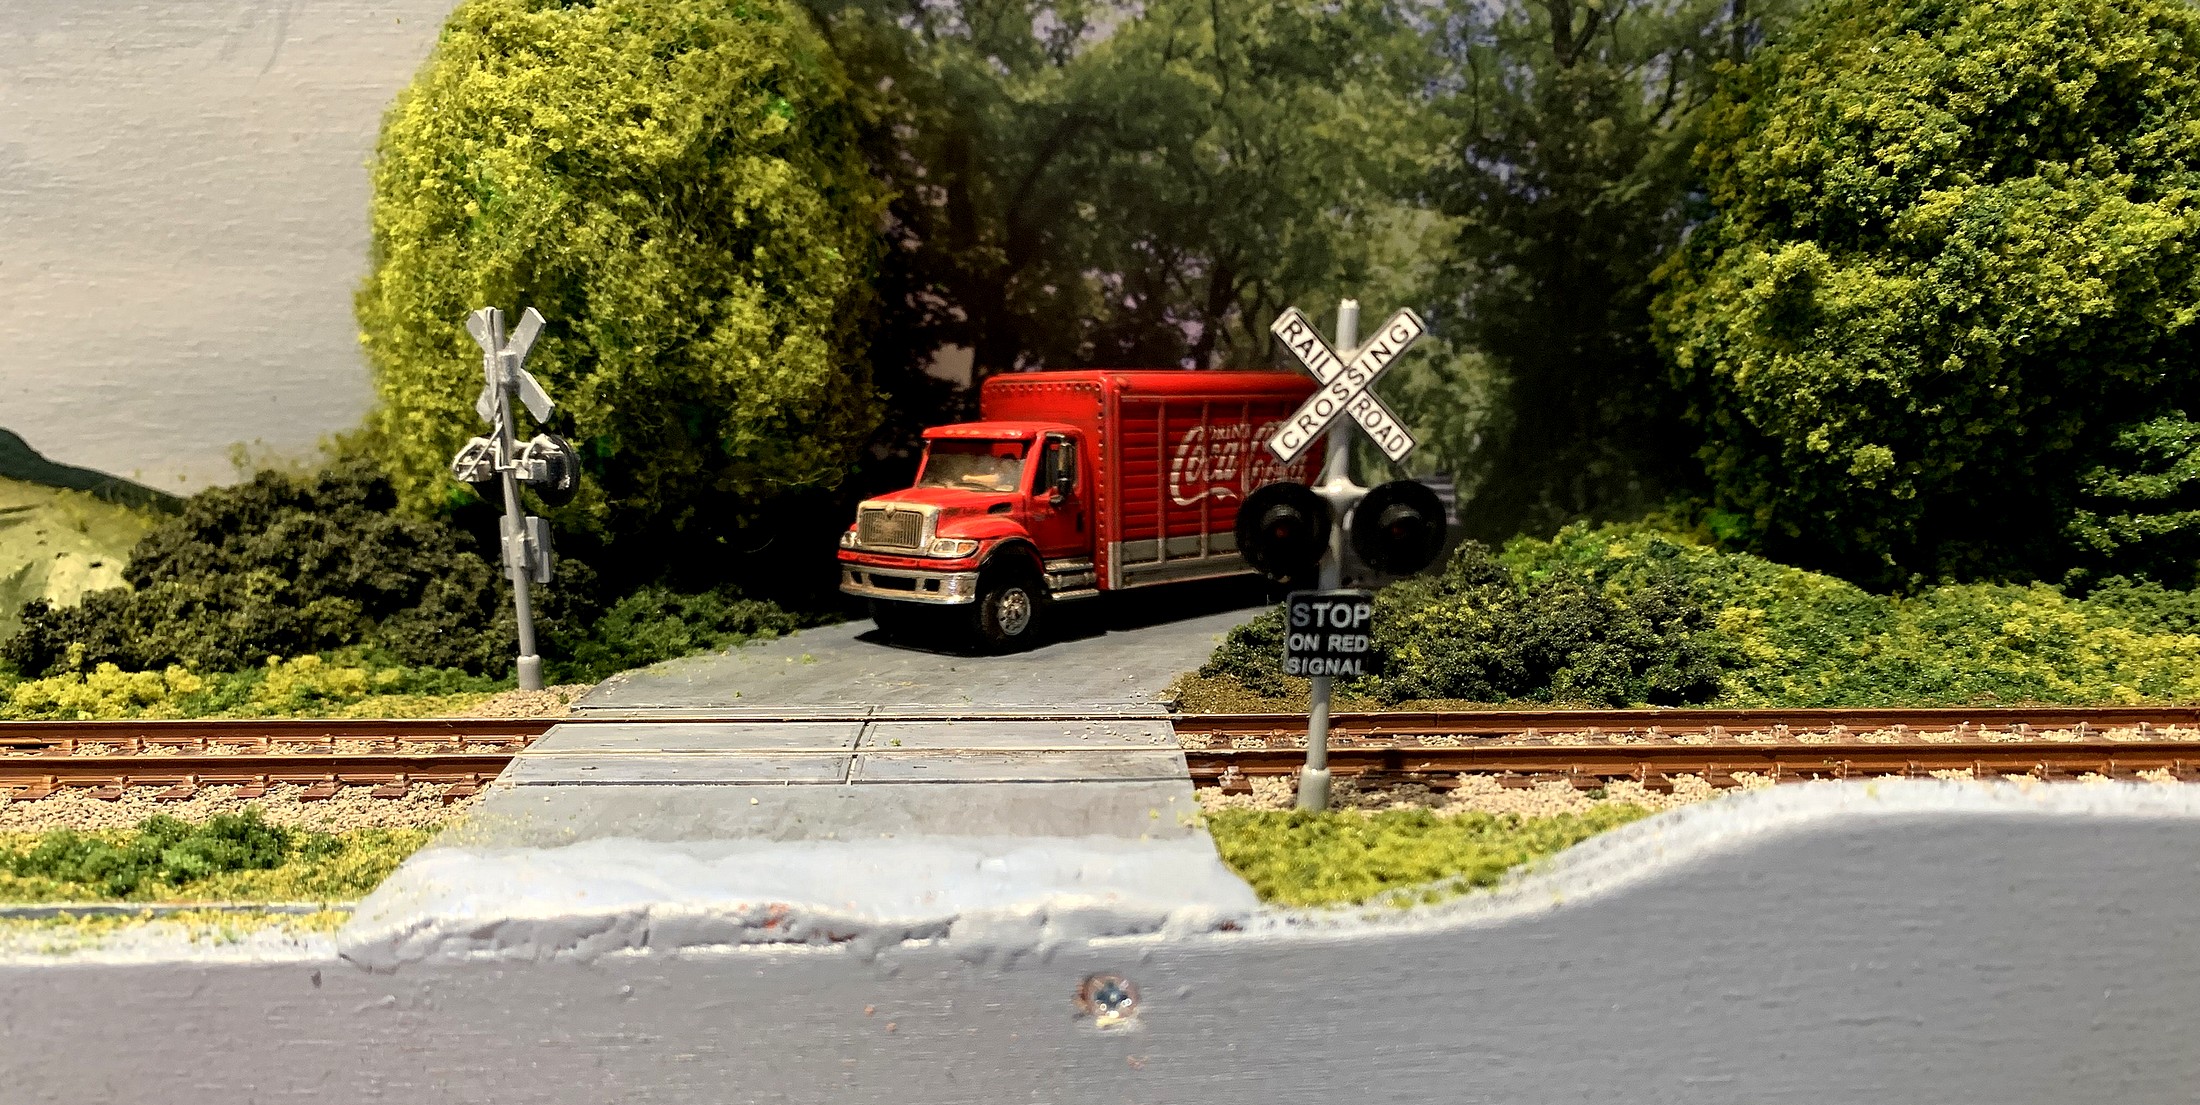
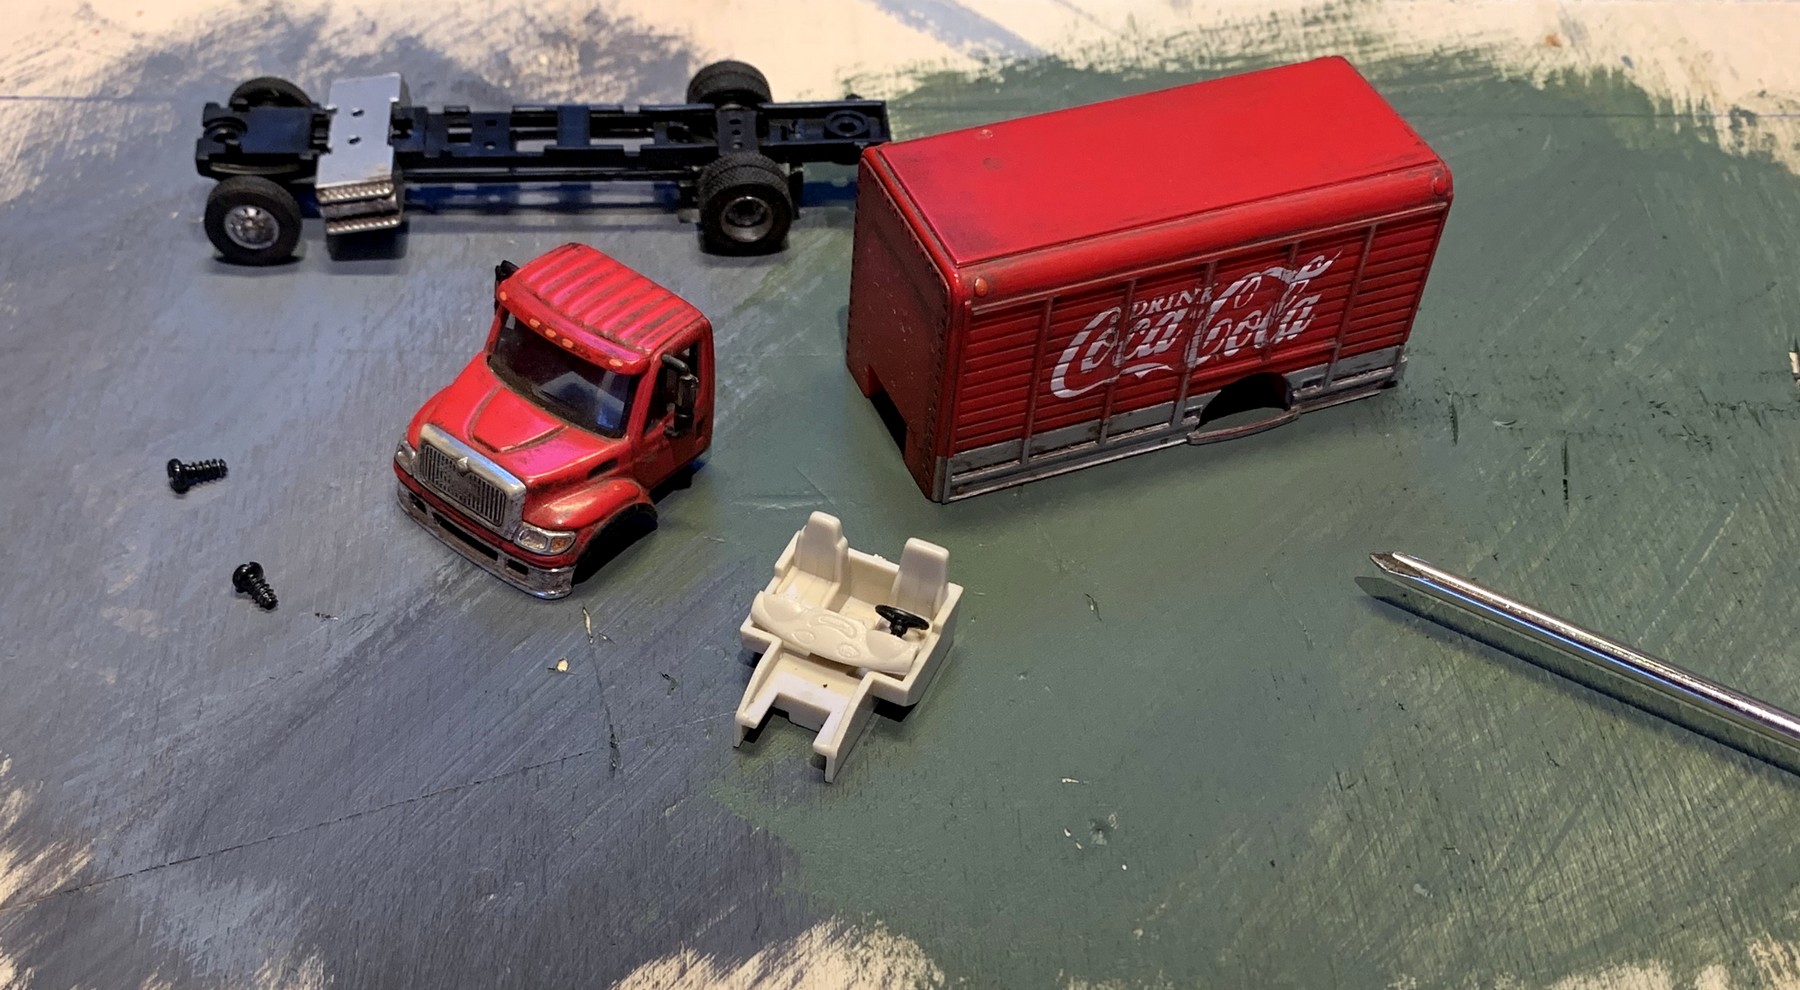
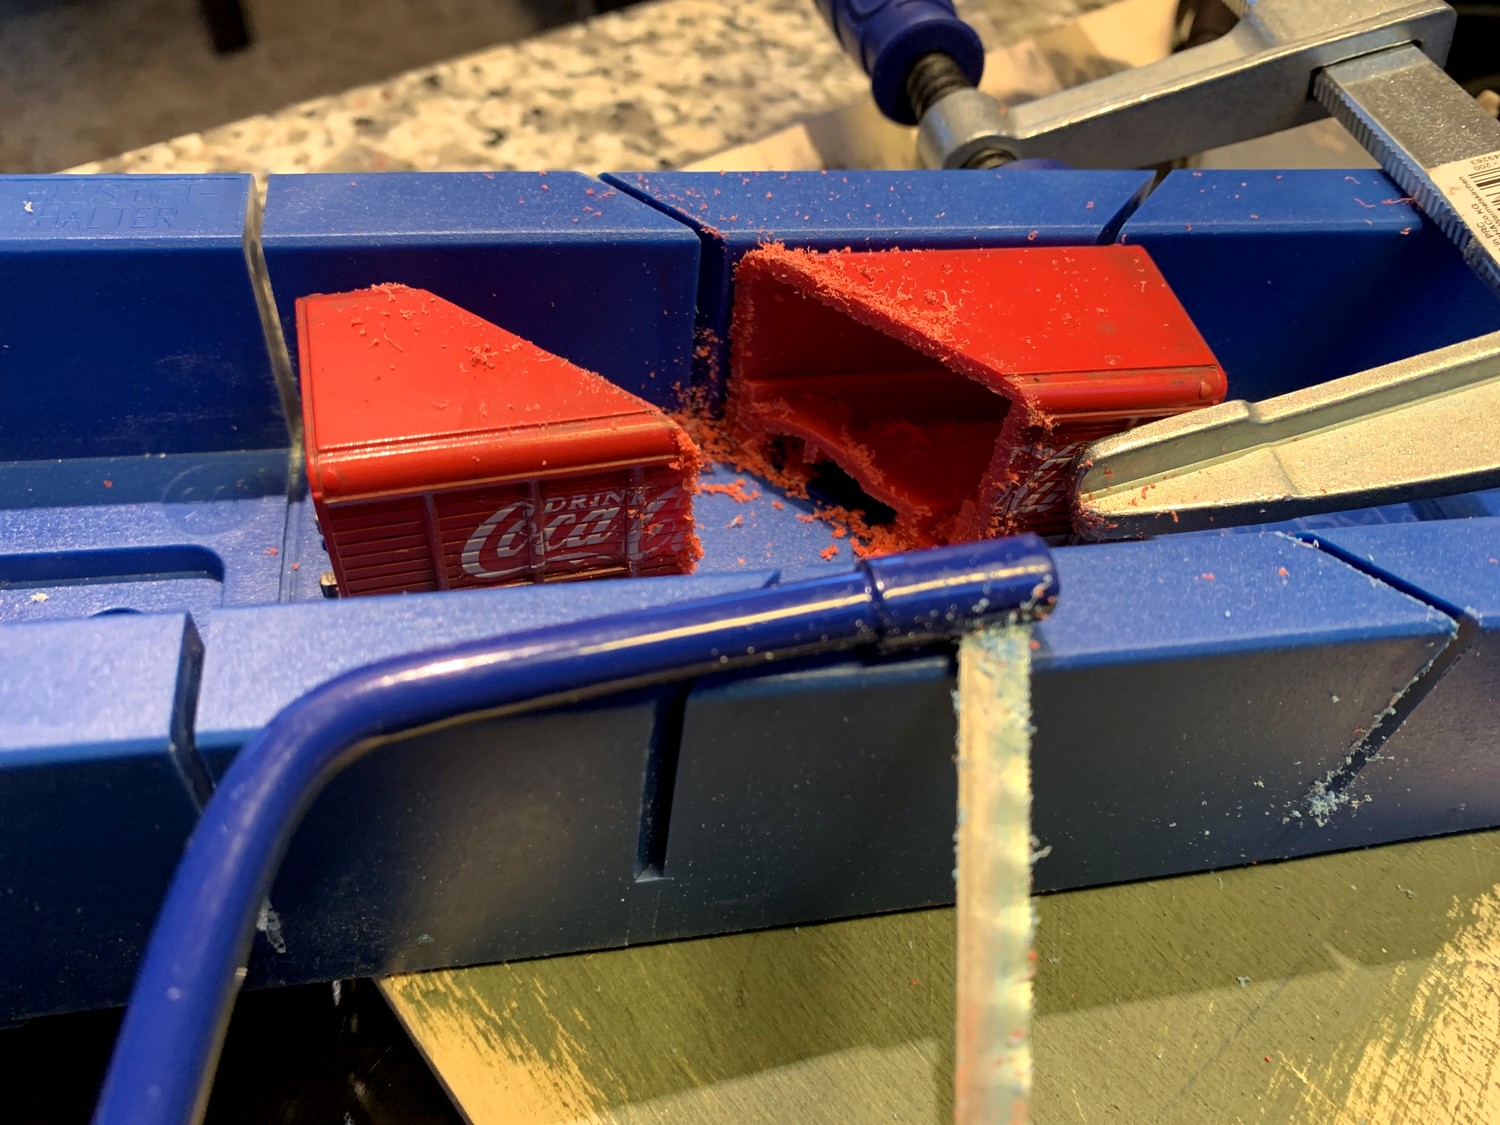
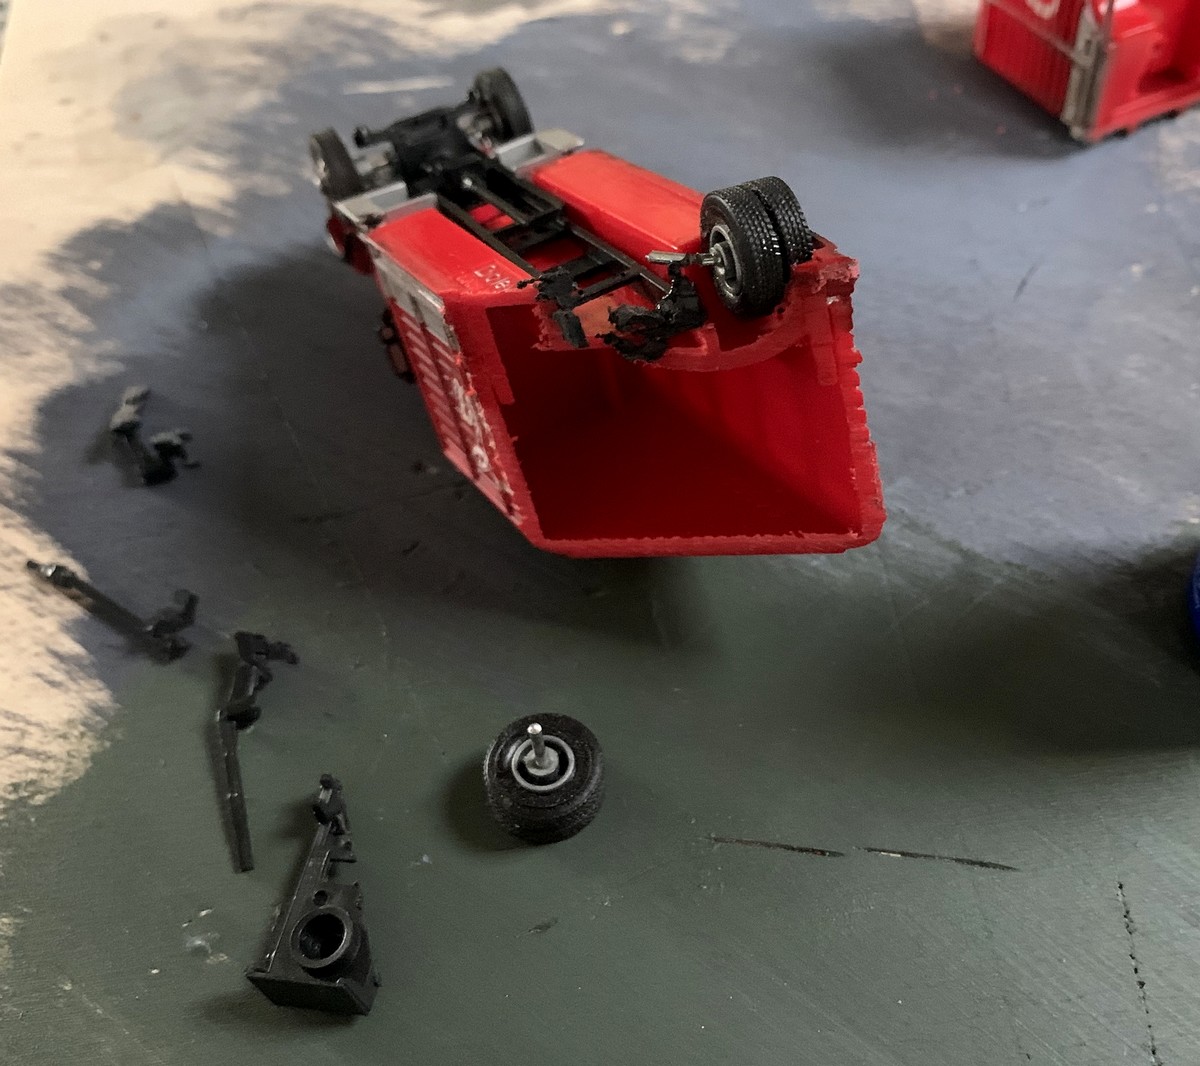
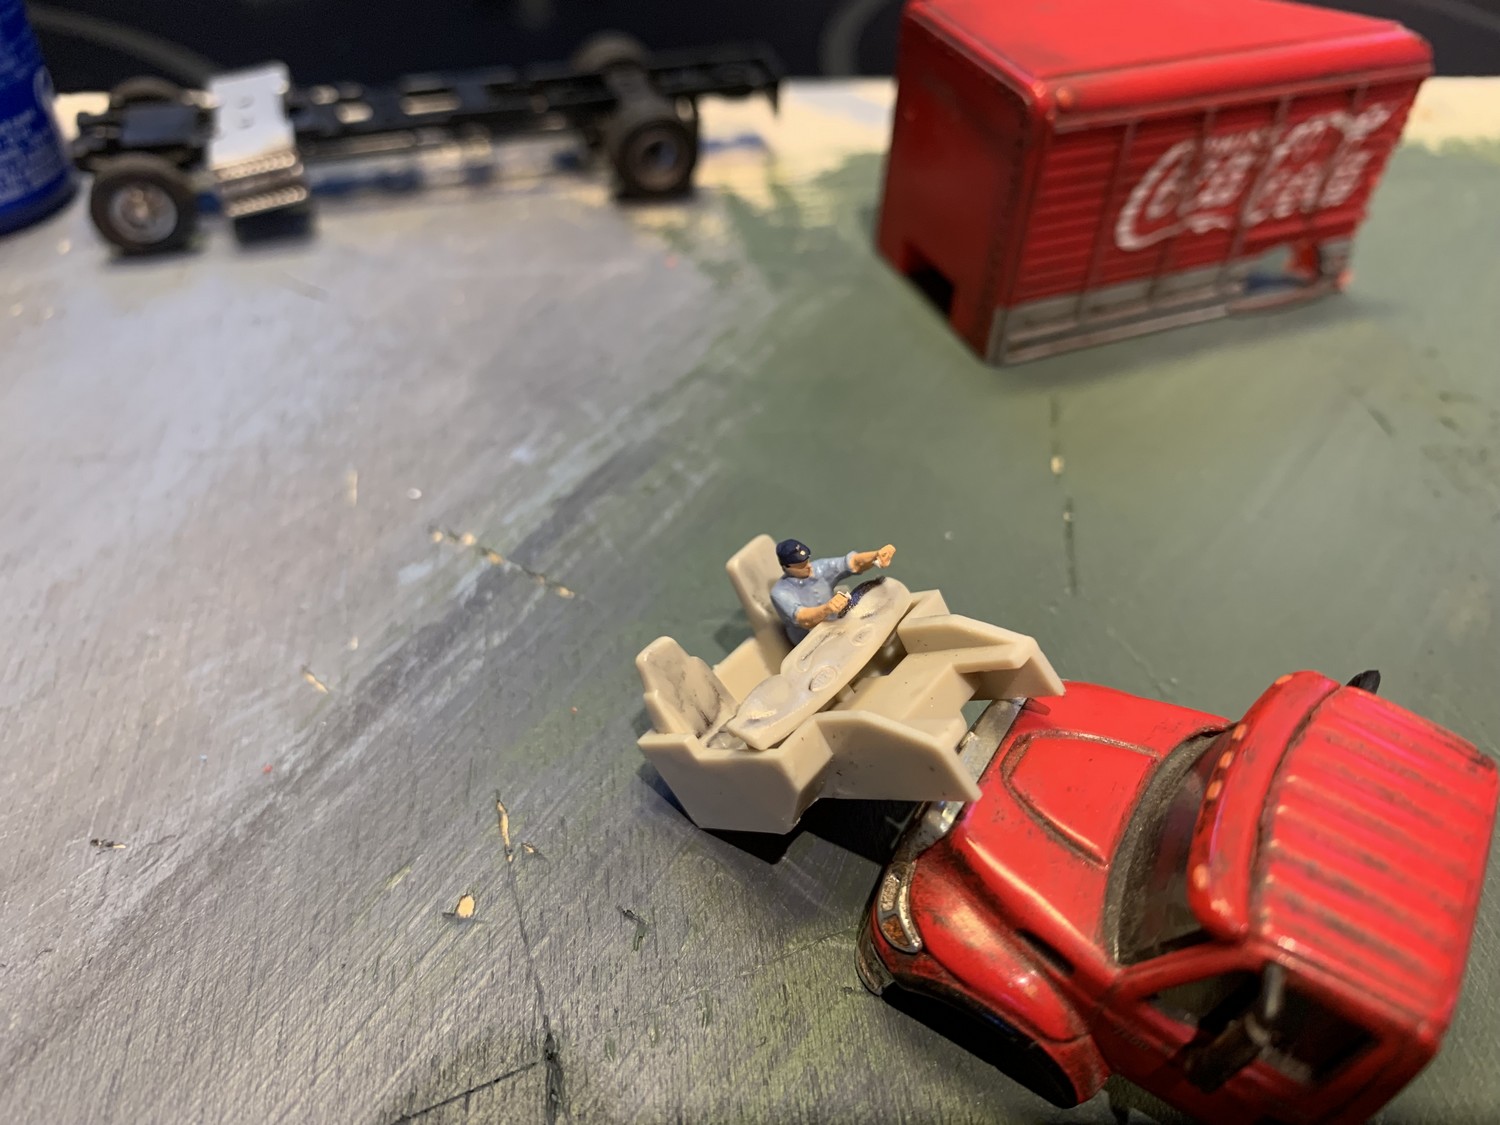
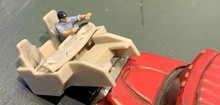
| In order to achieve this illusion, some further
theatrical trickery is necessary - what seems to be a
truck is actually only part of one. Cutting
down the rear of the vehicule at a 45º angle not only
allows a longer vehicule to be squeezed into what little
space there is, it can then also be placed in a skewed
position (another theatrical trick for props that are
supposed to fool our sense of perspective).
|
| |
|
| Taking apart the truck for the
procedure was also a good opportunity to fit a
driver behind its wheel - a suitably cut-up
Preise figure from a set of track maintenance
workers. It's another stage setting adage: things
that are there may not always get noticed, but
things that are missing most certainly will. In a perfect world, I would
have turned the front wheels somewhat, but simply
thought of this too late - so I simply imagine
the driver is just about to apply the steering
wheel...
|
|
 |
|
| |
| |
BACK
TO BALLASTING &
SCENERY
|
|
|
|
|
|
| |
| With the crossing scene set up,
the rest of the remaining portion of the second,
right-hand segment, was to be given a fairly
straightforward treatment in terms of ballasting and
background scenery. |
| |

|
|
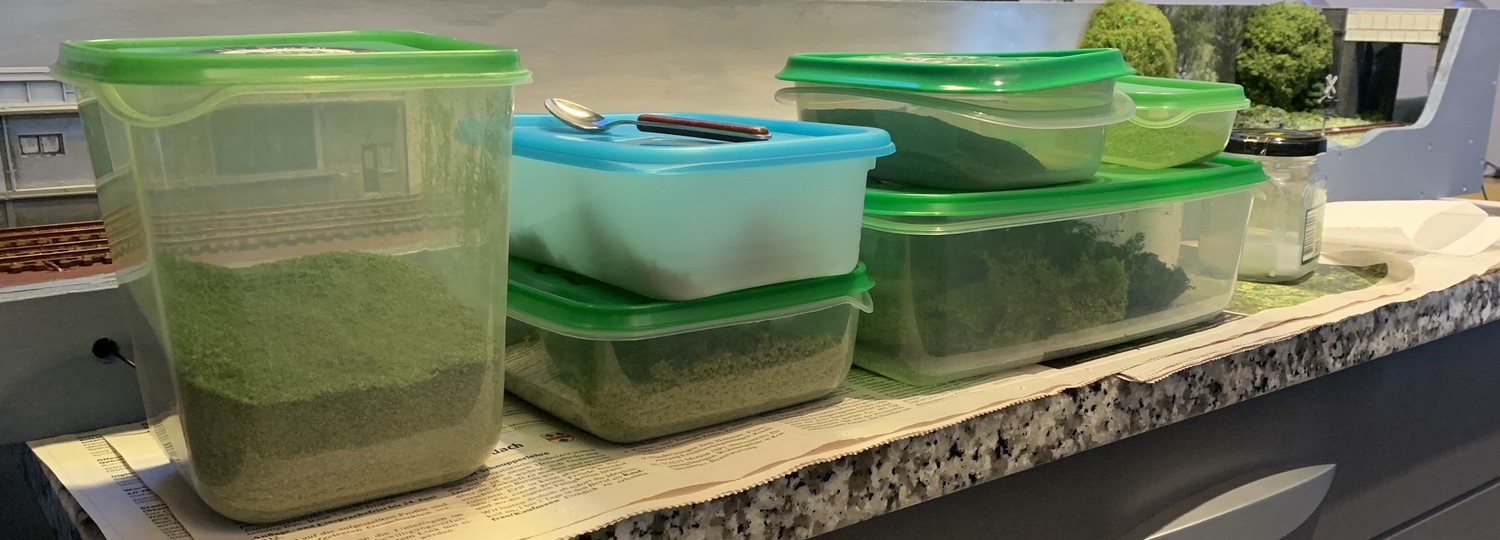
So out came my array of
transparent household storage boxes, holding the
contents of various bags of ballast and scenic
material (mostly from the Woodland Scenics
range). The usual pieces of
styorofoam were cut, glued down and given a heavy
coat of dull green acrylic paint in order to
serve as contours for the background scenicking
in front of the backdrop.
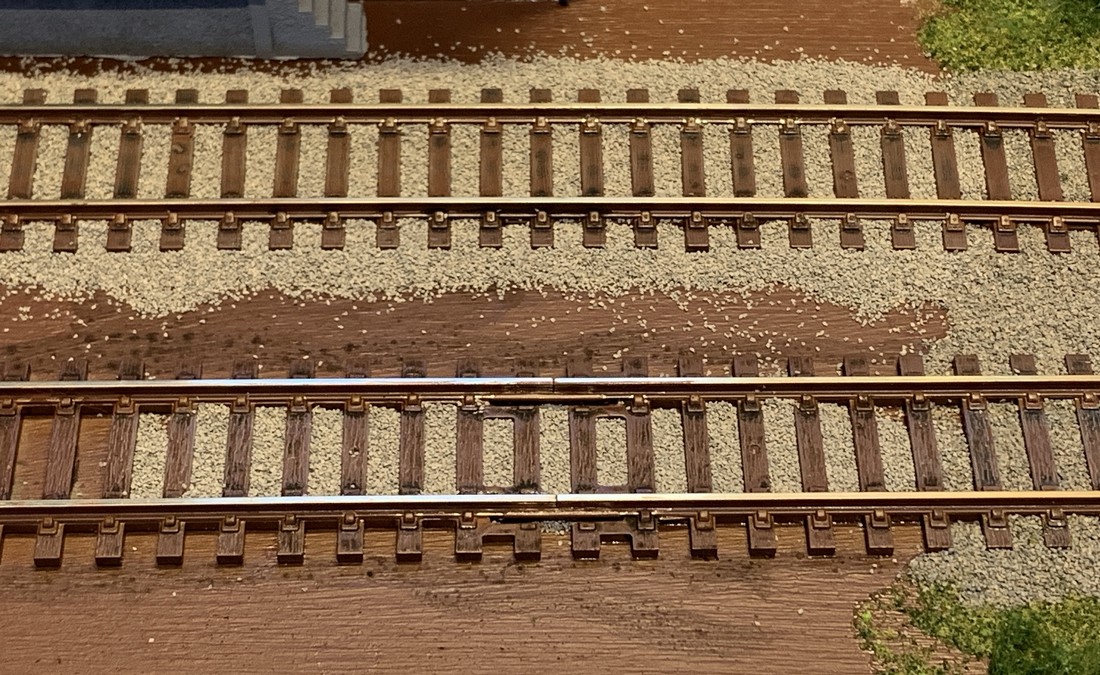
As for the ballasting I
decided to generally keep it fairly neat on this
part of the layout compared to the warehouse
segment. The basic plan was to see how things
would look once completed that way, and then add
more ballast or weeds on top of the already
ballasted track if needed.
|
|
| |
|
| |
| Once
tamped down this way, more ballast can be added where
needed (which is a lot easier than getting rid of too
much ballast). It is impossible to avoid getting at least
a little bit of ballast where it shouldn't be (e.g.on the
sides of the rail), but all it takes to remove this is a
gentle approach using a fine brush and a toothpick along
with some patience. |
| |
| Once
everything looks okay, scenic cement is applied
from a dropper to the edges of the ballasted
area, letting the ballast and scenic material
soak it up thanks to capillary action. Adding
more scenic cement to areas already soaked in it
will make it "spread" to areas that are
still dry. Again, some patience is
required, but it doesn't take too long and causes
minimal disturbance to the unsecured ballast
grains (glue applied directly to dry ballast will
cause it to float and drift around). Since taking
advantage of capillary action for ballasting, I
have in essence switched from using a syringe to
a simple drop dispenser with a rubber teat, since
the latter provides a more controlled and gentle
application.
|
|
 |
|
| |
| Again, the scenic ground cover is built up in steps by first
covering the painted styrofoam bases with white glue,
which in turn is covered with a mix of Woodland Scenics
"fine turf green grass" (T45, light to medium
green) and "weeds" (T46, medium to dark green)
in order to avoid a uniform look. Adding different colour
shades of Woodland Scenics "bushes" (FC146
medium green, FC147 dark green, and FC149 forest blend)
then results in another layer, which is secured with
scenic cement. |
| |
   |
|
In order to
provide a smooth transition to the road crossing
scene, a short tree line needs to be built up
along this basic scenery - which means more
tweaking and pruning of some "cheap model
trees from China sold on eBay". |
|
| |
| Since this is strictly background
scenery and therefore explicitly not supposed to attract
attention away from the foreground, it's not about detail
but rather the overall impression. |
| |
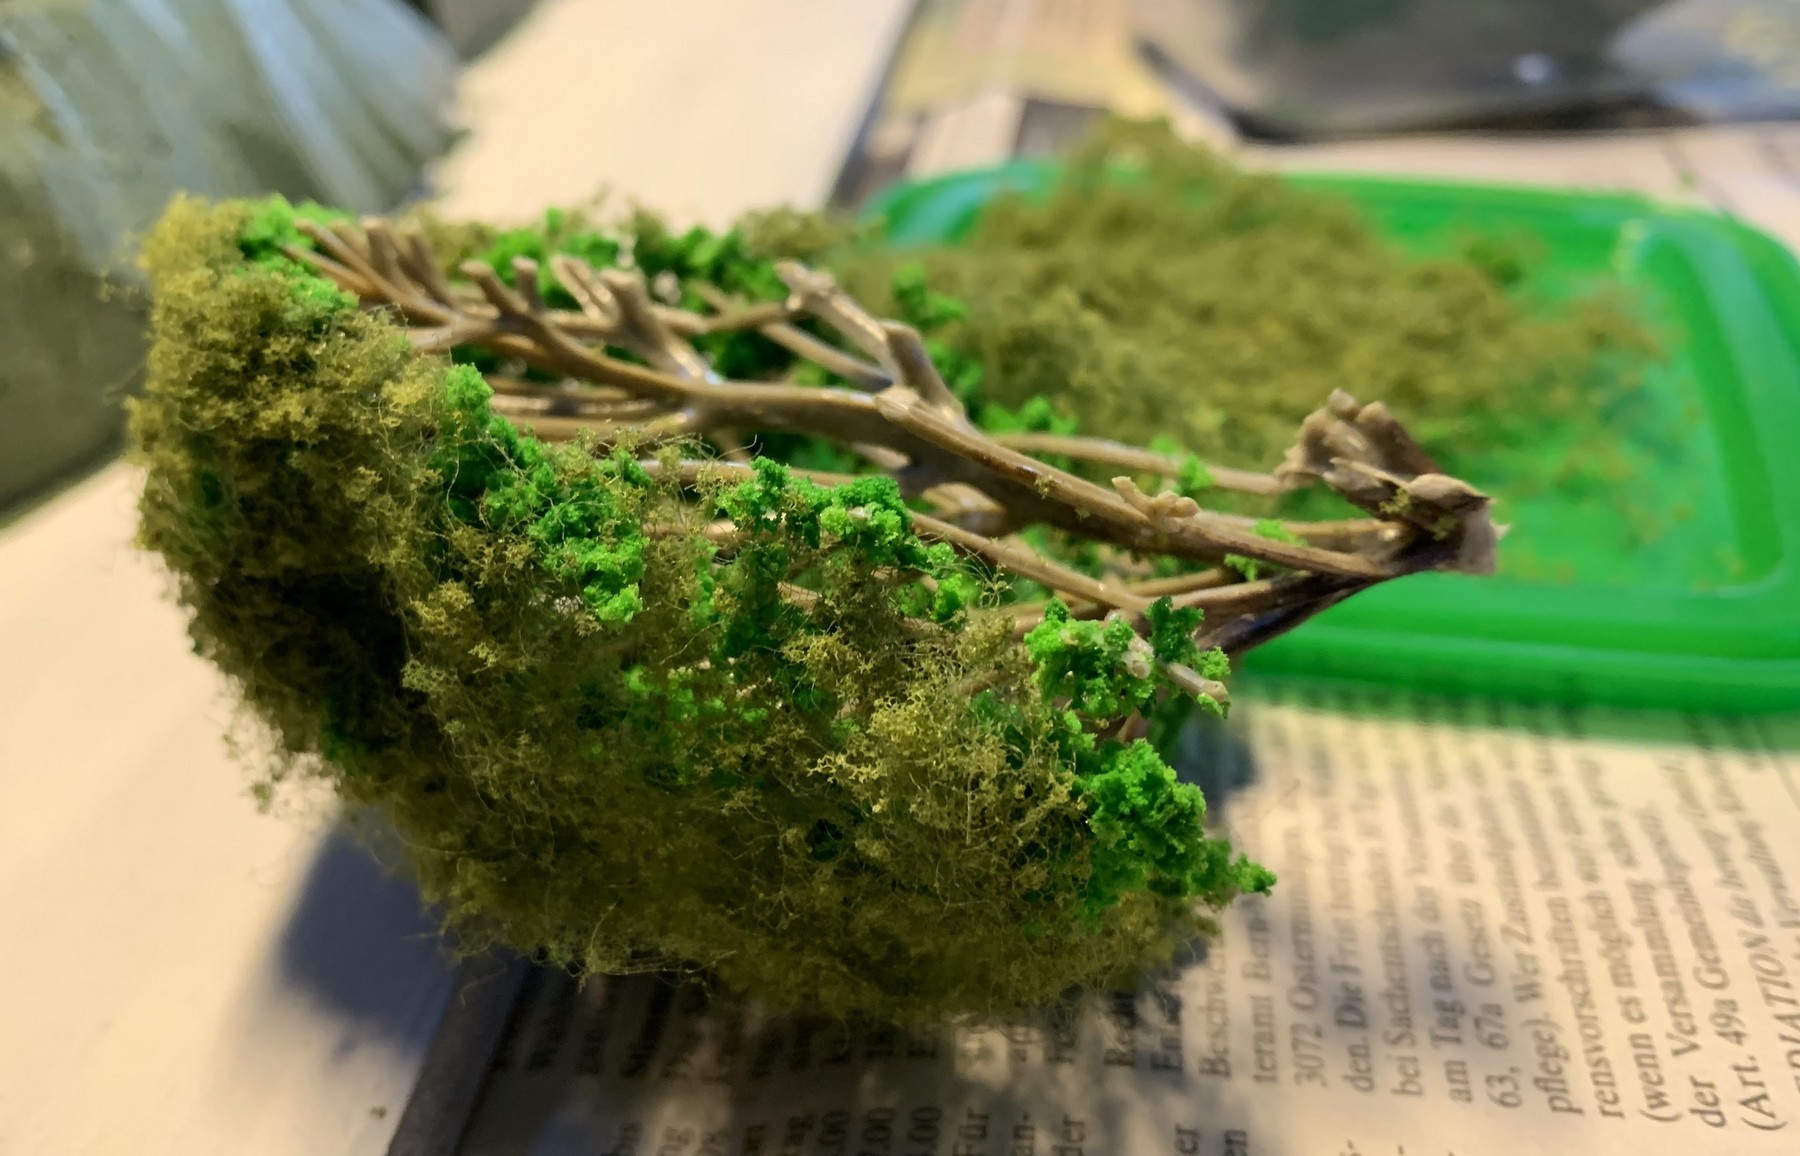
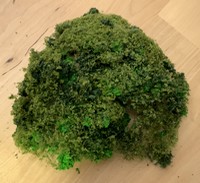
| Tree stems
therefore do not need to be visible, even
more so since the trees are heavy and
dense in foliage (a real life example of
such a tree would be the Arborvitae
Tree). This in turn
means that I really cut into the
"plastic skeleton" of these
trees, leaving only a minimal number of
unconnected "branches" - they
won't be visible, but this provides just
the right amount of structural cohesion
and flexibility at the same time. The
cut-up structure of the tree still shows
off some of the very bright green the
tree originally comes in, but once it's
all turned around the Woodland Scenics
foliage hides practically all of that.
|
|
  |
|
|
| |
 |
| |
| Since the layout itself only has
a very shallow depth of 6 inches (15 cm), the background
scenery needs to be extremely compressed. It would be
almost impossible to fit an actual complete model of a
tree into a space of 2 inches (along the single track),
let alone into the cramped quarters of just one inch
(along the segment with the mainline and the spur).
Cutting up the trees is therefore very much the
equivalent of having super-low-relief structures (as,
indeed, the storage building on the spur is). |
| |
 |
| |
| This also means that the tree line needs to be dense;
too much light foliage which would allow the onlooker to
see through the trees would be a dead giveaway. Stage designers have developed many
different tools to creating the illusion that a scene is
much deeper than it actually is, and this is just one
example of how applying theatrical
stage design to a layout works. Another trick of the
trade applies to hiding the true dimensions of low-relief
buildings. As with the warehouse on the left-hand
segment, an unobstructed view of the storage building on
this segment will clearly show that the side walls are
very shallow since they meet up with the backdrop almost
immediately.
In order to create the illusion of
an actual building that reaches further into the
background (as a real structure would) the view of the
side wall needs to be obstructed, This is exactly what
stage designers do both in theatres and on film
production sets, and in this case the effect is easily
accomplished by again adding some sprawling vegetation.
On the more visible right hand side of the building the
tree line meets up with it, along with some shrubs and
bushes. For the left hand side of the building - which is
in the far left corner of this segment and thus less open
visually - I opted for a more refinde model of an
individual tree.
|
| |
|
| |
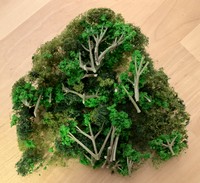
| Unlike the cheap
quantity-over-quality plastic examples from China, this
one was hand-made in Vietnam using strands of wire to
simulate the bark and branches more realistically (as is
the foliage). Also available on eBay, these trees are of
a far superior quality, but obviously also carry a higher
price tag (you get what you pay for). The corner seemed a
good spot to "plant" such a model - visible
enough, but not too much. The tree is used as is, with no
cutting, and it does protrude slightly out into the spur
a bit, but since its location is the end of the line for
that siding, this isn't a problem. |
| |
| Building up
the scenery in layers like this also has
the distinct advantage that it's always
possible to go back and add more shrubs,
bushes, weeds and other items later on. But already at this
point, the background scenery fulfills
its purpose. It provides a setting,
disguises the otherwise obvious spatial
limits of the layout, and overall sets
the mood of the scene. And of course it
works best when there's something in the
foreground that shifts the focus of
attention.
|
|
 |
|
|
| |
| |

|
| |

Text and
pictures are (c) 2022-2025 Adrian Wymann.
|
| |
page created 12 March 2022
last updated 31 August 2025
|
|
| |